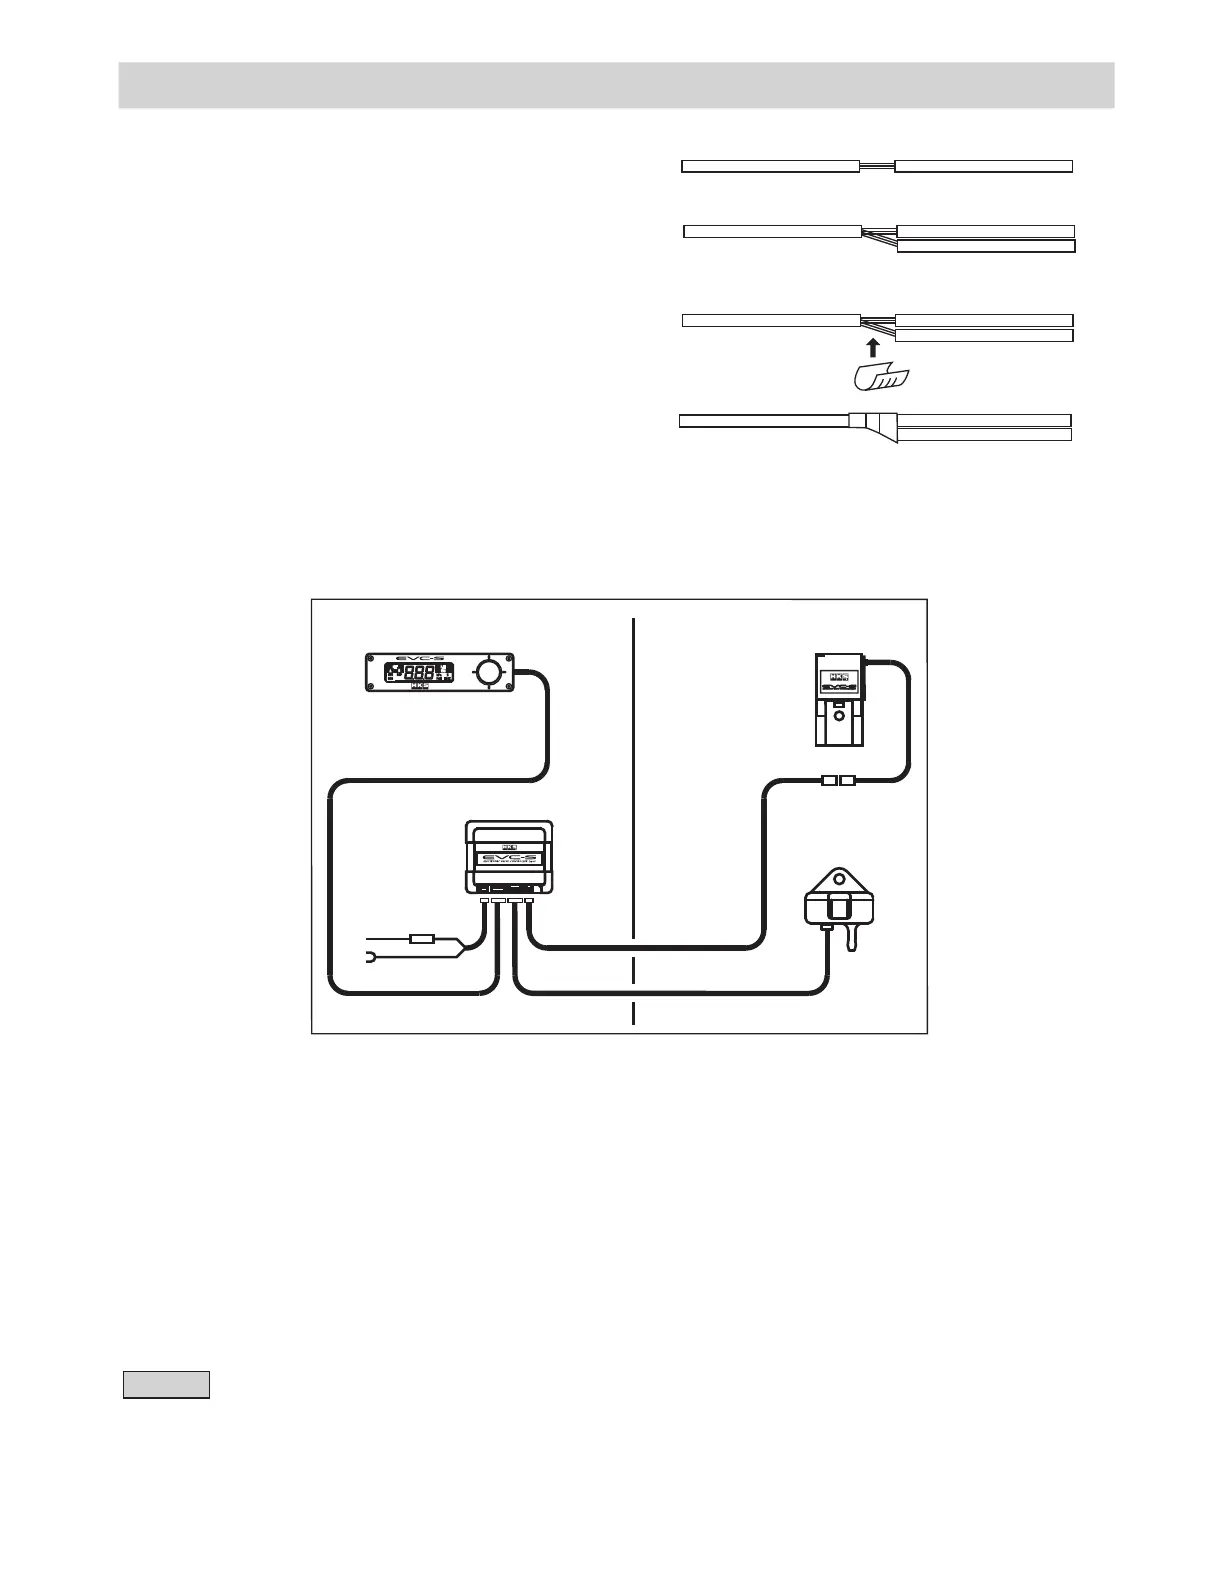
(1) Connect the Solenoid Valve to the Valve Extension Harness. Pull the Valve Extension Harness and
the harness connected to the Boost Sensor from the engine compartment into the vehicle's interior.
(2) Connect the Valve Extension Harness and the Boost Sensor to the Control Unit.
(3) Connect the Display Unit to the Control Unit.
(4) Connect the Power Supply Harness.
Connect the red wire of the Power Supply Harness to a 12V IG (Ignition) using a crimp connector.
a) Reconnect the negative cable to the battery.
b) Turn the ignition on to find the 12V IG wire using a voltage meter.
c) Disconnect the negative cable from the battery. Connect the ground wire to a good chassis
ground.
Remove any paint and/or rust from the surface where the ground wire is connected.
(5) Connect the Power Supply Harness to the Control Unit.
3. Wiring
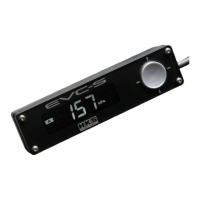
3-1. Installing the Crimp Connectors
ԘStrip about 5mm of wire insulation.
ԙConnect another wire to the uncovered portion
by twisting the wires together.
ԚCrimp the twisted wires using a crimp connector.
ԛCover the crimp connector and wires with electrical tape
to insulate.
Strip 5mm of insulation.
Twist wires together.
Crimp the wires using
a crimp connector.
Insulate with electrical tape.
3-2. Wiring
1(5
#
$
5'6
2*
940
.1%-
452
&41
25+
M2C
/#&'+0,#2#0
㧺㧻
Interior Engine Room
Solenoid Valve
Boost Sensor
Display Unit
Control Unit
㧙㧙
NOTE
Power Supply
Harness
Valve Extension
Harness