pH CALIBRATION
Your COM-300 has been factory calibrated to pH 7.0. While this is suitable for many applications, it is recommended to
recalibrate the meter as close as possible to the pH level that will be tested. Recalibrating prior to every test will provide
superior results (though this is not required). The COM-300 should be recalibrated at least once per month. If tests are
conducted between wide ranges, calibration should be done more frequently. Additionally, it should be noted that liquid
pH buer accuracy may vary. For best results use HM Digital’s pH Buers (Model: PH-BUF).
The COM-300 features digital auto-calibration to pH 4.0, 7.0 or 10.0 and digital manual calibration to any value within the
meter’s range. Manual calibration can also be used for “ne tuning.” For example, if calibrating to 10.01, it is recommended
to use auto-calibration to 10.00, and then manual calibration to 10.01. NOTE - If calibrating to 10 after the meter was
calibrated to 4 (or vice-versa), it is recommended to calibrate to 7 rst, prior to calibrating to the next value. Also, if you are
having trouble calibrating to 4 or 10, calibrate to 7 rst, then 4 or 10.
Automatic Calibration
1. Turn the meter on by clicking the power button. Note that the reading
will uctuate if the meter is not submerged in a liquid (it will stabilize in liquid).
2. Make sure the meter is in pH mode.
3. Insert the meter into a pH buer solution of 4.0, 7.0 or 10.0.
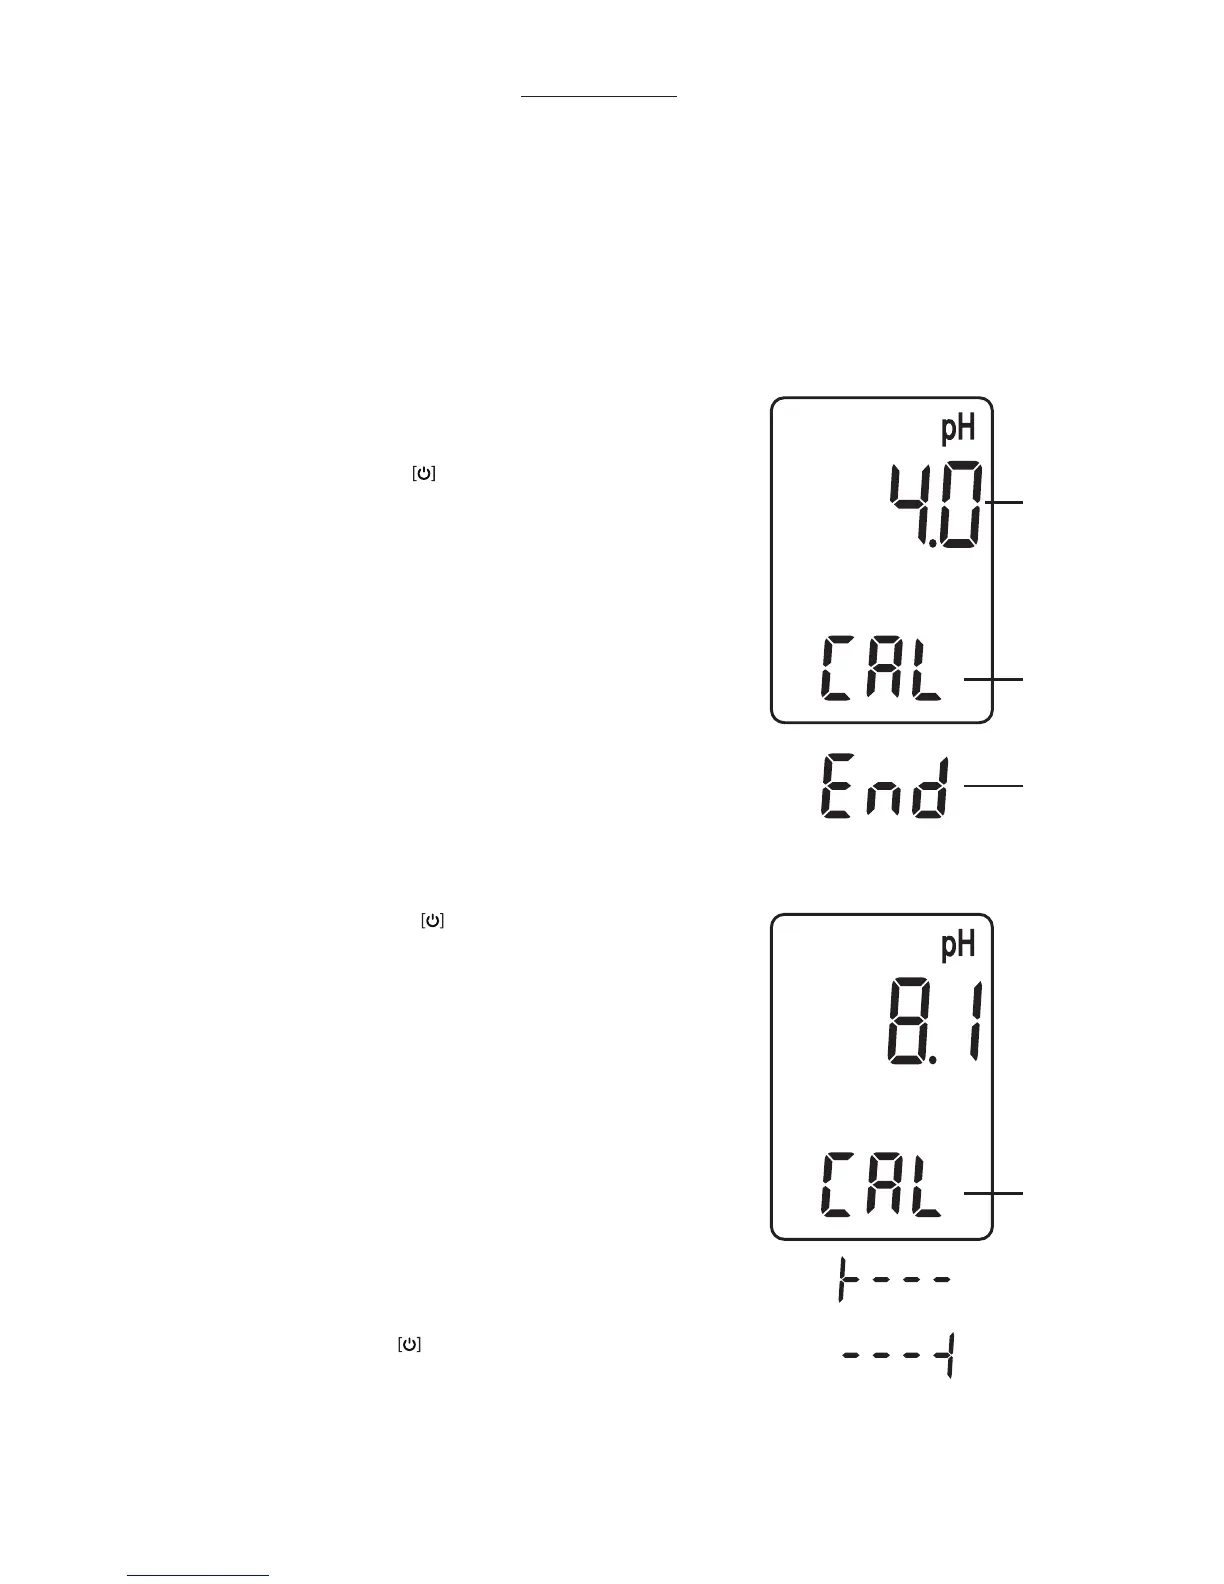
Press and hold the ‘CAL’ button for 5 seconds.
4. The temperature reading will change to a ashing ‘CAL’ image for 10 seconds.
Do not press any buttons. The meter will automatically recognize the
solution it is in (or the closest to it). This number will ash and the letters
of ‘CAL’ will ash as ‘C...CA...CAL’ indicating progress. Allow 5 - 60 seconds
during this stage. Do not press any buttons and do not move the meter.
5. When the meter is calibrated, ‘End’ will ash briey and the screen will
revert to measurement mode. Your meter is now recalibrated.
Manual Calibration (Fine Tuning)
1. Turn the meter on by clicking the power button.
2. Make sure the meter is in pH mode.
3. Insert the meter into a known pH buer solution.
4. Press and hold the CAL button for 5 seconds.
5. The temperature will change to a ashing ‘CAL’ image for 10 seconds before
entering automatic calibration. During this time, click either the up button
(PH/EC / CAL) or down button (HOLD/MODE) to remain in manual calibration mode.
6. Change the reading so that it matches the value of the calibration solution.
To increase the reading, click the up button and to decrease the reading click
the down button. Press and hold either button for rapid advancement.
7. To set the calibration, click the power button once.
‘C...CA...CAL’ will ash briey, followed by ‘End’ and the temperature will
return to the screen. Your meter is now recalibrated.
- If the calibration reading reaches the minimum or
maximum oset from the buer value (approx. +/- 3.3
pH), the screen will display the ‘minimum calibration
reached’ icon or ‘maximum calibration reached’ icon,
respectively. (e.g., if the meter is in a 7.0 solution, the
highest it can be calibrated to is 10.3.)
Flashing
min. calibration
reached
max. calibration
reached
Indicates
progress
indicates
completion
Flashing
7

 Loading...