Do you have a question about the HME Clear-Com RS-701 and is the answer not in the manual?
Rotates to adjust audio volume level.
Enables communication on the intercom channel.
Indicates when the intercom channel is active.
Alerts users and indicates when the call button is pressed.
Indicates when the beltpack power is on.
Ports for connecting intercom cables and headsets.
Details pin assignments for XLR intercom connectors.
Details pin assignments for XLR headset connectors.
Explains the function of each DIP switch for unit configuration.
Describes how to adjust the sidetone listening level.
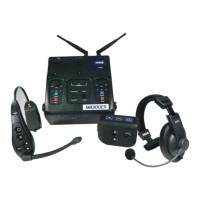
The RS-701 Beltpack is a single-channel intercom device designed for clear and reliable communication in various professional environments. Its compact and robust design makes it suitable for on-location use, providing essential communication capabilities for production crews, event staff, and other teams requiring real-time coordination.
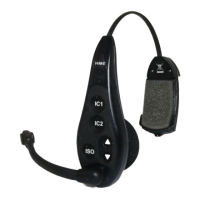
At its core, the RS-701 Beltpack facilitates two-way communication within an intercom system. Users can speak to all participants on their assigned channel and receive audio feedback from others. The device features a Volume control (1) that allows users to adjust the incoming audio level to their preference, ensuring comfortable listening in diverse acoustic settings.
Communication is initiated via the Talk button (2). Pressing and holding this button enables the user to speak to everyone on the intercom channel. For situations requiring continuous communication without holding the button, the device offers a latching function. A quick tap of the Talk button will engage the latch, keeping the microphone active until the button is tapped again to disengage it. This feature is particularly useful for hands-free operation during extended conversations or when a user needs to perform other tasks while speaking.
Visual indicators provide immediate feedback on the beltpack's status. The Talk LED (3) illuminates when the intercom channel is active, indicating that the user is either speaking or the latch function is engaged. This helps users confirm their transmission status at a glance. For alerting other team members, the beltpack includes a Call button (5). When pressed, this button sends an alert signal to all participants on the intercom channel, drawing their attention for important announcements or urgent messages. The activation of this call function is visually confirmed by the Call LED (4), which lights up when the call button is pressed.
Power status is also clearly indicated by the Power LED (6), which remains lit whenever the beltpack is powered on. This ensures users can quickly verify that their device is operational.
Connectivity is straightforward, with dedicated receptacles for intercom cables and headsets. The beltpack features two Intercom cable receptacles, one with a 3-pin XLR female connector (7) and another with a 3-pin XLR male connector (8). This dual connectivity allows for flexible daisy-chaining of multiple beltpacks within an intercom loop, simplifying system setup and expansion. For personal audio input and output, a Headset cable receptacle (9) with a 4-pin XLR male connector is provided, accommodating standard professional headsets.
The RS-701 Beltpack is designed for user-friendliness and adaptability. The DIP switch settings offer a range of customizable options to tailor the beltpack's behavior to specific operational needs. These settings are accessed by loosening a slotted screw inside a keyhole on the back of the belt clip, which then allows the belt clip to swivel and slide up, revealing the DIP switches.
The DIP switches allow for configuration of several key parameters:
Beyond its operational features, the RS-701 Beltpack incorporates a Sidetone adjustment mechanism, which is crucial for maintaining clear and comfortable communication. Sidetone refers to the sound of one's own voice heard in their headset while speaking. Proper sidetone adjustment helps users regulate their speaking volume, preventing them from shouting or whispering unnecessarily.
The sidetone adjustment is accessible in the same area as the DIP switches, underneath the swivel belt clip. A small, flat-blade screwdriver is used to adjust a screw inside a hole, allowing users to fine-tune the level of their own voice heard in the headset. This adjustment helps to create a natural speaking experience, reducing listener fatigue and improving overall communication clarity.
The design of the beltpack, with its accessible DIP switches and sidetone adjustment, emphasizes ease of configuration and maintenance. The ability to customize these settings on-site without specialized tools ensures that the device can be quickly adapted to changing requirements and user preferences, maximizing its utility and lifespan in demanding professional environments. The robust construction is also indicative of a device designed for durability and minimal maintenance under typical usage conditions.
| Microphone Type | Dynamic |
|---|---|
| Connector | 4-pin XLR |
| Microphone Pattern | Unidirectional |
| Current Consumption | 30 mA |
| Impedance | 200 ohms |