OM−221 534 Page 9
SECTION 5 − REPLACING THE LENS COVERS
5-1. Replacing Outside Lens Cover
Never use the auto-darkening lens without the inside and outside lens covers properly
installed. Welding spatter will damage the auto-darkening lens and void the warranty
Place helmet on a flat surface. Grasp the front lens holder with one hand while pushing the inside re-
taining clips of the lens holder outward. Do one side at a time, gently pulling the front lens holder away
from the helmet as each tab is released from its retaining clip. Once released, the outside cover lens
can be replaced.
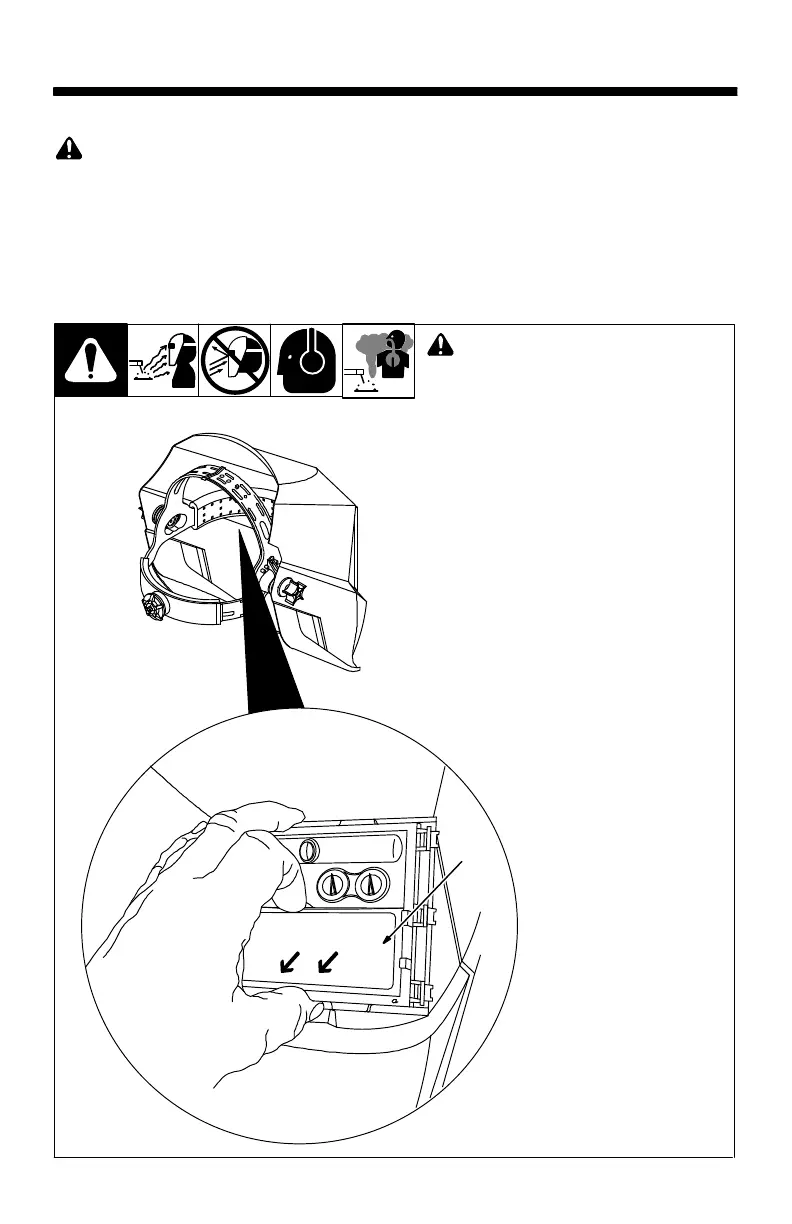
5-2. Replacing Inside Lens Cover
! Never use the auto-darkening lens
without the inside and outside lens
covers properly installed. Welding
spatter will damage the auto-dark-
ening lens and void the warranty.
1 inside Lens Cover
Remove the auto-darkening lens assembly
by following the procedure in Section 5-1.
With the auto-darkening lens removed
from the helmet, remove the inside cover
lens by prying the lens up at the thumbnail
opening located at the top center of the cov-
er lens.
Replace the lens by gently bowing it in the
center and inserting it, one end a time, into
the retaining clips located on the outside of
the auto-darkening lens assembly.
Be sure the cover lens is seated prop-
erly (flat) to prevent fogging.
804 793 / 804 794
1
 Loading...