Do not use too much force when tightening self-tapping
screws into plastic or fiberglass. Over tightening will cause
the threads in the plastic to strip. We recommend that you
stop turning a self-tapping screw once you feel some
resistance as the head of the screw comes in contact with the
plastic. Avoid using powered screwdrivers when assembling
this kit. They tend to over tighten the screws. Do not use
thread-locking compound on self-tapping screws. The thread-
locking compound may damage the plastic. IMPORTANT:
Use thread lock on any fastener that is threaded into metal or
fastened with a nut. Vibration from the engine will cause the
screws to loosen if thread-locking compound is not used.
• BOW: The front of the boat
• STERN: The back of the boat
• PORT: This is the left side of the boat when aboard and
facing the front (bow).
• STARBOARD: This is the right side of the boat when
aboard and facing the front (bow).
• HULL: The body of the boat.
• DECK: The top of the boat.
❏ HCAP2520 Hot Shot
™
2 Glow starter
❏ 10-20% Nitromethane Model Car Fuel
(10%–DTXP0570, 20%–DTXP0600)
❏ DTXP0125 Kwik-Pit
™
250 Fuel Bottle
Other Useful Items to Have On Hand:
❏ OSMG2691 Glow Plugs
❏ GPMQ4131 Fuel Tubing
❏ HCAP3000 After Run
™
Engine Oil
❏ Phillips head screwdriver (HCAR1022)
❏ 4-way wrench (DTXR1170)
❏ Needle-nose pliers (HCAR0625)
❏ Adjustable wrench or 5.5mm wrench (for changing
propellers)
Decals have been provided for your Nitro Hammer. Simply
cut them out, peel and stick! See the photos on the box for
decal placement.
Carefully remove your Nitro Hammer from the box and place
it atop the pre-built boat stand. Remove all remaining
components from the box. You may wish to keep the box in
order to more easily transport and store your Nitro Hammer.
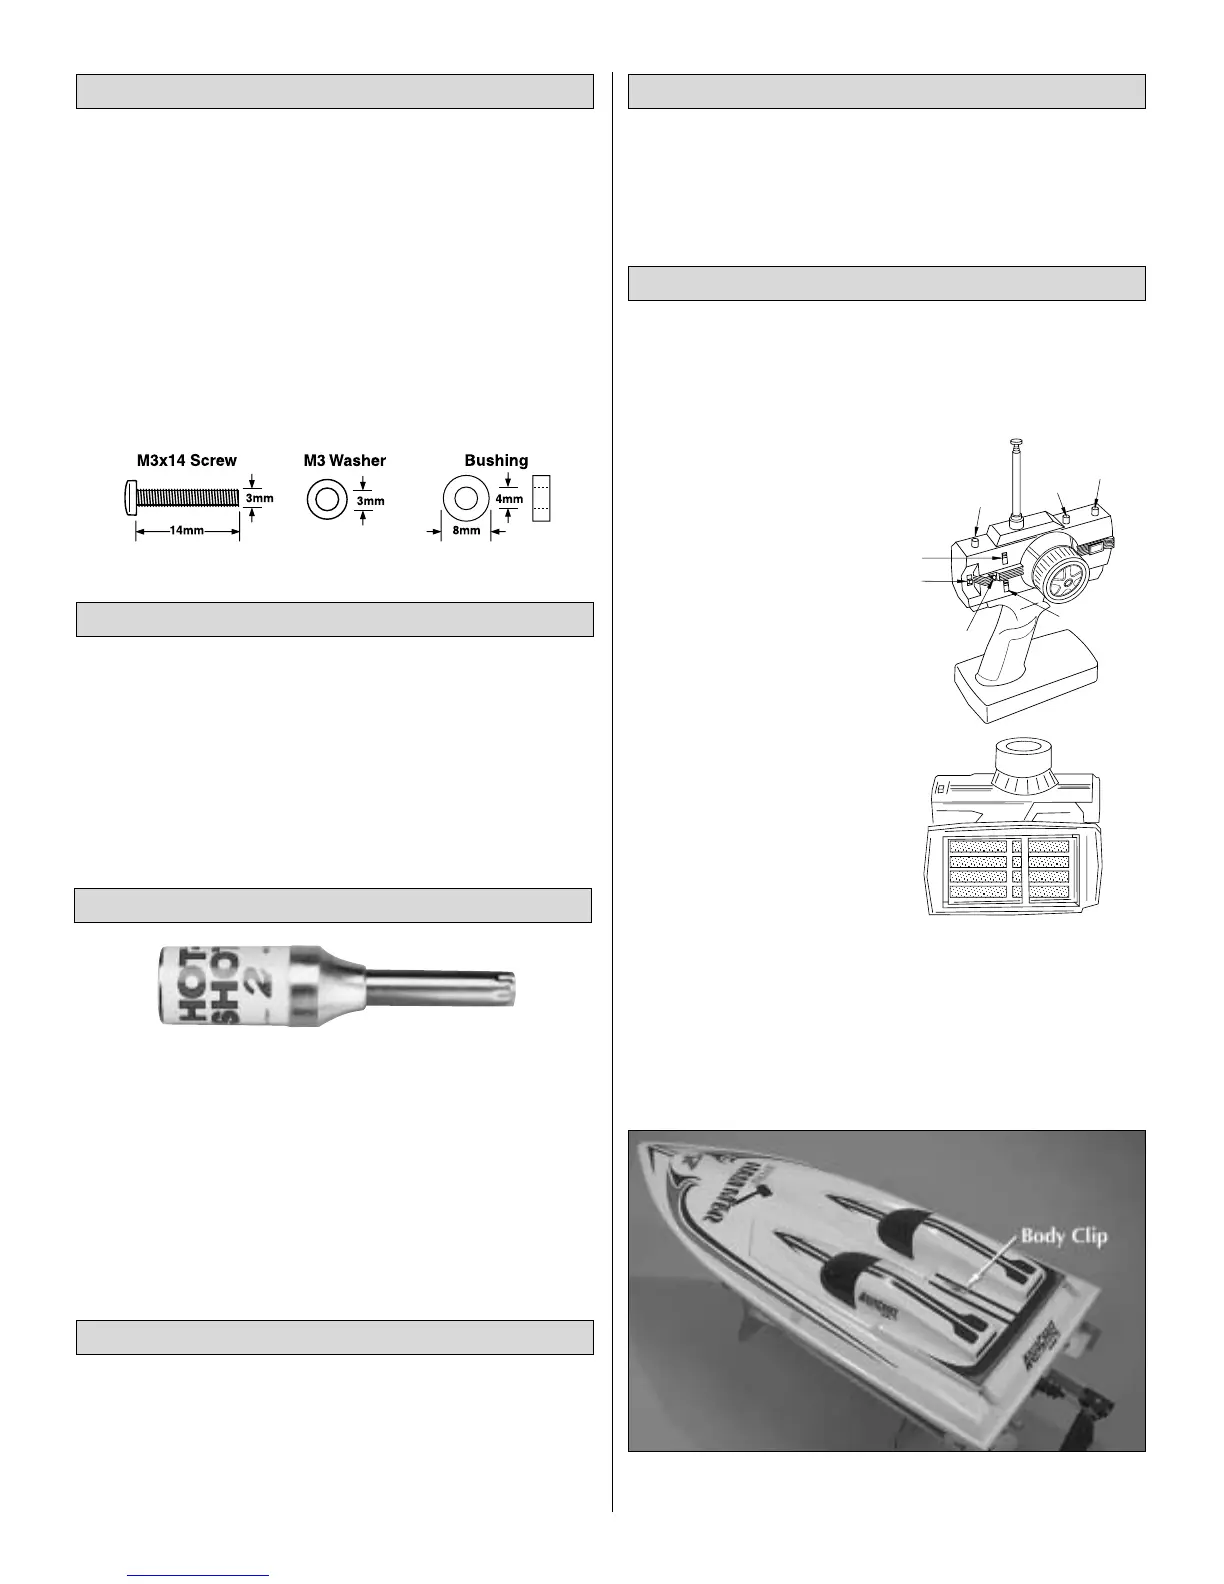
Transmitter Assembly
❏ 1. Remove the transmitter
antenna from the parts bag
and screw it into the top of
the transmitter. To ensure
that the antenna is attached,
lightly pull on the base of
the antenna. If it slides out, it
is not installed properly.
❏ 2. Slide off the battery
door on the bottom of the
transmitter. Install 8 new “AA”
batteries into the bottom of
the transmitter in the
configuration molded into the
battery holder. Re-install the
battery door onto the bottom
of the transmitter.
❏ 3. Turn the transmitter on using the switch on the front. The
red LED light next to the on/off switch should light up. If the
LED does not light up, turn the transmitter off and check to
make sure that the batteries are installed properly. If you see a
flashing LED, the batteries are low and need to be replaced.
Receiver Preparation
❏ 1. Remove the body clip at the rear of the top deck and
carefully remove the hatch.
FINAL ASSEMBLY
FINISHING THE RTR NITRO HAMMER
TOOLS YOU WILL NEED
REQUIRED FIELD EQUIPMENT
BOAT TERMINOLOGY
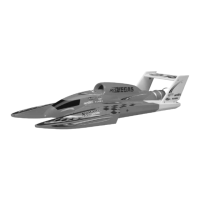
SCREW INFORMATION
3
 Loading...