c 5
c 4
c 3
WING ASSEMBLY
5
c 1
Place the wing plans on the building bench
and cover them with waxed paper to protect
them from glue.
c 2
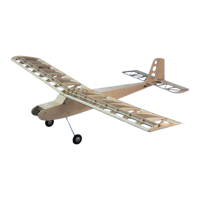
Locate W1 and W1-B (the little donuts on the
1/8” sheet) and glue a W1-B to the 1/8” holes
in W1. Glue them on opposite sides to make
a left and a right root rib. These holes will be
used later to align the wing panels. Use the
1/8” dowel to align W1 and W1-B but do not
allow the dowel to get glue on it.
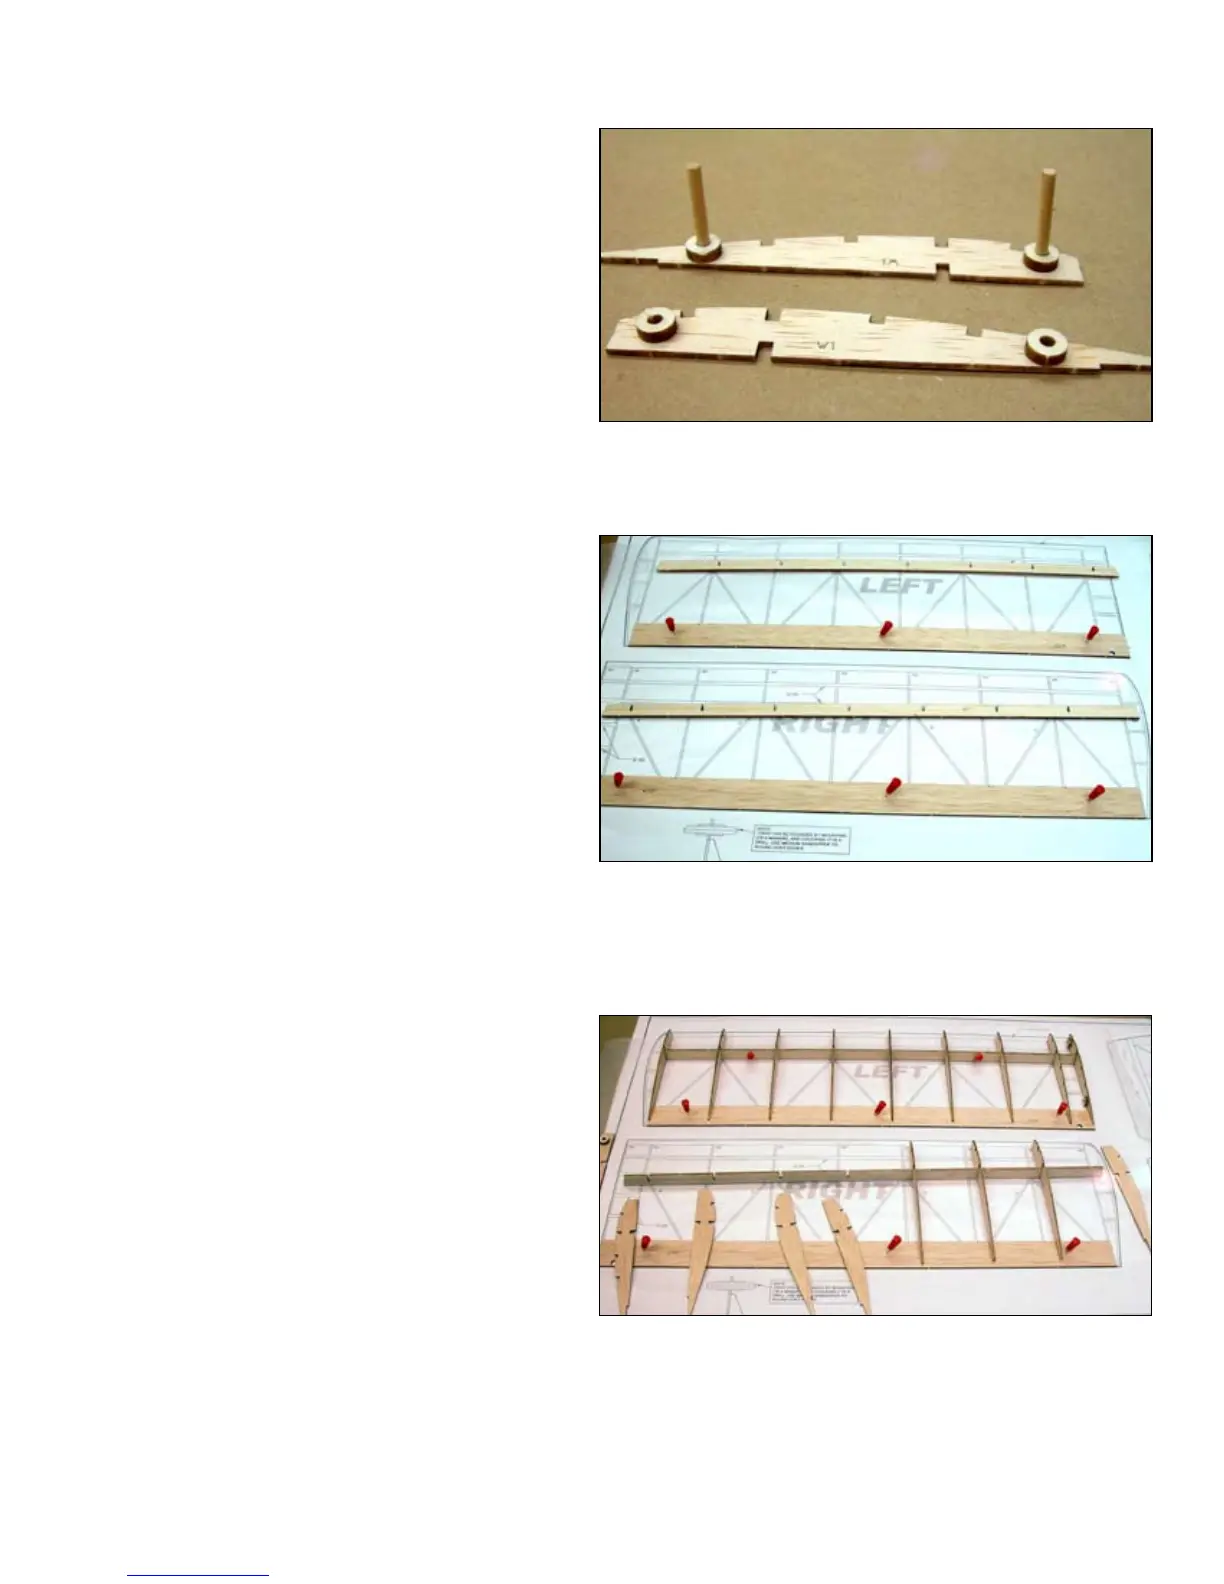
Align WTEP to the plans and pin in place.
Prepare all remaining ribs and the bottom spar
(WBS). Note the root end of WBS and install
W2 and all W3’s into the notches in WBS.
Note that W1 and W2 have extra notches for
the 1/8” square balsa. W1 and the W3 at the
wing tip will be installed later.
ABOVE: The 1/8” dowels are used to align W1-B with the holes in
W1 and then removed before gluing. At the top is the right wing W1
assembly and at the bottom the left wing W1 assembly.
ABOVE: Here both wings are being assembled at the same time.
WTEP has been pinned to the workbench and the bottom spar SP-B
has been prepared to receive the ribs.
Place the spar and rib assembly into position
over WTEP. Make sure the ribs are fully en-
gaged in the notches in WTEP. Align the ribs
with the plans and glue them to WTEP only at
this time. Pin WBS in position to the plans.
ABOVE: At the top of the photo, the ribs have been installed onto
the bottom spar and this assembly has been glued to the wing trail-
ing edge plate (WTEP). At the bottom of the photo, ribs are being
installed onto the bottom spar.
 Loading...