1. IMPORTANT!
B e f o r e r a i s i n g
t h e m a s t , loo k
o v e r h e a d f o r
powerlines.
!CAUTION!
WATCH FOR OVERHEAD POWER LINES
WHEN HANDLING THE SAIL AND MAST.
NEVER RIG, TRAILER, OR SAIL THE BOAT
NEAR OVERHEAD POWER LINES. MAST
CONTACT WITH A POWER LINE COULD
BE FATAL!
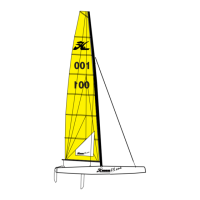
2. To install, take the
bottom of the mast,
and insert it through
the bearing on the
forward deck-mounted
crossbar and into
the mast cup. It is
important to have
good control of the
mast as you install it
so it goes straight into
the hole.
3. As the mast collar
goes into the bearing, you
should hear the lock snap
over the collar. When
installed, there should be
a 1/8”-1/4” gap between
the collar on the mast and
the plastic bearing ring.
4. Unwrap the furling line
from the mast and feed
it through the inboard
crossbar cleat as shown
in the picture below.
5. Feed the mainsheet
h o o k t h r o u g h t h e
grommet at the clew of
the sail. For the best
performance, make
sure the line isn't
twisted around itself.
See page 13 for a 3:1
mainsheet conversion.
Removing the Mast
When storing or transporting the boat, be sure to take
down the mast. Before pulling the mast out, look
overhead for powerlines that could make contact
with the mast.
1. Pull back on the mast release trigger.
2. Apply a little side pressure on the mast away from
the trigger as you lift it out. As soon as the mast is free,
grab it with both hands and pull the mast all the way out.
Always pull the mast straight out.
8
! IMPORTANT !
The mast cup must be completely clear of sand that can
collect at the bottom. Collection of sand will prevent the
mast from fully going inside of the cup. To rinse the mast
cup out, lay the boat on its side and splash water into the
cup to allow it to rinse out.

 Loading...