7
Initial Operation - Outdoor Sensor & Indoor Sensor
Programming - Manual Time Setup
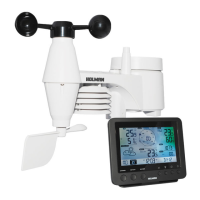
Outdoor Sensor
• Please install batteries in the Outdoor Sensor rst.
• Open the battery compartment located on the rear side of the device.
Place the batteries in the battery compartment. Observe the shown polarity.
• Please place in a sheltered position outside where it will not get wet or weathered.
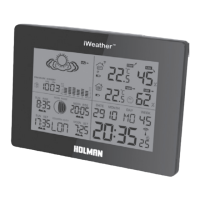
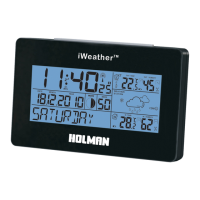
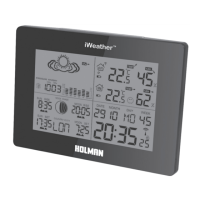
Indoor Unit
• Open the battery compartment located on the rear side of the device.
Place the batteries in the battery compartment. Observe the shown polarity.
• The atlitude is ashing, please use `+` or `-` to set the atlitude of your position, then
press History. Weather symbol will be ashing please use + or – to choose weather picture.
• The station is now connecting to the outdoor sensor. This process takes about 3 minutes.
Then the display will show the outdoor temperature and humidity, in case of failure
of reception, please press“CHANNEL“for more than 3 seconds to receive again.
Manual time set-up (most important to quit the reception of radio controlled signal by holding the
minus button for 3 seconds in case it starts to ash before setup.)
• Press and hold “MODE“ for 3 seconds.
• The display for the year is ashing. Use “+ “ and “-“ to select the year.
Press “MODE “ to conrm.
• The display for the month is ashing. Use “+ “ and “-“ to select the month.
Press “MODE “ to conrm.
• The display for the date is ashing. Use “+ “ and “-“ to select the date.
Press “MODE “ to conrm.
• The display for the time zone is ashing. Use “+ “ or “- “ to select the time zone.
Press “MODE “ to conrm.
• The language selection for the display of the weekdays is ashing. Use “+ “ or “- “ to select the
language.
Press “MODE “ to conrm.
WS5019 Weather Forecaster.indd 9 25/07/13 10:24 AM