© 2008 American Honda Motor Co., Inc. – All Rights Reserved. AII 38576-38846 (0802) 3 of 23
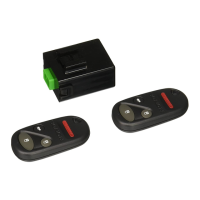
Setting the Control Unit
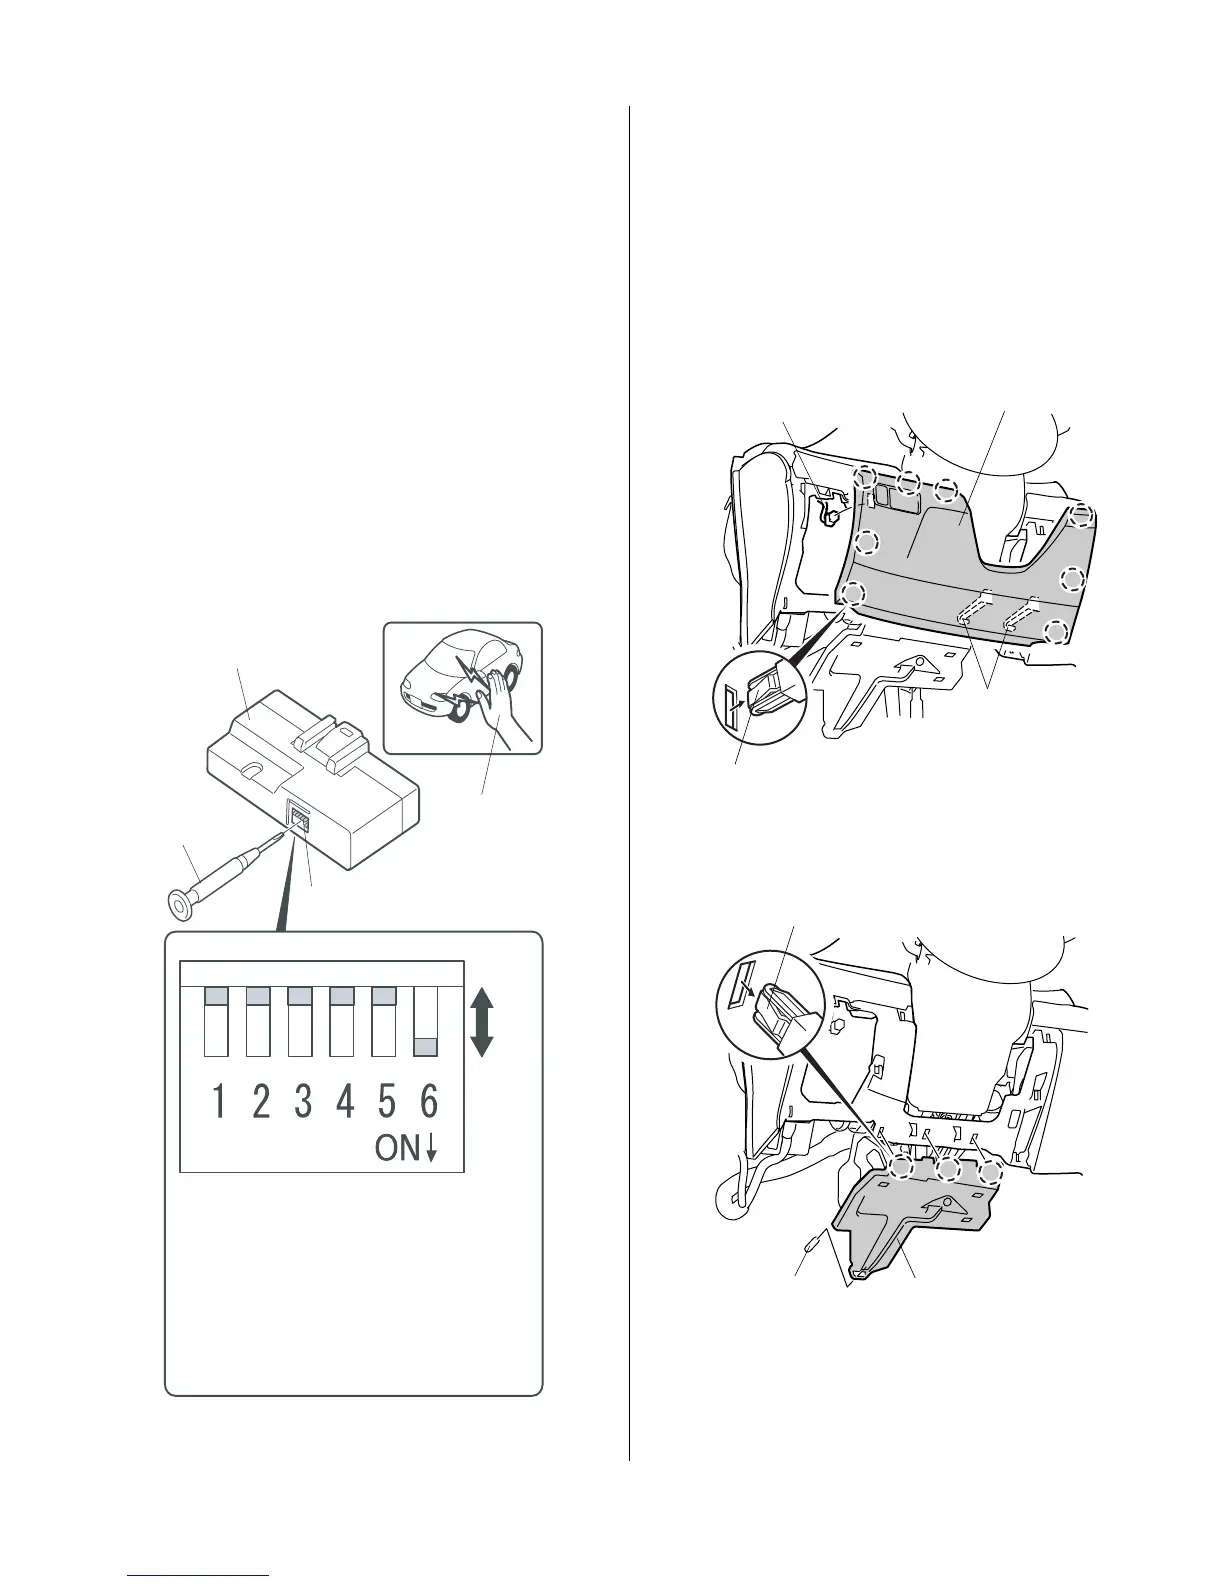
3. Using a small flat-tip screwdriver, adjust the switches
on the (accessory) control unit to the locations
shown. Using isopropyl alcohol on a shop towel,
clean the area where the protective tape will attach
control. Remove the adhesive backing, and attach
the protective to the control unit.
NOTE:
• The switches must be selected before the
control unit is plugged in.
• If the switch setting is not correct the remote
engine starter will not operate correctly.
• If adjusting the switches with the control unit
installed in the vehicle, touch the metal part of
the screwdriver to any metal part of the vehicle
to discharge any static electricity.
• If you change the switch settings with the unit
connected, you must disconnect the unit then
reconnect it before the settings change.
CONTROL
UNIT
SMALL
FLAT-TIP
SCREW-
DRIVER
Discharge any
static electricity.
The switches must
be selected before
the control unit is
plugged in.
SET
SWITCHES
SW:1 RR Junction unit -----------------------> OFF
SW:2 Trunk or Tailgate ----------------------> OFF
SW:3 Smart Entry -----------------------------> OFF
SW:4 Horn or Buzzer Answerback ------> OFF
SW:5 Trunk Main SW -------------------------> OFF
SW:6 Reserve ----------------------------------> ON
SWITCHES
SW:1 RR Junction Unit
SW:2 Trunk or Tailgate
SW:3 Smart Entry
SW:4 Horn or Buzzer Answer Back
SW:5 Trunk Main SW
SW:6 Reserve
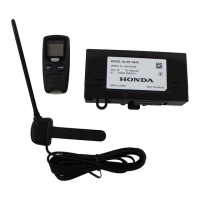
4. Remove the driver’s dashboard lower cover (eight
clips, two hooks, and disconnect the vehicle
connector).
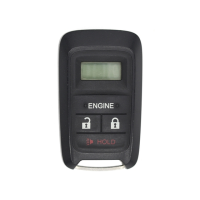
5. V6 Model only: remove the driver’s dashboard under
cover (three clips and one pin).
8 CLIPS
DRIVER’S DASHBOARD
LOWER COVER
2 HOOKS
VEHICLE
CONNECTOR
3 CLIPS
DRIVER’S DASHBOARD
UNDER COVER
PIN