Do you have a question about the Honda 08P35-SJC-100 and is the answer not in the manual?
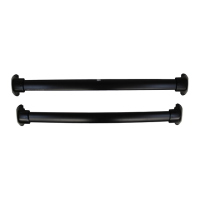
Lists all components included with the nose mask for installation.
Specifies the necessary tools for fitting the nose mask to the vehicle.
Instructions for cutting the bumper mask section to accommodate a license plate.
Procedure for modifying the bumper mask to fit around fog lights.
Step-by-step guide for attaching the front bumper section of the nose mask.
Instructions for fitting and securing the hood portion of the nose mask.
The Honda Full Nose Mask (P/N 08P35-SJC-100) is an accessory designed for the 2006 Honda Ridgeline, providing protection for the vehicle's front end. This accessory is intended to shield the bumper and hood from road debris, insects, and other elements that could potentially damage the paint finish. It's important to note that this nose mask cannot be installed on vehicles already equipped with fender flares, front lower trim, or an air deflector, as these existing accessories would interfere with its proper fitment.
The installation process for the nose mask is divided into two main sections: the hood section and the bumper section, each requiring careful attention to detail to ensure a secure and effective fit. Before beginning the installation, several preparatory steps are crucial. The vehicle and the nose mask must be thoroughly clean and completely dry. Any moisture trapped underneath the mask could lead to paint clouding over time. If the mask gets wet during use, it should be removed and allowed to air-dry completely to prevent this issue. Additionally, any repainted surfaces on the vehicle must be fully cured before installation. It is also recommended to wax the hood and nose of the vehicle with a high-quality paste wax, as this provides an extra layer of protection for the paint underneath the mask. A critical safety reminder is included: if the nose mask begins to flap or come loose while driving, the driver should safely pull off the highway, stop the vehicle, and either secure or remove the mask immediately.
The nose mask comes with specific features to accommodate different vehicle configurations and legal requirements. For instance, if state law mandates the display of both license plates, a designated section of the bumper mask can be cut out. This involves facing the inside of the mask towards the installer, carefully cutting out the license plate section along the top seam with scissors, and removing the overcast stitching. Similarly, if the vehicle is equipped with fog lights, a corresponding section of the bumper mask can be removed. This process is identical: facing the inside of the mask, carefully cutting out the fog lights section with scissors along the top seam, and removing the red overcast stitching. These customizable features ensure that the nose mask can be adapted to various local regulations and vehicle options without compromising its protective function.
The installation of the hood section is straightforward. First, the hood is opened. The corners of the hood section of the mask are then fitted around the hood, and the mask is adjusted to ensure it lies smoothly over the edges. Three hooks on the hood section are then attached to corresponding holes in the hood, securing this part of the mask in place.
Installing the bumper section is a more involved process. It begins by turning the steering wheel all the way clockwise to provide access to the inner fender area. A plastic pin is then pried out, and an expansion clip that fastens the inner fender is removed; this clip should be retained for later use. The area around the hole where the clip was removed should be cleaned. Next, the inner fender is pulled back, and one of the supplied fenderwell nuts is pressed into a hole in the fender flange. With a washer in place, one snap-screw is securely tightened into the fenderwell nut. This process is then repeated on the other side of the vehicle after turning the steering wheel all the way counterclockwise.
Further steps for the bumper section involve attaching five hooks to the top inside edge of the bulkhead upper frame and the radiator cover. A plastic clip is then attached to the top inside edge of the fender, and the mask is fitted across the bumper. The mask is then pulled toward the left fender, and the left pocket of the bumper section is slipped onto the left front corner of the fender. If necessary, downward pressure on the headlight may be applied to help install the fender pocket. Three tabs on the mask are then inserted between the headlight and the bumper. These steps (pulling the mask, slipping the pocket, and inserting tabs) are then repeated for the other side of the vehicle. Finally, the mask is pulled back toward the wheelwell, smoothed out to remove any wrinkles, and snapped onto the snap-screw. This is also repeated on the other side. To complete the bumper section installation, three plastic hooks on each side of the vehicle are attached to the fenderwell. Four plastic clips and two hooks are attached to the upper bumper grille, and another four plastic clips and two hooks are attached to the lower bumper grille. Six hooks are then attached to the bottom inside edge of the front bumper. Once all parts are securely fastened, the plastic pins and expansion clips that were removed in step 3 are placed into the provided storage bag, which should then be stored in the trunk.
Maintenance of the nose mask is simple but important for its longevity and effectiveness. To clean the nose mask, a sponge or cloth should be used with a solution of mild liquid dishwashing soap and water. This cleaning solution is applied to both the vinyl exterior and the flannel backing. After cleaning, the mask must be rinsed completely with clean water. It should then be hung to dry, away from direct sunlight. It is crucial to ensure that the mask is completely dry before reinstalling it on the vehicle to prevent moisture-related issues like paint clouding. Proper cleaning and drying will help maintain the mask's appearance and protective qualities over time.
| Part Number | 08P35-SJC-100 |
|---|---|
| Category | Automobile Accessories |
| Manufacturer | Honda |
| Product Type | Cargo Tray |
| Color | Black |
| Compatibility | Honda Ridgeline |