EasyManua.ls Logo

Honda 08L09-TA1-100 User Manual

Honda 08L09-TA1-100
4 pages
To Next Page IconTo Next Page
Page #1 background imageLoading...
Page #1 background image
© 2011 American Honda Motor Co., Inc. - All Rights Reserved. AII 46956 (1111) 1 of 4
4617010Y
Put this information in the glove box with the vehicle owner's manual.
INSTALLATION
INSTRUCTIONS
Accessory Application Publications No.
Issue Date
NOV 2011
08L09-TA1-1000-91
2012 RIDGELINE
KAYAK ATTACHMENT
P/N 08L09-TA1-100
PARTS LIST
2 Hydro-glide assemblies
4 Brackets
8 Bolts
8 Knobs
2 Straps with buckle
2 Attachment straps
2 Ratchet hooks
2 Hooks
2 Pieces of rope
INSTALLATION
NOTE: Be careful not to damage the finished surfaces
of the body when installing the kayak attachment.
1. Position the two saddles on the front crossbar.
Loosely install the saddles using one bracket, two
bolts, and two knobs for each saddle. The
distance between the two saddles should be the
same as the width of the kayak.
2 Saddles
2 Buckle covers
BOLTS
BRACKET
KNOB
KNOB
CROSSBAR
SADDLE
SADDLE
SADDLE
AII 12025
Question and Answer IconNeed help?

Do you have a question about the Honda 08L09-TA1-100 and is the answer not in the manual?

Honda 08L09-TA1-100 Specifications

General IconGeneral
Product TypeCargo Organizer
Part Number08L09-TA1-100
Cargo OrganizerYes
ColorBlack
CategoryAutomobile Accessories
ManufacturerHonda

Summary

Kayak Attachment Parts List

Kayak Attachment Installation Guide

Installation Safety Note

Cautionary note regarding careful installation to avoid damaging vehicle surfaces during kayak attachment installation.

Mount Front Saddles

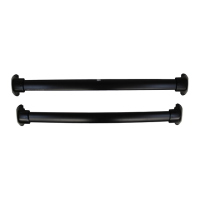
Position and loosely install two saddles on the front crossbar using brackets, bolts, and knobs for kayak attachment.

Mount Rear Hydro-glide Assemblies

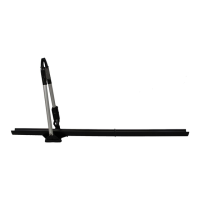
Position and loosely install two hydro-glide assemblies on the rear crossbar using brackets, bolts, and knobs.

Load Kayak Onto Rack

Rest the kayak front on hydro-glide assemblies, lift rear, and slide forward onto roof rack saddles.

Secure Saddle and Assembly Fit

Adjust distance between saddles/assemblies to kayak width and tighten knobs to secure components.

Level Kayak and Adjust Angle

Slide kayak to level it with the roof and adjust saddle angle for a snug fit, then tighten knobs securely.

Route Front Straps and Buckles

Route strap under front crossbars, around kayak, through buckle, and secure with buckle cover.

Route Rear Straps and Buckles

Route strap under rear crossbars, around kayak, through buckle, and secure with buckle cover.

Attach Rope to Hooks

Attach a rope to the end of each hook and tie a knot to secure the rope to the hook.

Route Rope Through Ratchet Hook

Route rope through the bottom of a ratchet hook and turn spool until rope end exits the ratchet.

Wrap Attachment Straps

Wrap attachment straps around the handles at the front and rear of the kayak.

Attach Ratchet Hooks to Vehicle

Attach ratchet hooks to front/rear straps and vehicle tie-down points (bumper beam, tow hook, bed anchor).

Loosen Rope Tension

To loosen the rope, push up on the ratchet strap lever and then pull on the rope.
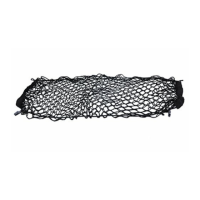
Related product manuals