EasyManua.ls Logo

Honda 08L07-E09-100 - User Manual

Honda 08L07-E09-100
7 pages
Print Icon
To Next Page IconTo Next Page
Loading...
Publications No.
Issue Date
INSTALLATION
INSTRUCTIONS
Accessory Application
© 2012 American Honda Motor Co., Inc. – All Rights Reserved. AII 47246 (1208) 1 of 7
08L07-E09-1002-91
AII 13265
BICYCLE
ATTACHMENT
P/N 08L07-E09-100
2013 ODYSSEY
AUG 2012
Put this information in the glove box with the vehicle owner’s manual.
PARTS LIST
Bicycle attachment
Hex wrench
2Keys
2 Wheel straps
2 Tire adapters
2 End caps
4Bolts
4 Washers
2Brackets
4 Knobs
Rear plate
TOOLS AND SUPPLIES REQUIRED
Tape measure
Illustration of the Bicycle Attachment on the Vehicle
950101AT
BICYCLE
ATTACHMENT
www.collegehillshonda.com
Question and Answer IconNeed help?

Do you have a question about the Honda 08L07-E09-100 and is the answer not in the manual?

Summary

Bicycle Attachment Installation

Attaching Bicycle Attachment to Vehicle

Steps to prepare and mount the bicycle attachment onto the vehicle's crossbars.

Mounting Bicycle onto Attachment

Steps to secure a bicycle onto the installed attachment using the clamp and straps.

Use and Care Precautions

Use and Care

Guidelines for using the bicycle attachment and general care instructions.

Precautions

Important safety warnings and precautions for using the bicycle attachment.

Overview

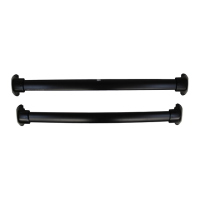
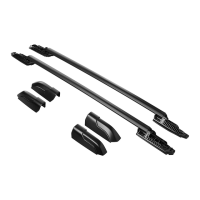
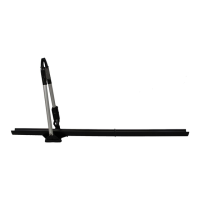
This document describes the installation and usage of a Honda Bicycle Attachment, part number 08L07-E09-100, designed for the 2013 Odyssey. It is an accessory intended to transport bicycles on the vehicle's roof.

Function Description:

The Honda Bicycle Attachment is a roof-mounted carrier system designed to securely hold a bicycle on top of a 2013 Honda Odyssey. It integrates with the vehicle's existing crossbars (sold separately) to provide a stable platform for bicycle transport. The attachment features a locking clamp lever mechanism to secure the bicycle frame and wheel straps to hold the wheels in place. This system allows for the safe transportation of bicycles, freeing up interior space and protecting the vehicle's finish from damage. The design emphasizes security and ease of use, with features like a key-lockable clamp lever to deter theft of the attachment itself and the mounted bicycle.

Important Technical Specifications:

  • Part Number: 08L07-E09-100
  • Application: 2013 Honda Odyssey
  • Front Plate Setting: The front plate of the bicycle attachment should be set 245 mm (9.6 in.) from the end of the bicycle attachment.
  • Socket Bolt Torque: The three socket bolts on the bottom of the front plate must be torqued to 8 N·m (5.9 lbf·ft) during installation.
  • Bicycle Frame Diameter Limit: Do not carry a bicycle if the diameter of its frame exceeds 55 mm (2.2 in.) or if its sectional view is not circular in the area where it is held by the bicycle holder. This is a critical safety specification to ensure proper and secure clamping of the bicycle frame.

Usage Features:

  • Exclusive Use: This bicycle attachment is designed to be used exclusively with Honda crossbars, which are sold separately. Non-Honda accessories, carriers, or attachments should not be used with this kit.
  • Installation Order: The bicycle attachment must be installed after the crossbars are already on the roof rails.
  • Mounting Side: The attachment is primarily intended for installation on the passenger's side. Instructions are provided for adjusting the front plate if installing on the driver's side.
  • Multiple Attachments: If installing more than one bicycle attachment, it may be necessary to alternate mounting positions (front to rear) to allow for handlebar clearance and key lock access.
  • Tire Adapters and Locking Clamp Lever Orientation: Ensure the tire adapters and the locking clamp lever are installed on the outboard side of the attachment.
  • Secure Installation: The end caps "click" into place, and four bolts secure the front plate. Six knobs, six washers, and three brackets are used to secure the attachment to the crossbars.
  • Theft Deterrence: The locking clamp lever can be locked with a key to deter theft of the bicycle attachment and the mounted bicycle. Users are advised to write down the key number in case of loss or theft and store the key in the glove box.
  • Bicycle Loading: To load a bicycle, the locking clamp lever is released with the key and pulled down. The bicycle is then positioned on the attachment, the arm is lifted, the bicycle holder is positioned around the bicycle frame, and the slider is pushed down. The locking clamp lever is then pushed up to secure the frame and locked with the key.
  • Wheel Securing: Wheel straps are positioned at the center of the bicycle wheels and secured by inserting the belts through the buckles. If the bicycle tire is too large, the tire adapters can be reinstalled upside down on the belts. Buckles must be fastened securely.

Maintenance Features:

  • Pre- and Post-Drive Checks: Before and after driving, or after loading a bicycle, users must check the security of the attachment mounts and retighten them as necessary. This is a crucial maintenance step for safety.
  • Key Management: Users are instructed to write down the key number for the locking clamp lever in case the key is lost or stolen, and to store the key in the glove box for future use.

Precautions and Use and Care:

  • Overall Height: Adding the bicycle attachment raises the vehicle's overall height. Users must pay attention to overhead obstacles when driving.
  • Driving Habits: Avoid sudden starts or stops with the attachment on the vehicle, as this may cause bolts and other fasteners to loosen.
  • Legal Compliance: Obey local laws and regulations regarding vehicle modifications and cargo transport.
  • Security Check: Always check that the attachment is locked securely before driving, regardless of whether a bicycle is mounted.
  • Vehicle Compatibility: Do not use the bicycle attachment with vehicles other than the specified 2013 Honda Odyssey.
  • Roof Protection: Care must be taken not to damage the roof and other finished surfaces of the body during installation.

Honda 08L07-E09-100 Specifications

General IconGeneral
BrandHonda
Model08L07-E09-100
CategoryAutomobile Accessories
LanguageEnglish

Related product manuals