EasyManua.ls Logo

Honda 08L20-TA1-100 - User Manual

Honda 08L20-TA1-100
4 pages
Print Icon
To Next Page IconTo Next Page
Loading...
© 2005 American Honda Motor Co., Inc. - All Rights Reserved. AII 28621 (0502) 1 of 4
INSTALLATION
INSTRUCTIONS
Accessory Application Publications No.
Issue Date
FEB 2005
08L20-TA1-1000-91
2006 RIDGELINE
ROOF BOX, SHORT
P/N 08L20-TA1-100
AII 28621
PARTS LIST
Roof box
4 Brackets A
4 Brackets B
4 Plates
8 Knobs
8 Bolts
8 Washers
2 Straps
Adhesive seals
2 Keys
4 Large pads
4 Small pads
SUPPLIES REQUIRED
Isopropyl alcohol
Shop towel
ROOF BOX
ADHESIVE
SEAL
ADHESIVE
SEAL
Put this information in the glove box with the vehicle owner's manual.
INSTALLATION
NOTE:
Be careful not to damage the roof and other finished
surfaces of the body when installing the roof box.
An optional roof rack (sold separately) is required to
attach the roof box.
1. Open the roof box. Attach an adhesive seal over
the unused mounting holes along the bottom of
the box. The seals will help prevent water from
entering the roof box.
Question and Answer IconNeed help?

Do you have a question about the Honda 08L20-TA1-100 and is the answer not in the manual?

Summary

Installation Steps

Prepare Roof Box and Attach Seals

Open roof box and apply adhesive seals to unused mounting holes.

Mount Brackets to Roof Box

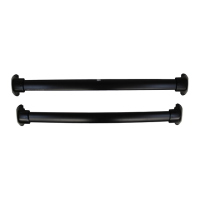
Bolt Brackets B and A to the bottom of the roof box.

Position and Secure Box on Crossbars

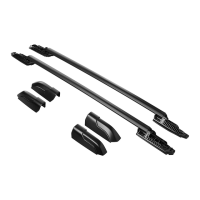
Place box on crossbars, adjust, and tighten knobs.

Fasten Straps

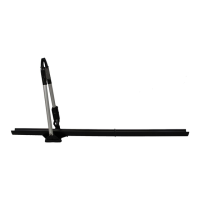
Insert and fasten straps through eyelets on Bracket A.

Use and Care

Unlocking;Locking the Roof Box

Instructions for unlocking and locking the roof box lid.

Loading the Roof Box

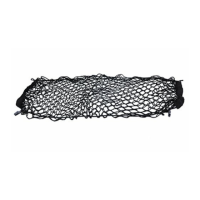
Guidance on weight distribution and securing loads.

Overview

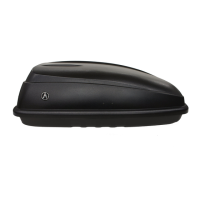
This document provides installation instructions and usage guidelines for the Honda Roof Box, Short (P/N 08L20-TA1-100), designed for the 2006 Ridgeline. It is an accessory intended to expand the cargo capacity of the vehicle.

Function Description:

The Honda Roof Box, Short is an external storage unit that attaches to the roof of a vehicle, specifically the 2006 Ridgeline, to provide additional cargo space. It is designed to carry items that may not fit inside the vehicle's cabin or trunk, or to keep certain items separate from the interior. The roof box is secured to the vehicle's crossbars (an optional roof rack, sold separately, is required for attachment) and features a lockable lid to protect contents from theft and weather.

Important Technical Specifications:

  • Part Number: 08L20-TA1-100
  • Application: 2006 Ridgeline
  • Maximum Allowable Load: 100 lb (45 kg)
  • Minimum Bar Spread Required (for all racks): 21 5/8 inches
  • Components: The roof box assembly includes the main roof box unit, four Brackets A, four Brackets B, four Plates, eight Knobs, eight Bolts, eight Washers, two Straps, Adhesive seals, two Keys, four Large pads, and four Small pads.

Usage Features:

  • Expanded Cargo Capacity: Provides additional storage for luggage, sports equipment, or other items, freeing up space inside the vehicle.
  • Security: The roof box features a lockable lid, which is operated with a key. The key is typically found attached to the inside of the roof box upon initial use. To unlock, the key is inserted and turned counterclockwise, then a center button is pressed to lift the lid. To lock, the lid is pressed down until an audible click is heard, ensuring it's latched, then the key is turned clockwise. The key should be removed when not in use.
  • Weather Protection: The design, including adhesive seals for unused mounting holes, helps prevent water from entering the roof box, protecting its contents from the elements.
  • Load Distribution: When loading, weight should be distributed equally on both sides to minimize imbalance.
  • Cargo Securing: Loads inside the box must be secured with the provided straps to prevent them from sliding during transit.
  • Centering and Orientation: The roof box should be centered on the crossbars and positioned parallel to the direction of travel, with its flat surface facing the front of the vehicle.

Installation Features:

The installation process involves several steps, requiring careful attention to detail and, for some steps, the assistance of another person.

  1. Seal Application: Adhesive seals are applied over unused mounting holes on the bottom of the roof box to prevent water entry.
  2. Pad Attachment: Small pads are attached to Brackets B, and large pads are attached to the Plates. This involves cleaning the surfaces with isopropyl alcohol and removing adhesive backing from the pads.
  3. Bracket Assembly (Internal): Bolts are inserted through Bracket B, then through a Plate, and into predrilled holes in the bottom of the roof box. Bracket A is then fitted over the bolt threads, followed by a washer and a knob, which is loosely installed. Bracket B should be installed with its cutout facing the outboard side. This process is repeated for all four mounting points.
  4. Placement on Crossbars: With assistance, the roof box is carefully placed on the vehicle's crossbars, ensuring the hardware hanging from the bottom does not cause damage.
  5. Securing to Crossbars: The slotted end of Bracket B is swung around the bolt, and the knobs are tightened to secure the box at all four mounting points.
  6. Crossbar Adjustment: If necessary, the distance between the crossbars can be adjusted to align with the pads on the plates. The document notes that additional holes can be drilled in the bottom of the roof box if needed, provided stability or load capacity are not affected. The maximum possible distance between crossbars is recommended.
  7. Strap Installation: The provided straps are inserted through the eyelets on Bracket A and fastened.

Maintenance Features:

  • Regular Fastener Checks: Fasteners should be checked at regular intervals to ensure they remain secure, especially after loading and before travel.
  • Key Management: The key should be removed from the lock when not in use to prevent loss or damage.
  • Strap Placement: Ensure straps are not outside the roof box when locked.
  • Cleaning: The document mentions using isopropyl alcohol for cleaning surfaces during installation, implying that general cleaning of the roof box should also be done carefully to avoid damage to its finish.

Important Notes for Users:

  • An optional roof rack (sold separately) is required to attach the roof box.
  • Care must be taken not to damage the roof and other finished surfaces of the vehicle body during installation and use.
  • Do not overload the roof box; adhere to the maximum allowable load of 100 lb (45 kg).
  • The installation instructions should be kept in the glove box with the vehicle owner's manual for future reference.

Honda 08L20-TA1-100 Specifications

General IconGeneral
BrandHonda
Model08L20-TA1-100
CategoryAutomobile Accessories
LanguageEnglish

Related product manuals