EasyManua.ls Logo

Honda CB160 - Page 75

Honda CB160
136 pages
Print Icon
To Next Page IconTo Next Page
To Previous Page IconTo Previous Page
Loading...
4. l O
REAR
FORK
AND
REAR
FENDER
3. Measurement
of
rear fork pivot bolt
Standard value
I
Correction
limit
Outside
13.925
ta
13.968
mm
diameter
1.557
11
ta
.558
11
1
Bend
Below
0102
4.
Measurement
of
twist
of
the
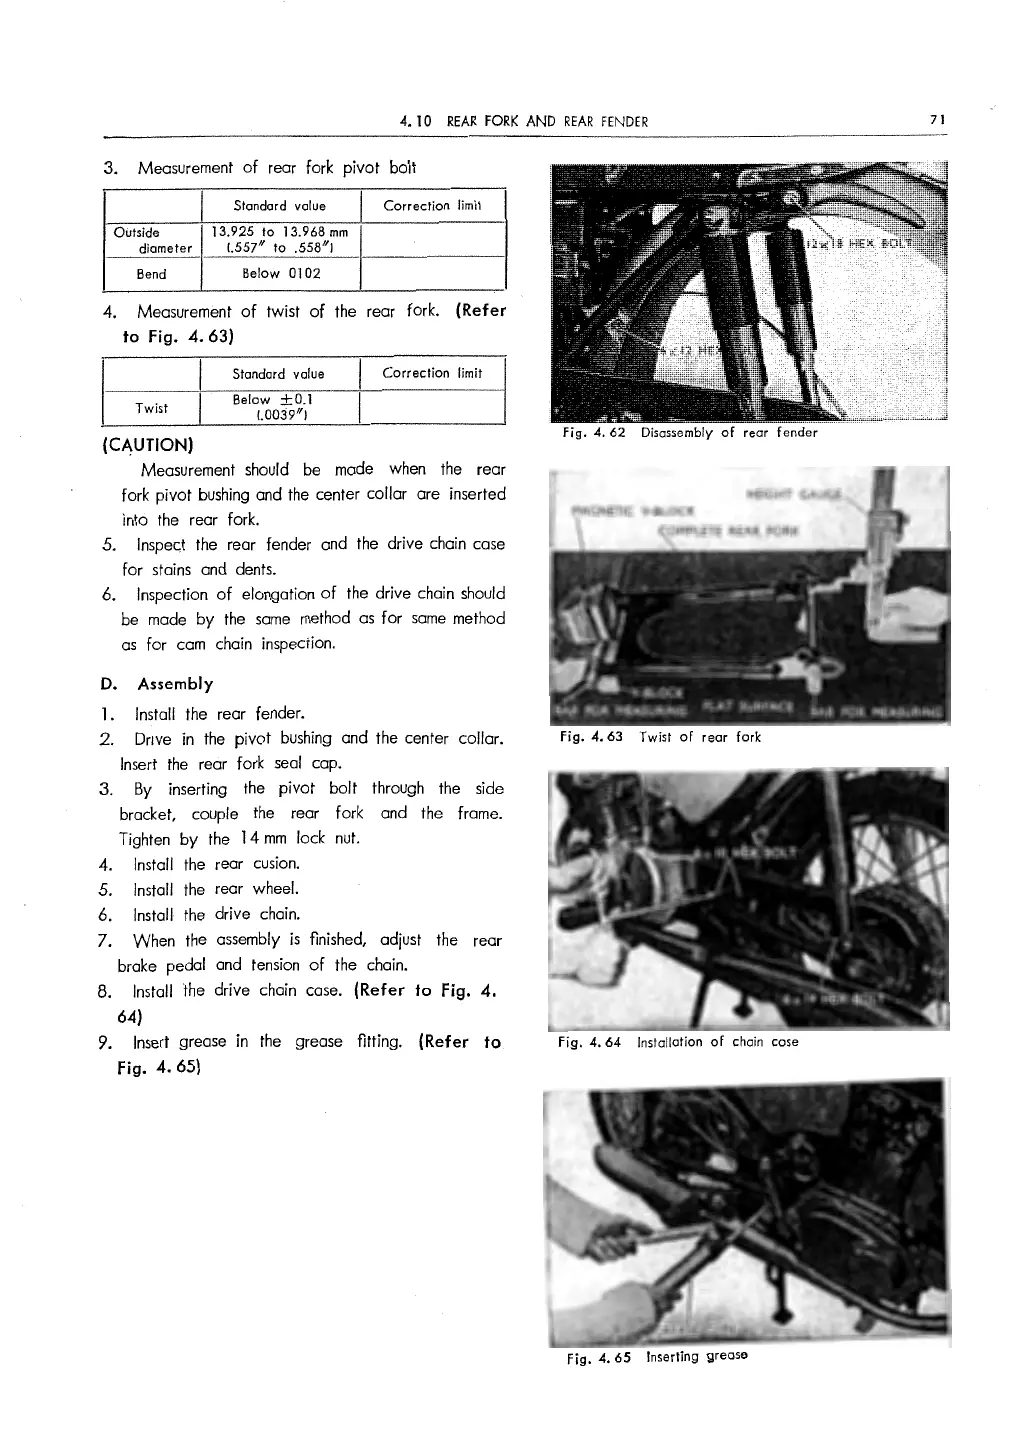
rear fork. (Refer
to
Fig. 4. 63)
Standard value
Correction
limit
Twist
Below
±0.1
1.0039
11
)
(CAUTION)
Measurement
should
be made
when
the
rear
fork pivot
bushing
and
the
center collar are inserted
into
the
rear fork.
5.
Inspect
the
rear fender and
the
drive
chain
case
for
stains
and dents.
6. Inspection
of
elongation
of
the
drive chain
should
be
made
by
the
same
method
as
for
same
method
as
for
cam
chain inspection.
D.
Assembly
1.
Install the rear fender.
2.
Drive in
the
pivot
bushing
and the center collar.
Insert
the
rear fork
seal
cap.
3.
By
inserting
the
pivot bolt through the side
bracket, couple
the
rear fork and
the
frame.
Tighten
by
the
l 4
mm
lock
nut.
4. Install
the
rear
cusion.
5.
Install
the
rear wheel.
6. Install
the
drive
chain.
7. When
the
assembly
is
finished, adjust the rear
brake pedal
and
tension
of
the chain.
8. Install the drive chain
case.
(Refer to Fig. 4.
64)
9. Insert grease
in
the
grease fitting. ( Refer
ta
Fig. 4. 65)
,..;
Fig. 4.
62
Disassembly
of
rear
fender
fig.
4.
63
Twist
of
rear
fork
fig.
4.
64
Installation
of
chain
cose
fig.
4.
65
Inserting
grease
71