– 4 –
IF NECESSARY, CONFIGURE DETECTION MASKING
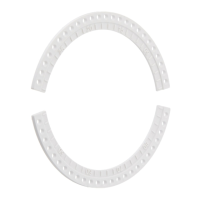
1. Spread the Cover and gently press on the
Lens
to remove the Lens Holder.
2. Separate the Lens from the Cover.
Cover
Lens
Area Masking
Plate
Lens
Holder
3. Identify the segments on the Lens to be masked.
4. Then apply the adhesive Masking
Strip(s), as necessary, inside the
lens to mask the desired
segments.
1
13
2
3
4
5
6
7
8
9
10
12
11
1
13
2
3
4
5
6
7
8
9
10
12
11
5. Replace the Lens by aligning the 4 cutouts
on the lens to the 4 projections inside the
cover. Snap in place with the Lens Holder
.
Cover
Lens
6. Ensure the Lens Holder is held by the left and
right cover prongs and the two tabs are engaged.
Cover
Lens
Holder
SET THE SENSITIVITY SET THE DIP SWITCHES
1. Set the Sensitivity Select Switch to the desired
sensitivity.
Sensitivity
Select Switch
(Low, Med, High)
DIP
Switches
Low Sensitivity - Best to prevent false detections.
High sensitivity - Best detection catches (increased
false detections). Use for applications where you are
tagging video, or need high security awareness.
1. At the DIP switches, set switch 2
for the desired Battery Saving
Timer period.
Note: The alarm output
activations are limited by the timer
selection (5 or 120 seconds). Even
if there are continuous alarm
events, the alarm output operates
only once in the selected timer
period. This period can be set for 5
or 120 seconds.
120s – Default Setting
5s – Used when frequent alarm
transmission is required. Battery
life will be shortened when using
this setting.
2. Set switch 3 for the desired Pulse Count
(selectable for 2 or 4).
Pulse Count of 2 = detection can be
made with as little as two steps.
Pulse Count of 4 = detection can be
made with as little as four steps.
3. Set switch 1 to enable the Walk Test,
then perform the walk test on the next
page.
ON 1. Walk Test
5s 2. Battery Saving Timer
2 3. Pulse Count
ON
1
2
3
OFF
120s
4
Default Setting
Default Setting

 Loading...

