Do you have a question about the Honeywell 8 Series and is the answer not in the manual?
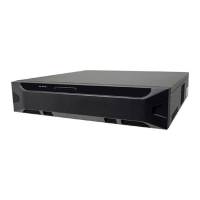
The Honeywell Performance Series 8 SATA Storage Expansion Chassis is a device designed to expand the storage capacity of compatible Network Video Recorders (NVRs) and Digital Video Recorders (DVRs). This quick installation guide provides instructions for unpacking, installing disks, connecting to a host, and formatting disks, along with a list of compatible NVRs and HDDs.
The primary function of this device is to provide additional storage for video surveillance systems. It acts as an external storage unit that connects to a host NVR or DVR via an eSATA port. This allows users to increase the recording capacity of their surveillance system, enabling longer retention of video footage or support for more high-resolution cameras. The chassis supports multiple SATA hard disk drives, providing a scalable storage solution.
While specific detailed technical specifications like power consumption, dimensions, or operating temperature are not explicitly listed in the provided document, several key specifications can be inferred or are directly stated:
In summary, the Honeywell Performance Series 8 SATA Storage Expansion Chassis is a robust and user-friendly solution for extending the video storage capabilities of compatible Honeywell NVRs and DVRs. Its design emphasizes ease of installation and integration, making it a practical choice for enhancing surveillance system capacity.