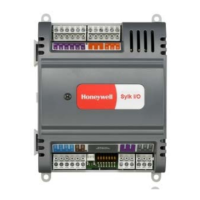
Do you have a question about the Honeywell Series 8 I/O and is the answer not in the manual?
| Brand | Honeywell |
|---|---|
| Model | Series 8 I/O |
| Category | I/O Systems |
| Language | English |
Important installation declarations including ESD HAZARD and WARNINGs.
Pinouts and wiring for HART/Non-HART Analog Input IOTAs, including terminal block details.
Pinouts for differential analog input IOTAs, supporting various input configurations.
Pinouts and graphics for Analog Output IOTAs, detailing output current ranges.
Information and graphics for 24V Digital Input IOTAs, detailing field wiring protection.
Information and graphics for 24V Digital Output IOTAs, including over-current protection.
Details the configuration information on the Main tab for all Series 8 module types.
Details for the Calibration tab for Analog Input, Analog Output, and TC/RTD modules.
Details for configuring HART parameters on channel blocks, including alarm enablement.
Steps to add an IOM to the project using File menu or drag-and-drop methods.
Represents an I/O point within an I/O module with common attributes and parameters.
Explains the MODE parameter and its operating modes, and MODEATTR.
How the FAULTOPT parameter specifies output behavior during fault conditions.
How to set a channel as 'out of service' for repair or maintenance.
Overview of HART protocol, its capabilities, and enabling HART for Series 8 I/O.
Parameters exposed after HART is enabled, all located on the Configuration tab.
How the PV signal is characterized using parameters like SENSRTYP and PVCHAR.
Calculation of PVCALC based on raw input and engineering unit spans.
Calculation of PVCALC for square root conversion of PVRAW.
Thermal linearization process for thermocouple and RTD input types.
PV range checking to ensure PVCALC output is within specified limits.
Represents an analog output point, converting output value (OP) to a 4-20mA signal.
Specifies whether the data point output is direct or reverse acting using the OPTDIR parameter.
Optional function to interpolate linearly between values using configurable X-Y coordinates.
Represents a digital input point, converting digital PVRAW to PV data for Experion system use.
How PVAUTO represents the raw input signal state after direct/reverse conversion.
Configuration for capturing momentary digital inputs, ensuring control function execution.
Provides a digital output to the field based on input origin and configured parameters.
Provides a digital output to the field based on input origin and configured parameters.
How PWM output receives input and calculates pulse length based on OP parameter and PERIOD.
Explains the MODE parameter and its operating modes for channel blocks.
Digital outputs are protected from over-current conditions, shedding to manual control.
Behavior of electronic short-circuit protection when activating in non-redundant configurations.
Behavior of electronic short-circuit protection in non-redundant configurations.
Behavior of electronic short-circuit protection in redundant configurations, including switchover.
Steps to recover the Digital Output channel to normal operation after a short-circuit fault.
Steps to assign a channel to a HART IOM and enable HART communications.
Steps to assign a channel to a HART IOM and enable HART communications.
Process of transferring the Control Strategy to field components via the load operation.
Order for loading control strategy components to avoid load interaction errors.
Ensures IOM blocks are loaded prior to Control Modules containing associated channel blocks.
Ensures IOM blocks are loaded prior to Control Modules containing associated channel blocks.
Lists specific rules for reconfiguring IOMs based on their RUN state.
Uploads Series 8 I/O blocks' parameter values from IOM to Monitoring database.
Loads CM block, standard blocks, and IOC block parameters to IOM device.
Optional selection to improve control loop latency using Priority IOM on IO Link interface.
Optional selection to improve control loop latency using Priority IOM on IO Link interface.
Characteristics of Priority_IOMs regarding I/O Link bandwidth and controller preference.
Guidelines for handling FOE modules to prevent electrostatic discharge damage.
Required sequence for mounting FOE modules, back panels, and cables.
Required sequence for mounting FOE modules, back panels, and cables.
Calculation to ensure planned splices and cable choice support necessary cable span distance.
Calculation of available optical power for Standard I/O Link Extenders.
Table used for calculating losses in splices for fiber optic cables.
Requirements for standard I/O Link Extender cable signal loss at 850 nanometers.
Basic checks to help isolate problems, not in a particular order.
How to interpret error messages and codes found in Control Builder dialogs.
Series 8 I/O modules run self-tests upon power-on or reset, checking CPU, RAM, address lines, flash, and stack.
Series 8 I/O modules run self-tests upon power-on or reset, checking CPU, RAM, address lines, flash, and stack.
Common reasons for loss of communication between IOM and IOLINK function block.
Common reasons for loss of communication between IOM and IOLINK function block.
How C300 determines and re-establishes communication with an IOM.
Procedures for removing and installing IOMs safely under power without interruption.
Steps to replace an IOTA board, requiring the IOM to be in an inactive offprocess state.