HONEYWELL MODEL 700/800 SIGNAL PROCESSOR AND VIEWING HEAD
13 66-2069EP—08
the setup should be reviewed for proper viewing head aim
and sight path to ensure it is optimized.
Orificing
Orifice disks have been used in applications with older
viewing heads that did not have adjustable gain in order to
reduce the extreme brightness of certain burner flames.
The orifice disk kit is part number M-702-6. Orifice disks
come with 3/8, 1/4,
3/16 and 1/8 inch diameter holes. Contact the factory for
guidance is using orifice disks. The disks are installed with
retaining rings in the flange at the edge of the 1/2 inch
NPT female pipe thread for the process connection. An
internal type retaining ring is first installed by positioning
a ring in the machined groove inside the flange opening
from the housing side. The orifice disk is then inserted.
Use a second retaining ring to hold it in place so that it is
sandwiched tightly between the two retaining rings.
If the displayed flame count is 25 or higher when the gain
is set to 1, an orificing disc inserted in the back end of the
mounting block can be used. Choose a disc that gives a
reading of 12 to 24 at a low fire firing rate. The discs have a
range of orifice sizes; each size step results in about a 2:1
change in the counts displayed.
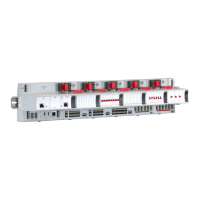
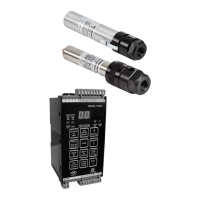
Signal Processor User Interface
The 700ACSP and 700DCSP signal processors have a user
interface that includes four lights, a two-digit display and
twelve push buttons for operation and programming.
Each button has at least one specific purpose.
To enter a menu, press and hold the applicable button for
2 seconds. Adjustments to the applicable setpoint can be
made via the INCREASE or DECREASE arrow buttons. To
store the new setting, press the STORE button until “--” is
shown, indicating the value has been accepted.
If no activity occurs for a period of four seconds while the
menu value is displayed, it will revert back to the operating
display.
To exit a menu at any time without saving changes, simply
press the RESET/rE button.
The following describes the functions of the LED
indicators, display and push buttons:
Front Panel LED Indicators and Display
• ON SEQ/AUTO SET LED (green):
— Used in conjunction with the BNR-ON SEQ
START/END and BNR-OFF SEQ START/END but-
tons during the automatic setup process
• OFF SEQ/FAULT LED (green):
— Used in conjunction with the BNR-ON SEQ
START/END and BNR-OFF SEQ START/END but-
tons during the automatic setup process
— Indicates a fault condition
• Two digit display
— When in operating mode, the display indicates the
current flame signal, which ranges between 00 and
29
— Upon power up, indicates whether an IR or UV view-
ing head is attached and the selected gain setting;
such as r7 (IR with gain of 7) or u5 (UV with gain of
5).
— Indicates various characters during the automatic
setup process as well as whether the panel is
locked
• FLAME SIG LED (yellow):
— When a flame is present, LED flashes at a rate pro-
portional to flame signal, except when the pulses
are interrupted once per second for viewing head
self-checks.
• FLAME ON LED (red):
— When the flame signal is above the selected value,
the LED will be illuminated and the flame relay will
be energized.
Push Button Functions
• RELAY ON SETPOINT button:
— Allows user to select flame on threshold value.
When the flame signal is above the selected value,
the flame relay will be energized. Used in conjunc-
tion with the INCREASE, DECREASE and STORE
buttons (range of 00 to 29).
• LOAD FACTORY DEFAULTS button:
— Used to restore all settings to the factory default
values
•
INCREASE button:
— Used to increase parameter value when in pro-
gramming mode
• RATIO (%) RELAY OFF/RELAY ON button:
— Used along with the INCREASE, DECREASE and
STORE buttons to set the RELAY OFF setpoint at a
percentage of the RELAY ON setpoint. Adjustable
from 20% to 80%.
• STORE button:
— Stores new parameter values during programming
— After making changes “--” will be displayed indicat-
ing the new values are accepted and stored
•
DECREASE button:
— Used to decrease parameter value when in pro-
gramming mode
• BNR-ON SEQ START/END button:
— Used to initiate and proceed through the automatic
parameter setup sequence, which includes the
RELAY ON, RATIO (%) and GAIN settings (the
FFRT, mA output and communication address
must be set manually)
• BNR-OFF SEQ START/END button:
— Used during the automatic parameter setup
sequence
• ACCEPT RATIO/SET GAIN button:
— Allows user to set the viewing head gain in con-
junction with the INCREASE, DECREASE and
STORE buttons
— Used in conjunction with the BNR-ON SEQ
START/END and BNR-OFF SEQ START/END but-
tons during the automatic setup process
• FFRT 1/2/3 SEC OPTION button:
— Used to set the FFRT timing along with the
INCREASE, DECREASE and STORE buttons
• 0-20MA 4-20MA OPTION button:
— Used in conjunction with the INCREASE,
DECREASE and STORE buttons to select the pro-
portional mA output for the flame signal
• RESET rE button:
— Resets a lockout condition
— Also used to exit a menu while programming
 Loading...