– 10 –
Schedules
SchedulesSchedules
Schedules
About
Schedules
• The system provides up to 24 end-user schedules (programmable by master/installer only), which can
control various types of events.
• Each schedule causes a defined event to start and stop (when appropriate) at a specified time.
• Schedules can be set to automatically repeat at various intervals.
• Schedules can be set for random starting, if desired.
Creating Schedules
1. System Master Code + [#] + [6] [4]
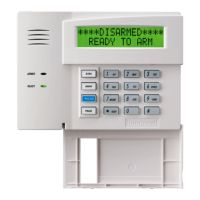
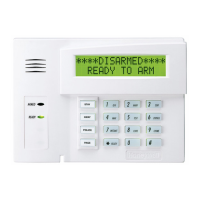
1 DISARMED
READY TO ARM
2. Enter a 2-digit schedule number from 01-24.
Press [∗] to continue.
ENTER SCHED NO.
00=QUIT 00
3. Enter the desired 2-digit event number from the following list.
00 = remove the scheduled event
01 = turn a programmed device on or off
02 = set a user access schedule for one or more users)
ENTER EVENT
03 = send “child-not-home” report; see Child Not Home notes below
04 = automatically arm the system in STAY mode at a specified time
05 = automatically arm the system in AWAY mode at a specified time
06 = automatically disarm the system at a specified time
07 = Display the word “REMINDER” at a specified time
08 = Disarm Time Window (system can be disarmed only during this time period; Exception: if a burglary alarm occurs,
the system can be disarmed outside the scheduled time window)
Press [∗] to continue.
4. For event number “01,” enter the 2-digit output number (01-18) associated with this
schedule. Otherwise, this prompt is skipped.
Press [∗] to continue to the “Start” prompt below.
DEVICE NUMBER
XX
5. For event number “02,” enter the 1-digit access group number (1-8). Otherwise, this
prompt is skipped.
Press [∗] to continue to the “Start” prompt below.
GROUP NUMBER
X
6. For event numbers “03-07,” enter the partition number to be armed or disarmed.
Otherwise, this prompt is skipped.
0 = arm all; 1 = partition 1; 2 = partition 2; 3 = partition 3
Press [∗] to continue to the “Start” prompt.
PARTITION
X
7. Enter the event’s start time and days of week: Hour = 00-23; minute = 00-59
Days = Position the cursor under the desired days using the [∗] key to move
forward, then press “1” to select the day(s). Press [∗] to continue.
START SMTWTFS
HH:MMAM 1000000
8. For events 04 or 05, enter the desired amount of time, 01-15 minutes, the system
should warn of impending arming. The system beeps once every 30 seconds to alert
users that arming will soon occur. Otherwise, prompt is skipped.
Press [∗] to continue.
WARNING DELAY TIME
00
9. Enter the event’s stop time and days of week. Refer to step 7 for available entries.
Press [∗] to continue.
STOP SMTWTFS
HH:MMAM 1000000
10. Enter the desired repeat option.
0 = no repeat; 1 = repeat schedule weekly
2 = repeat schedule biweekly (every other week)
3 = repeat schedule every third week; 4 = repeat schedule every fourth week
e.g., To make a schedule that happens everyday you would select all days with a
repeat count of 1. To make a schedule that runs for one week then stops, select
everyday with a repeat count of 0.
REPEAT OPTION
0-4 X
11. Select the randomize option, if desired: 0 = no; 1 = yes
If selected, the schedule times will vary within 60 minutes of the “hour” time. For
example, if a schedule is set to start at 6:15, it will do so the first time 6:15 arrives,
but on subsequent days it will start anytime between 6:00 and 6:59
This feature is typically used for lighting control to make an unoccupied facility
appear occupied during extended absences.
Press [∗] to return to the ENTER SCHED No. prompt.
RANDOMIZE
0=NO 1=YES X
Child-Not-
Home Paging
• You can program a schedule that causes a pager report to be sent to Pager 1 phone number if the system
is not DISARMED by the scheduled time (see event “03”). The message sent is:
777– 7777 .
For example, a working parent might want a message to be sent to a pager if their child did not arrive
home from school and disarm the system by a certain time.
NOTE: Your installer must program the control for pager reporting before you can use the child-not-home
scheduling option (installer must program pager number and report options).
 Loading...