AQ250 SERIES HYDRONIC CONTROL PANELS
68-0306—05 4
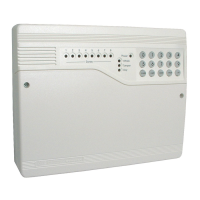
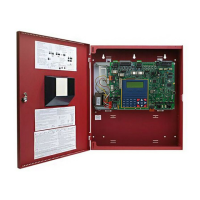
In general, the top terminals of the AQ2000 Series components
carry low voltage (24 Vac) power and the bottom terminals
carry line voltage (120 Vac) power. This is illustrated in Fig. 1.
The two exceptions to this are:
1. AQ15740B Zoning Module for use with zone valves with
end switches.
2. AQ15540B Zoning Module when used with low voltage
zone valves without
end switches.
For these the two exceptions, the bottom terminals of the
Transformer and Control Module carry line voltage (120 Vac),
but the bottom terminals of the Zoning Module will carry low
voltage (24 Vac) power.
The powered terminals on the bottom of the AQ2000 Series
Control Modules and Zoning Modules are connected internally,
as shown in Fig. 2. The voltage supplied to the N and L
terminals is also available at the adjacent terminal pairs when
the hot ( ) relays are switched.
Fig. 1. AQ250 Control Panel layout (AQ25044B shown).
Fig. 2. Internal wiring for AQ2000 Series components line voltage relays.
2MOUNTING
This section describes how to mount the Control Panel,
Expansion Zoning Panels, and the Thermostats.
Mount AQ250 Control Panel
Mount the control panel on the wall:
1. Use the template supplied with the AQ250 Series
Control Panel to mark the four mounting holes for the
panel.
2. Install two top screws, mount the panel, and install the
two lower screws.
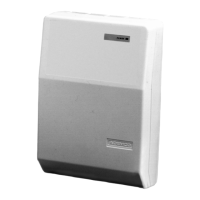
Mount Expansion Zoning Panels
If there are Expansion Zoning Panels to install, mount them to
the wall now:
1. Remove wire channel plugs from the AQ250 Control
Panel and any Expansion Zoning Panels (see Fig. 3 on
page 5).
2. Mount Expansion Zoning Panel on the right-hand end of
the AQ250 Control Panel. Install two top screws of the
Expansion Zoning Panel, ensuring it is level with the
adjoining Control Panel, and install two lower screws.
3. Reverse wire channel plugs and re-insert them into their
slot, to form a wiring channel between the Control Panel
and the Expansion Zoning Panel (see Fig. 3 on page 5)
and to connect the two panels together.
Zone 1
Zone 2
Zone 3
Zone 4
ZR
Boiler
DHW
Aux
M29032A
LOW VOLTAGE
(24 V)
LOW VOLTAGE
(24 V)
ZONING MODULE
CONTROL MODULE
TRANSFORMER
LINE VOLTAGE
(120 V)
M29033
Zone 1
Zone 2
Zone 3
Zone 4
CONTACTS
SYMBOL
ZR
Boiler
DHW
Aux
 Loading...