AreaRAE Pro & AreaRAE Plus
QuickStart Guide
WARNINGS
Read Before Operating
The AreaRAE Pro/Plus User’s Guide must be carefully
read by all individuals who have or will have the
responsibility of using, maintaining, or servicing this
product. The product will perform as designed only if it is
used, maintained, and serviced in accordance with the
manufacturer’s instructions.
CAUTION!
Never operate the monitor when the rear cover is re-
moved. Remove rear cover, sensors, and/or battery only
in an area known to be non-hazardous. Never use the
instrument with the calibration adapter installed, as this
can cause distorted readings, a potential safety threat.
Note: If the AreaRAE Pro/Plus is equipped with a
gamma sensor, it comes pre-calibrated from the factory
and no calibration is required.
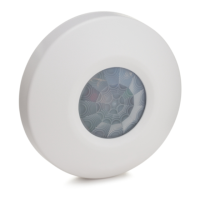
User Interface
The user interface consists of the display and three keys,
[Y/+], [MODE] and [N/-]. The LCD displays
information such as monitored threats, real-time
readings, measurement units, alarm type (when in alarm,
including cal. overdue), battery and pump status, datalog
(if on), and radio and connection quality (if available).
Charging The AreaRAE Pro/Plus
Always fully charge the battery before use.
1. Remove the cover over the AreaRAE Plus/Pro’s
power port.
2. Plug the AC/DC adapter’s barrel plug into the
AreaRAE Pro/Plus’ power port.
3. Plug the AC/DC adapter into an AC outlet.
Replacing Battery Packs
The AreaRAE Pro/Plus is powered by a re-
chargeable Li-Ion battery pack (PN: W01-3007-000)
To change the battery:
1. Unscrew battery. 2. Lift out. 3. Insert battery.
4. Replace and tighten screws.
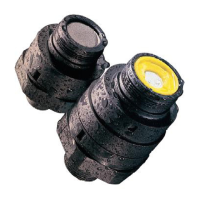
External Battery Charger
You can charge a spare Li-Ion battery with the
optional External Li-Ion Battery Charger For
AreaRAE. Attach it to the battery and then plug in
its AC adapter.
2.
3.
5.
6.
4.
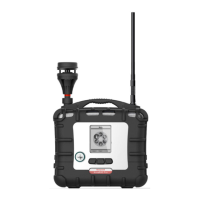
Charging
Port
Display
RAEMet
Alarm
LEDs
Alarm
LEDs
Charging &
USB ports
(on side)
External Filte
And Gas Inlet
Alarm
Buzzer
USB
Port
Phone: 408-952-8200 Fax: 408-952-8480
Email: customerserv@raesystems.com
www.raesystems.com
RAE Systems by Honeywell
3775 N. First St.
San Jose, CA 95134-1708 USA
[N/-] key
[MODE] key
[Y/+] key
Antenna
IMPORTANT!
Keep all ports covered when
they are not in use.
Align the Charger’s
edges and contact pins
with the battery
Press the Charger into
place, making sure the
contact pins mate
Press down on the back
of the Charger to ensure
that it is securely set
Plug in the AC adapter’s
barrel and plug the power
cord into an AC source