CM907-TRV CHRONOTHERM
3 EN0H 8555 UK07 R0 09/06
INSTALLER SET-UP
Specific Applications Setting What do you need to change?
Cycle/
Hour
Minimum
ON time
(in minutes)
Note :
a. To change Cycle/Hour, please go to parameter n. 2, category 2
in the installer set-up mode.
b. To change Minimum ON Time, please go to parameter n. 1,
category 2 in the installer set-up mode.
Heating Gas Boilers
(<30KW)
6 1 No action required
Oil Boiler 3 4 1. Set Minimum ON Time to 4 minutes.
2. Set Cycle/Hour to 3.
Thermal Actuator 12 1 Set Cycle/Hour to 12.
Zone valve 6 1 No action required.
Electric heating
(for applications
<8A)
12 1 1. Configure the thermostat for electric heating (set parameter n.3,
category 2 in the installer set up mode to 1).
2. Set Cycle/Hour to 12.
Air
conditioning
1. Configure the thermostat to allow switching between heating
and cooling modes (set parameter n.4, category 2 in the
installer set-up mode to 1)
2. Set the thermostat accordingly to the required mode of
operation (heating or cooling) by pressing the TEMP
or
buttons together for 5 seconds.
Modify the cooling program
as required.
Heat Pump/
Air conditioner
3 4 1. Set Minimum ON Time to 4 minutes.
2. Set Cycle/Hour to 3.
2
Fan coil 6 1 No action required.
In Installer set-up we can:
❑ Set-up specific applications
❑ Enable special features
❑ Establish support for optional accessories
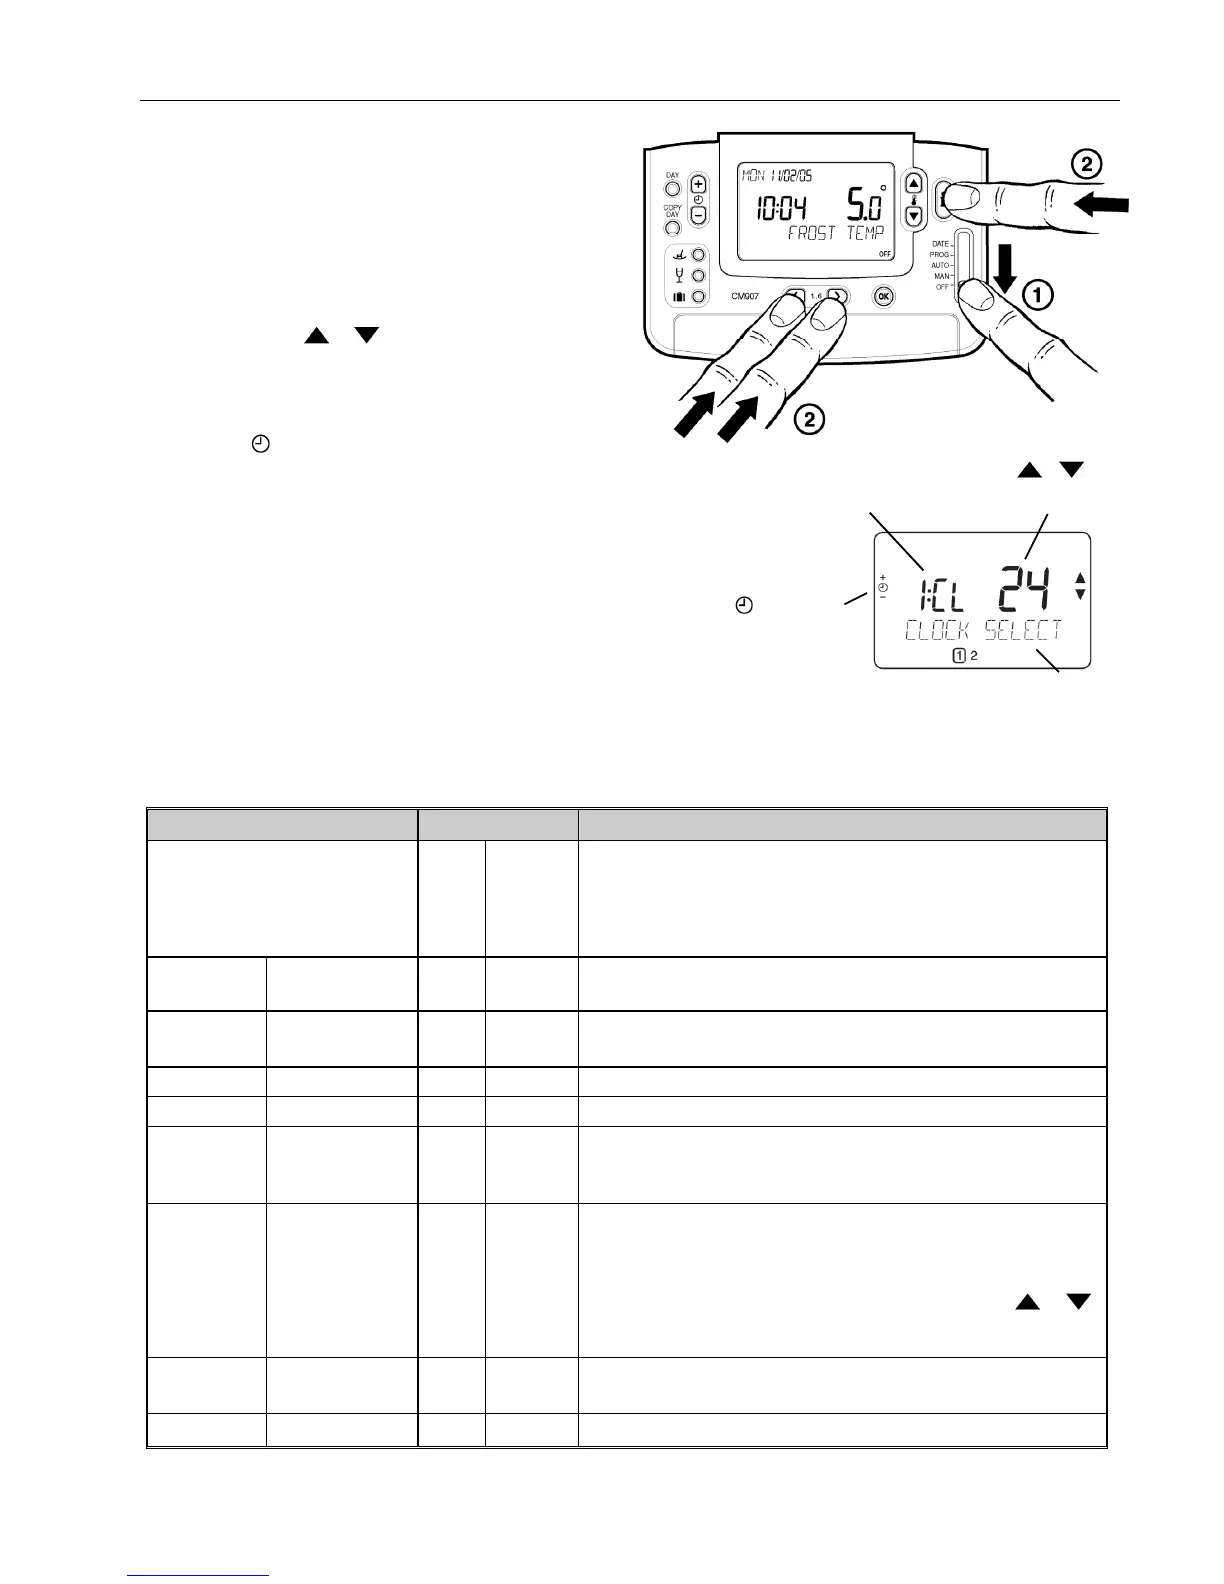
To enter the installer set-up mode:
a) Move the slider switch to the OFF position.
b) Press and hold the INFO
i button and the two program
buttons ‘< >’ together.
c) The unit will display the first parameter of installer
parameter group category 1 (from n.1 to n.19).
d) Press the TEMP
or buttons to change the factory
setting. The display will flash indicating that a change has
been made.
e) Press the green OK button to confirm this change and the
display will stop flashing.
f) Press the
+ button to go to the next parameter.
g) Press the program button > to go to category 2 in the
Installer mode (from n.1 to n.5).
h) To exit the installer mode, move the slider switch to the
AUTO or MAN positions.
Abbreviated Set-Up Description
e.g. Cl = Clock Format
Factory Setting or New Choice
Press TEMP or to change
e.g. 12 = AM/PM Format
24 = 24hr Format
Installer Set-up Number
(Press + or - to change)
e.g. 1 = Clock Format
Brief Description of the
Parameter Function.
 Loading...