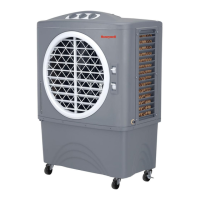
This document is the owner's manual for the Honeywell Portable Evaporative Air Cooler, model CO301PC. It provides comprehensive information on the device's function, technical specifications, usage, and maintenance.
Function Description:
The Honeywell Portable Evaporative Air Cooler is designed to provide cooling through the natural process of water evaporation. It operates by drawing in warm, dry air, passing it over a honeycomb cooling media saturated with water, and then expelling cooler, humidified air. This process is similar to a breeze blowing across a lake, which drops the temperature and creates a relaxing cooling effect. The unit does not use a compressor or refrigerant gas, distinguishing it from a refrigerated air conditioner. It can also be used to humidify dry air during cool weather by closing windows and doors to allow humidified air to accumulate.
Important Technical Specifications:
- Model: CO301PC
- Power Rating: 270 Watts
- Voltage Rating: 220-240 Volt, 50Hz
- Water Tank Capacity: 30 Litre
- Cooling Media: Honeycomb
- Product Dimension (L x W x H): 546 mm x 437 mm x 1082 mm
- Net Weight: 30 Kg
- Current: 1.2/2.2 A
- Maximum Water Pressure (Continuous Supply): 300 kPa
Usage Features:
The cooler offers several user-friendly features for operation:
- Control Panel and Remote Control: The unit can be operated via a touchscreen control panel or a remote control. The remote control includes buttons for Power (on/off), Speed (LOW/HIGH), Cool (pump/COOL function on), Swing (automatic swing of louvers), and Timer (0.5 to 8 hours).
- Power On/Off: To turn on, connect the cord to a power outlet; the unit enters Stand-by mode with a "beeping" sound and amber power display. Touch POWER to turn it on; the blue outer power circle lights up, and the fan starts at HIGH speed before automatically reducing to LOW. To turn off, touch POWER for 2 seconds.
- Fan Speed Adjustment: The SPEED button allows changing the fan speed between HIGH and LOW, indicated by incremental bars on the display.
- Cooling Function: To activate evaporative cooling, touch the COOL button. The pump will turn on and wet the cooling pad.
- Automatic Swing Function: The SWING button on the touchscreen panel activates automatic side-to-side movement of the louvers to direct the air stream. Vertical airflow can be adjusted manually.
- Timer Function: The TIMER button allows programming the unit to automatically shut off after 0.5 to 8 hours.
- Water Filling:
- Manual Fill: Open the water fill door on the right side and pour water until it reaches the Max. Level on the Water Level Indicator.
- Continuous Water Supply: Connect a garden hose to the hose adapter securely, ensuring the seal washer is in place. Connect the water supply to the garden hose and turn it on. The tank will automatically refill when the water level drops to Min. and stop when it reaches Max.
- Low Water Level Warning: The CO301PC features a low water level warning. If water is below the minimum level, the COOL display will flash continuously, and a warning sound will beep for 10 seconds. The pump will shut off to protect itself. To disengage the alarm, turn off and unplug the unit, then refill the tank above the minimum level. If the COOL button is pressed again without sufficient water, the alarm will reactivate. The unit can still be used in FAN mode without water by turning it off and on after the alarm.
- Safety Lock Function: To prevent unintentional changes, touch POWER and COOL simultaneously and hold until the power icon on the display turns off to lock. To unlock, touch POWER and COOL simultaneously and hold until the power icon reappears.
- Optimal Placement: For best cooling, place the cooler in front of an open door or window to draw in outside air and ensure cross-ventilation by leaving an opposite door or window open. The unit should be kept at floor level with water in the tank. The maximum cooling effect is felt when a person is in the airflow.
Maintenance Features:
Regular cleaning and maintenance are crucial for optimal performance and longevity.
- General Cleaning:
- Before cleaning, switch off the unit and unplug it.
- Use a damp cloth to clean the exterior; do not use detergents, corrosive elements, or chemicals.
- Store the unit in a dry place out of direct sunlight when not in use for extended periods.
- Draining the Water Tank:
- Turn off the unit and disconnect from power.
- Move the unit to a suitable location for draining.
- Remove the drainage cap from the bottom to allow water to drain out.
- Refill with clean water and drain again weekly to maintain integrity and remove filtered particles.
- Once clean, refill the tank for use.
- Cleaning the Honeycomb Cooling Media (Filter):
- The honeycomb pads are located at the front and rear. Cleaning frequency depends on local air and water conditions. In areas with high mineral content, clean every two months to prevent buildup and restricted airflow.
- To clean, simply wash and rinse with water. A soft brush can be used to loosen mineral deposits.
- Deep Cleaning (Caution: service one assembly at a time):
- Rear Honeycomb Assembly: Remove the screw holding the rear honeycomb cover. Gently unsnap and remove the cover. Grab and pull out the rear honeycomb frame. Remove screws from the honeycomb retainer cover. Remove the honeycomb for inspection, cleaning, or replacement.
- Front Cooling Honeycomb Assembly: Remove the screw holding the front honeycomb cover. Gently unsnap and remove the cover. Grab and pull the front honeycomb frame out. Remove screws from the honeycomb retainer cover. Remove the honeycomb for inspection, cleaning, or replacement.
- Odor Omission: When new, the honeycomb cooling media may have an odor that will dissipate within a week of initial use. If an old unit develops an odor, it may indicate an algae issue, and the honeycomb cooling media should be replaced.
- Troubleshooting: The manual includes a troubleshooting guide for common issues such as no air discharge, unit making noise, odor omission, and the unit not responding, providing possible causes and solutions. For issues like damaged pumps, PCBs, or persistent problems, contacting a service center is recommended.