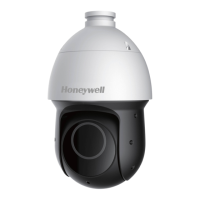
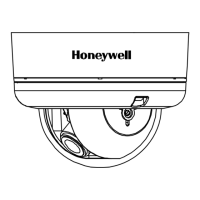
Do you have a question about the Honeywell HDZ402LIWV and is the answer not in the manual?
Information regarding the equipment's compliance with FCC rules for digital devices.
Statement of compliance for the digital apparatus with Canadian ICES-003.
Declaration of conformity with European and North American safety standards.
Guidelines for the correct disposal of the product as per WEEE regulations.
Instructions to adhere to all warnings on the unit and in the operating instructions.
Guidelines for proper installation, including professional service and environmental considerations.
Steps to download and install the Honeywell Unified Tool for camera management.
Procedure to find and identify Honeywell cameras connected to the network.
Instructions for manually assigning a static IP address to the camera.
Guide on how to update the camera's firmware to the latest version.
Steps to access the camera's interface using a web browser.
Procedure for logging into the camera's web client with default or new credentials.
Description of the layout and components of the camera's live video interface.
How to adjust settings and controls within the live video interface.
Configuring stream types and protocols for live video output.
Setting up and managing Pan, Tilt, and Zoom functions for the camera.
How to define, save, and manage preset camera positions for PTZ operation.
Setting up camera scanning patterns between defined limits.
Recording and playing back custom camera movement patterns.
Enabling and configuring the camera's 360-degree continuous rotation feature.
Adjusting the speed at which the PTZ camera moves and responds.
Setting up automatic camera actions when the unit is idle.
Setting upper and lower tilt limits for the camera's PTZ movement.
Scheduling specific camera actions to occur during defined time periods.
Resetting all PTZ functions to their factory default settings.
Using the on-screen controls for manual PTZ operation, zoom, focus, and iris.
Layout of the web client's playback interface for reviewing recorded footage.
Description of controls for playing, pausing, stopping, and navigating recorded video.
Visual representation of recorded video segments for navigation and playback.
Steps to select and play back recorded video files from storage.
How to take, view, and download snapshots from live or recorded video.
Adjusting basic camera properties like brightness, contrast, and sharpness.
Viewing and applying camera property information on the Conditions tab.
Setting the picture style and adjusting detailed picture settings.
Applying backlight compensation (BLC), HLC, or WDR to the image.
Adjusting white balance modes for accurate color representation under different lighting.
Setting the day and night type, mode, sensitivity, and delay time.
Adjusting IR light brightness based on zoom rate, overexposure, or manual control.
Enabling and configuring the defog function for improved visibility in fog or haze.
Setting video streaming properties like encode mode, resolution, and frame rate.
Selecting the video compression format (H.264B, H.264, H.265, MJPEG).
Enabling or disabling Smart Codec for bandwidth and storage savings.
Setting the frames per second (FPS) for video streams.
Configuring constant or variable bit rate for video streams.
Setting the interval between I-frames for video compression efficiency.
Applying custom text watermarks to the main video stream.
Setting snapshots to general (scheduled) or event-based triggers.
Determining the image size based on the main stream resolution.
Setting the quality level for snapshots.
Defining the frequency for taking snapshots.
Drawing and configuring privacy masks to conceal specific areas of the video.
Displaying, moving, and modifying the channel title overlay on the video.
Configuring the time title overlay, including day of week display.
Setting up other text overlays like preset, temperature, and direction.
Configuring font properties for channel title, time title, and OSD info.
Adding and positioning custom image overlays on video snapshots.
Configuring custom OSD text overlays for the video feed.
Setting up display of abnormalities in the monitoring picture.
Configuring custom overlays for structured statistics.
Setting up IPv4/IPv6, DNS, and ARP/Ping parameters for network connectivity.
Configuring static or DHCP IP address settings for IPv4.
Enabling and configuring IP address and gateway settings for IPv6.
Assigning an IP address to the camera using the ARP/Ping service.
Enabling or disabling RTSP Over TLS for secure video stream transmission.
Setting up Point-to-Point Protocol over Ethernet for internet connection.
Enabling Universal Plug and Play for automatic network device detection.
Enabling Bonjour for zero-configuration network device discovery.
Managing settings to detect and resolve IP address conflicts.
Configuring Quality of Service settings to prioritize network traffic.
Installing and managing security certificates for secure communication.
Creating certificate requests for signing by a certificate authority.
Adding specific IP or MAC addresses to allow access to the camera.
Modifying existing IP or MAC addresses in the approved users list.
Removing IP or MAC addresses from the list of approved users.
Setting up video detection events like motion and scene changes.
Configuring audio event detection settings for abnormal sound changes.
Adding auto tracking or face detection to configured camera presets.
Configuring advanced Intelligent Video System (IVS) features like auto tracking.
Setting up rules for intelligent video analytics, including target parameters.
Configuring alarms triggered when a target crosses defined fence boundaries.
Setting up alarms triggered when a target crosses a defined warning line.
Configuring alarms for targets entering, leaving, or appearing within defined areas.
Detecting and alarming on objects left unattended in the scene for too long.
Configuring alarms based on target speed exceeding a defined threshold.
Detecting and alarming on targets that remain stationary beyond a set duration.
Alarming when a high density of people is detected in a specific area.
Detecting and alarming when an object disappears from the scene unexpectedly.
Configuring alarms for targets that remain in a designated area for too long.
Setting parameters for snapshot, analysis, and alarm within specific scenes.
Setting overlay information on snapshots, including object types and location.
Viewing reports on detected objects like vehicles and people within selected periods.
Configuring system event settings for SD card and network errors.
Configuring event settings for SD card status: no card, error, or capacity warning.
Configuring event settings for network disconnection or IP conflict.
Setting up detection for excessive unsuccessful login attempts.
Setting up schedules for video recording and snapshot saving.
Configuring snapshot settings based on preset locations.
Configuring storage paths for recorded video and snapshots.
Specifying where to save recorded video and snapshots (SD card, FTP, NAS).
Details and management of the local microSD card for storing data.
Enabling and configuring FTP server settings for storing video and snapshots.
Enabling and configuring Network Attached Storage (NAS) for data storage.
Configuring device name, language, video standard, and log quantity.
Setting and synchronizing the camera's date and time.
Managing users and their permissions.
Creating, modifying, and deleting user accounts and their permissions.
Steps to create a new user account with specific authority list permissions.
Changing user name, password, and permissions for an existing account.
Removing user accounts that are no longer needed.
Creating custom user groups and assigning permissions to them.
Steps to create a new custom user group and assign permissions.
Adjusting permissions for administrator, user, or custom groups.
Removing custom user groups that are no longer required.
Resetting the camera to its factory default settings.
Performing a general reset of the camera to its default settings.
Resetting all camera parameters to their original factory default state.
Backing up and restoring camera configuration settings.
Configuring automatic functions like rebooting and deleting old files.
Procedure for upgrading the camera's firmware.
Setting up and managing the camera's wiper function for specific models.
Viewing camera firmware, web client, ONVIF, and PTZ versions.
Viewing, backing up, and deleting system log files.
Selecting and viewing logs by type, time, and user.
Saving system log files to a local directory for backup.
Clearing system log files from the camera.
Checking which users are currently logged into the camera system.
| Resolution | 1080p (1920 x 1080) |
|---|---|
| Field of View | 130° diagonal |
| Night Vision | Up to 30 feet (9 meters) |
| Audio | Two-way audio |
| Zoom | Digital Zoom |
| Motion Detection | Yes |
| Weather Resistance | Yes |
| Connectivity | Wi-Fi |
| Protection | IP65 |
| Storage | Cloud |
| Compatibility | Honeywell Home App |

