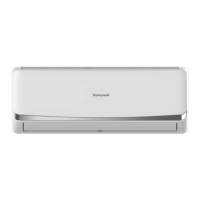
Technical Information HW-QUICK12E
Article No indoor unit UK plug 7.120.604
(Mastercode)
Article No outdoor unit UK plug 7.120.605
EAN Code indoor unit UK plug 40 22167 120 649
(Mastercode)
EAN Code outdoor unit UK plug 40 22167 120 656
Input power Cooling Mode 1200 Watt
Heating Mode 1316 Watt
Voltage/Frequency V~/Hz 230-240/50
Sound level approx. db(A) 46 (indoor unit)
ref 1pW 54 (outdoor unit)
Refrigerant R410a
Dehumidifying performance approx. l/24h 43
Cooling performance kW/h 3.3
BTU/h 12,000
Heating performance kW/h 3.8
BTU/h 12,000
Air flow capacity approx. m³/h
setting 1 500
setting 2 520
setting 3 550
IP Protection class outdoor unit IPX4
Ideal for rooms approx. m³ 125
*1
Length of connection pipe approx. m 5
Colour white/grey
Dimensions outdoor unit approx. cm 85 x 54 x 32
l x w x h
Dimensions indoor unit approx. cm 80.5 x 28 x 18
l x w x h
Dimensions single box approx. cm 88 x 60 x 36
outdoor unit l x w x h
Dimensions single box approx. cm 98 x 37 x 36.5
Indoor unit l x w x h
Weight of single box indoor unit approx. kg 20
Weight of single box outdoor unit approx. kg 34
*1
To calculate the optimal cooling capacity the following rule can be taken
as basis: Usually the air-conditioning of 1 m² requires 60 to 100 Watt.
Slants of a roof, large glass/window surfaces, humidity and additional
factors can influence the unit´s performance capacity.
Specifications are subject to change without notice
KAZ Hausgeräte GmbH • Home & Health Care Products Europe • Westerhaar 54 • D-58739 Wickede
Phone +49 2377 9289-0 • E-Mail info-europe@kaz.com • Internet www.kaz.com
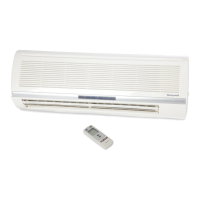
HW-QUICK12E
Wall-mounted
Air Conditioner
AN 4253-E-GB/06-01
Rev. 0-2006-01-20 Cu
How to assemble the air conditioner:
3
1
2
Install rear panel Insert indoor unit
4
MountedExtend drainage hose indoor unit
Remove cover of the
Quick-Connection
Remove screw of the
cover
Open tightening lever
Connecting both ends
Close tightening lever Connecting power
clamps
Close the cover of the
Quick-Connection
7
5 6
8
9 10
11 12
Install fixing clamp
 Loading...