EasyManua.ls Logo

Honeywell HWAC-1217S - User Manual

Honeywell HWAC-1217S
30 pages
Print Icon
To Next Page IconTo Next Page
Loading...
HWAC-1217S
HWAC-1817S
HWAC-2417S
Professional Installation Required!
Please read and retain these instructions.
Mini-Split Air Conditioner
Single Zone
Installation and Operations Manual

Other manuals for Honeywell HWAC-1217S

Questions and Answers

  • S
    Shane McclureAug 21, 2025
    How to fix Honeywell HWAC-1217S that cannot operate at all?
    • H
      hjohnsonAug 22, 2025
      If your Honeywell Air Conditioner isn't operating at all, consider the following: Ensure the power hasn't been shut down and that the wiring isn't loose. A professional should measure if the voltage is too high or too low. Check if the unit has reached the set time for start-up, and verify that the circuit protection device hasn't tripped.
  • H
    hawkinspatrickAug 23, 2025
    Why is my Honeywell HWAC-1217S Air Conditioner cooling efficiency not good?
    • J
      Jacob WebsterAug 23, 2025
      If your Honeywell Air Conditioner isn't cooling or heating efficiently, several factors could be the cause. Check if the temperature setting is appropriate for the room. Ensure that nothing is blocking the air inlet or outlet. The indoor fan speed might be set too low. Also, consider if there's a heat source in the room or if the air filter is dirty.
  • S
    Scott AndersonAug 25, 2025
    Why do I hear running water sound in my Honeywell HWAC-1217S Air Conditioner?
    • W
      williambranchAug 26, 2025
      The “hissing” sound of running water you hear during the operation of your Honeywell Air Conditioner is the sound of the refrigerant flowing. This is normal and not a malfunction.
  • R
    Ricardo CampbellAug 27, 2025
    What to do if my Honeywell HWAC-1217S remote controller is not responding?
    • A
      angela49Aug 27, 2025
      If the remote controller for your Honeywell Air Conditioner isn't responding, consider these possibilities: you may be out of the effective distance from the indoor unit, there might be obstructions blocking the signal between the controller and the receptor, or the batteries in the remote controller might be exhausted.
  • P
    Pamela Ramirez DVMAug 27, 2025
    Why does my Honeywell HWAC-1217S indoor unit not operate immediately after restarting?
    • J
      Julian MckeeAug 27, 2025
      If you turn your Honeywell Air Conditioner on immediately after turning it off, the protective delay switch will delay the operation for 3 to 5 minutes. This is normal.
  • J
    Jonathan FlemingAug 29, 2025
    Why does my Honeywell HWAC-1217S have an unusual smell after starting?
    • J
      Jimmy GrayAug 29, 2025
      Your Honeywell Air Conditioner itself should not produce an undesirable odor. If there is an odor, it's likely due to the accumulation of smells in the environment. Clean the air filter or activate the cleaning function to resolve this issue.
  • V
    Veronica HoAug 31, 2025
    Why does my Honeywell Air Conditioner make a clicking sound at start-up or shut-down?
    • G
      griffinmeganAug 31, 2025
      A slight “click” sound heard at the start-up or shut-down of your Honeywell Air Conditioner is due to temperature changes causing the panel and other parts to swell, resulting in friction. This is normal and not a fault.
  • J
    Julie YatesSep 1, 2025
    Why does mist blow out of my Honeywell HWAC-1217S during cooling operation?
    • K
      Kevin MullinsSep 1, 2025
      During cooling operation, if the indoor unit outlet of your Honeywell Air Conditioner sometimes blows out mist, it is because the indoor air is cooled rapidly. After it runs for some time, the indoor temperature and humidity will be reduced, and the mist will disappear.
  • L
    Larry BauerSep 5, 2025
    What to do if my Honeywell HWAC-1217S displays 'F2 – PFC PROTECTION ERROR'?
    • A
      Andrew HerreraSep 6, 2025
      If your Honeywell Air Conditioner shows an 'F2' error, indicating a PFC (Power Factor Correction) Protection Error, start by checking if the supply voltage is unstable or too low (below AC135V). Inspect the reactor for damage and ensure the reactor connecting wire is in good condition. If the error occurs immediately after startup, look for any components near the module panel that may have been damaged by a strike arc. Test the stability of the 15V and 5V (3.3V) power supply on the PFC board. Replace the PFC board; if the unit operates normally afterward, the original board is defective. If the error persists and the supply voltage and reactor connections are fine, consider replacing the controller of the external unit.
  • M
    Mrs. Tiffany LeeSep 9, 2025
    How to fix 'E5 – INTERNAL & EXTERNAL COMMUNICATION ERROR' on a Honeywell Air Conditioner?
    • L
      Lisa MelendezSep 9, 2025
      To resolve an 'E5' error (Internal & External Communication Error) on your Honeywell Air Conditioner, start by checking if the Indoor Unit (IDU) and Outdoor Unit (ODU) are properly connected. Inspect the outdoor unit control panel; upon turning on the unit, three lights should illuminate, then turn off as the relay engages. If this sequence doesn't occur, suspect a power supply problem. Connect the black signal line S to terminal N of the ODU. If the 'E5' error persists, the outdoor unit control panel likely needs replacement.

Summary

Specifications

Product View

Indoor Unit Overview

Details components of the indoor unit, including air inlet, panel, filter, louvre, vent, switch, and pipe protector.

Outdoor Unit Overview

Details components of the outdoor unit, including air outlet grille, power cable, connecting pipe, and drain hose.

Notice for Installation

Important Installation Notices

Key points before installation, warranty implications, and professional requirements.

Installation Location Requirements

Criteria for choosing an installation site, avoiding hazards and ensuring accessibility.

Mounting Plate Requirements

Specifications for the mounting plate's strength, rustproofing, and secure fastening.

Electrical Safety Requirements

Essential electrical safety guidelines, including voltage, circuit protection, and cable sizing.

Operations at Raised Height & Grounding

Safety measures for high installations and proper grounding procedures.

Packing List

Lists components included with the indoor and outdoor units for installation.

Indoor Unit Installation

Indoor Unit Clearance Requirements

Specifies required clearances around the indoor unit for proper airflow and installation access.

Mounting Plate Installation

Instructions for securely attaching the mounting plate to the wall.

Wall-Through Hole Preparation

Guidance on creating the wall opening for piping and cables, including angling and protection.

Pipeline Routing Options

Describes methods for routing the refrigerant pipes sideways or vertically from the indoor unit.

Drainpipe Connection and Torque

Details connecting the drainpipe and specifies torque values for flare nuts.

Piping Insulation and Protection

Instructions for insulating the joint parts and securing pipes, cables, and drain hoses.

Securing the Indoor Unit

Steps for hanging and properly seating the indoor unit onto the mounting plate.

Indoor Unit Wiring Diagram

Illustrates wiring connections for constant and variable speed operation, including connector details.

Outdoor Unit Installation

Outdoor Unit Clearance

Specifies required clearances around the outdoor unit for installation.

Outdoor Unit Dimensions & Bolts

Provides dimensions for outdoor units and bolt specifications for mounting.

Outdoor Unit Connection Pipe

Details connecting the refrigerant pipes to the outdoor unit and adding refrigerant if needed.

Outdoor Unit Wiring Connections

Instructions for connecting cables to the outdoor unit's terminal board, including grounding.

Outdoor Unit Wiring Diagram

Shows wiring configurations for constant and variable speed, and connector use.

Refrigerant Discharging Procedure

Steps to release refrigerant after pipe connection, ensuring proper torque and no leaks.

Vacuum Pumping Method

Detailed procedure for evacuating the system using a vacuum pump to remove air and moisture.

Outdoor Condensation Drainage

Instructions for installing the drain elbow and hose for condensate water removal.

Post-Installation Checks

A checklist covering electrical safety, installation security, water drainage, wiring, and leak testing.

Notices for Use

Operating Temperature Ranges

Specifies the acceptable indoor and outdoor temperature ranges for cooling and heating modes.

Heating Operation Notes

Explains behavior during heating, including frost formation, defrost cycles, and vapor emission.

Turning Off Unit Procedures

Describes how the unit manages shutdown sequences after being turned off.

Emergency Operation & Airflow

Instructions for using the force switch and adjusting airflow direction with the remote control.

Test Operation Procedure

Steps to prepare and conduct a test run of the air conditioner after installation.

Unit Operation Safety Instructions

Remote Controller Precautions

Safety guidelines for handling and using the remote controller to prevent damage or malfunction.

Remote Control Functions

Basic Remote Functions (ON;OFF, Temp, Speed)

Explains how to use the ON/OFF, temperature (°C/°F), and fan speed controls on the remote.

Display and Sense Features

Details the functions of the DISPLAY button and the SENSE feature for temperature monitoring.

Timer, Clean, and Temperature Adjustment

Covers setting timers, the CLEAN function, and adjusting temperature with the remote.

Turbo and Mode Selection

Explains the TURBO function for enhanced cooling/heating and how to select operating modes.

Sleep, Swing, and Anti-M Functions

Describes the SLEEP mode, vertical/horizontal SWING, and the ANTI-M anti-mold function.

ECO Mode Operation

Details how to activate and use the ECO mode for energy-saving operation.

Air Conditioner Operation Modes

Battery Installation & Auto Mode

Instructions for installing batteries and operating in automatic mode.

Cooling;Heating Operation

Guide to operating in cooling or heating modes, adjusting temp and fan speed.

Fan, Drying Modes & Backlight

Explains fan-only, drying modes, and the remote's backlight feature.

Machine Maintenance

Indoor Unit Panel Cleaning

Instructions for cleaning the front panel of the indoor unit with a damp cloth.

Air Filter Cleaning

Steps for removing, cleaning, and reinstalling the air filter.

Pre-Use and Post-Use Maintenance

Covers checks before use and maintenance steps after use.

Urgent Service Situations

Identifies critical issues requiring immediate professional service.

Troubleshooting

Two Years Limited Warranty

Overview

This document is an Installation and Operations Manual for a Honeywell Mini-Split Air Conditioner, designed for single-zone use. It covers three models: HWAC-1217S, HWAC-1817S, and HWAC-2417S. The manual emphasizes that professional installation is required to ensure safety and proper operation, and it advises users to retain the instructions for future reference.

Function Description:

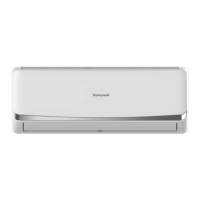
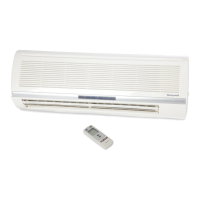
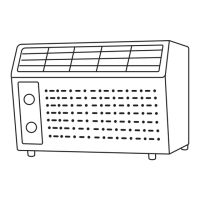
The Honeywell Mini-Split Air Conditioner is designed to provide both cooling and heating for single-zone areas. It operates as a split system, consisting of an indoor unit and an outdoor unit, connected by refrigerant piping and electrical cables. The system is controlled via a remote controller, offering various modes of operation and settings to optimize comfort and energy efficiency. The manual details installation procedures for both indoor and outdoor units, electrical safety requirements, and operational guidelines. It also includes troubleshooting information and maintenance instructions to ensure the longevity and efficient performance of the appliance.

Important Technical Specifications:

The manual provides detailed specifications for the three models:

  • HWAC-1217S:

    • Cooling Capacity: 12,000 BTU
    • Heating Capacity: 12,500 BTU
    • SEER Rating: 17
    • Room Size (Sq. ft.): 300-500
    • Voltage / Frequency: 115V / 60 Hz
    • Dehumidification: 2.11 pnt/h
    • Operating Sound Level: Indoor Unit: 42 dB, Outdoor Unit: 52 dB
    • Ambient Range: 61°F-90°F
    • Refrigerant: R410a
    • Cord Length: 14.8 ft. (4.5 m)
    • Zone Capacity: Single
    • Indoor Unit Dimensions (W x D x H): 34.68"W x 8.07"D x 11.65"H
    • Outdoor Unit Dimensions (W x D x H): 28.74"W x 11.22"D x 21.46"H
    • Indoor Unit Weight: 22 lbs.
    • Outdoor Unit Weight: 57 lbs.
    • Safety Certification: CETLus
  • HWAC-1817S:

    • Cooling Capacity: 18,000 BTU
    • Heating Capacity: 18,000 BTU
    • SEER Rating: 17
    • Room Size (Sq. ft.): 600-800
    • Voltage / Frequency: 230V / 60 Hz
    • Dehumidification: 3.38 pnt/h
    • Operating Sound Level: Indoor Unit: 46 dB, Outdoor Unit: 55 dB
    • Ambient Range: 61°F-90°F
    • Refrigerant: R410a
    • Cord Length: 14.8 ft. (4.5 m)
    • Zone Capacity: Single
    • Indoor Unit Dimensions (W x D x H): 35.40"W x 8.90"D x 12.2"H
    • Outdoor Unit Dimensions (W x D x H): 31.90"W x 11.80"D x 21.90"H
    • Indoor Unit Weight: 24 lbs.
    • Outdoor Unit Weight: 62 lbs.
    • Safety Certification: CETLus
  • HWAC-2417S:

    • Cooling Capacity: 23,000 BTU
    • Heating Capacity: 24,000 BTU
    • SEER Rating: 17
    • Room Size (Sq. ft.): 900-1,200
    • Voltage / Frequency: 230V / 60 Hz
    • Dehumidification: 6.34 pnt/h
    • Operating Sound Level: Indoor Unit: 49 dB, Outdoor Unit: 55 dB
    • Ambient Range: 61°F-90°F
    • Refrigerant: R410a
    • Cord Length: 14.8 ft. (4.5 m)
    • Zone Capacity: Single
    • Indoor Unit Dimensions (W x D x H): 42.6"W x 9.17"D x 12.99"H
    • Outdoor Unit Dimensions (W x D x H): 32.48"W x 12.20"D x 25.79"H
    • Indoor Unit Weight: 31 lbs.
    • Outdoor Unit Weight: 94 lbs.
    • Safety Certification: CETLus

All models use R410a refrigerant, which is a fluorinated greenhouse gas with a GWP of 2088. The manual explicitly warns against interfering with the refrigerant circuit or disassembling the product without professional assistance.

Usage Features:

The air conditioner offers a range of operational features controlled by a remote controller:

  • ON/OFF: Turns the unit on or off, clearing existing timer and sleep settings.
  • Temperature Display (°C/°F): Allows switching between Fahrenheit (default) and Celsius display.
  • Speed: Selects fan speed (Low, Mid, High, Auto). Auto speed is not available in FAN mode.
  • Display: Turns the unit's display on or off for user convenience, especially during sleep.
  • Sense: Sets the temperature display on the remote controller to reflect the temperature around the remote, or to a preset temperature.
  • Timer: Sets ON or OFF timers for automatic operation, with intervals of 0.5 to 24 hours.
  • Clean: Activates an automatic cleaning function to remove dust from the evaporator and dry it, improving cooling and heating efficiency. This function runs for approximately 30 minutes.
  • Temperature Adjustment (∧/V): Increases or decreases the temperature setting by 1°F, within a range of 60°F - 90°F. Not functional in AUTO or FAN mode.
  • Turbo: Speeds up cooling or heating in COOL or HEAT modes by setting the air speed to HIGH.
  • Mode: Selects running modes: AUTO, COOL, DRY, HEAT, FAN.
  • Sleep Mode: Enters a sleep-optimized mode, which the unit exits after 10 hours. Not available in FAN mode.
  • Swing (Vertically/Horizontally): Activates up/down and left/right airflow swing, or resets the swing position.
  • Anti-M: A function that runs the internal fan with weak flow for 3 minutes after the unit is turned off (in COOL, DRY, or AUTO mode) to remove moisture from the evaporator and prevent mold and bad smells. This function can be set or cancelled by the user.
  • ECO Mode: When activated in COOL mode, the unit operates with the lowest electricity consumption for 8 hours. Changing modes or turning off the remote controller cancels ECO mode.
  • Backlight Function: The remote controller has a backlight that turns on with any button press and automatically turns off after 10 seconds of inactivity.
  • Emergency Operation: If the remote controller is lost or broken, a force switch on the indoor unit allows for basic AUTO mode operation or turning the unit off.

Maintenance Features:

The manual outlines essential maintenance procedures to ensure the air conditioner's performance and safety:

  • Safety Precautions: Before any cleaning or maintenance, the unit must be shut down, and the electricity supply cut off for at least 5 minutes to prevent electric shock. The unit should not be wetted or rinsed with water. Harsh liquids, thinners, or gasoline should not be used for cleaning; instead, a soft dry cloth or a damp cloth with a gentle detergent is recommended.
  • Cleaning the Indoor Unit Panel: The indoor unit panel should be gently cleaned with a wrung towel moistened with warm water (below 113°F). The panel should not be removed during cleaning.
  • Cleaning the Air Filter:
    1. Open the indoor unit panel upwards.
    2. Release and remove the air filter from its slot.
    3. Clean the filter using a vacuum cleaner or water. For very dirty filters (e.g., with grease), use warm water (below 113°F) with a mild, neutral pH detergent, then dry it in the shade.
    4. Reinstall the dried filter in reverse order and lock the panel.
  • Pre-Use Checks: Before using the unit, ensure all air inlets and outlets are unblocked, the drainpipe water outlet is clear, the ground wire is reliably connected, remote control batteries are sufficient, and there is no damage to the outdoor unit's mounting bracket.
  • Post-Use Maintenance: After use, cut off the power, turn off the circuit breaker, remove remote control batteries, clean the filter and unit body, and remove dust/debris from the outdoor unit. Check the outdoor unit's mounting bracket for damage.
  • Troubleshooting: The manual provides a troubleshooting guide for common issues such as the unit not operating, remote controller not responding, poor cooling/heating efficiency, unusual smells, or running water sounds. It advises users not to attempt repairs themselves and to contact a qualified service technician for any issues or replacements.

The product contains fluorinated greenhouse gases, and the manual stresses that only professionals should handle the refrigerant circuit. The warranty information indicates a two-year limited warranty for parts, with a three-year warranty specifically for the compressor (parts only), but excludes labor costs.

Honeywell HWAC-1217S Specifications

General IconGeneral
BrandHoneywell
ModelHWAC-1217S
CategoryAir Conditioner
LanguageEnglish

Related product manuals