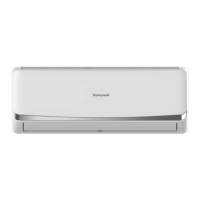
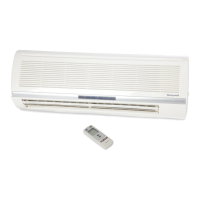
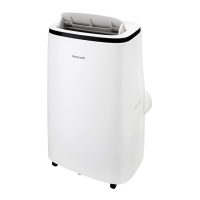
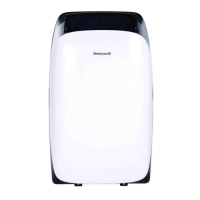
This document describes the Honeywell Portable Air Conditioner, a versatile appliance designed for spot cooling, dehumidifying, and heating (for applicable models). It is suitable for use in various indoor environments, providing flexible air conditioning solutions.
Function Description
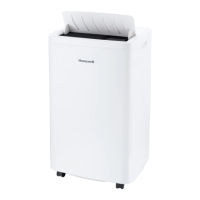
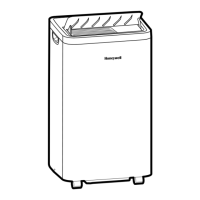
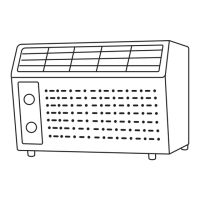
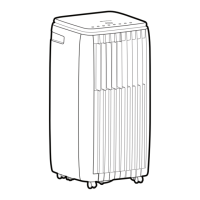
The Honeywell Portable Air Conditioner is designed to provide spot cooling, dehumidifying, and heating (for models with heating features) in indoor spaces. It utilizes a compact unit with a compressor, condenser, and evaporator, connected to a flexible exhaust hose to vent hot air outside. The unit does not require permanent installation and can be easily moved from room to room.
The appliance features an Auto Evaporation System, which automatically evaporates the condensate through the exhaust hose, eliminating the need to frequently empty a drainage tank in most dry or humid conditions. However, in very humid conditions, manual drainage may be required.
The control panel and remote control allow users to select various operation modes:
- Air Conditioning (COOL): Provides cooling by expelling hot air outside.
- Dehumidifying (DRY): Reduces humidity in the room without significant cooling. The fan speed is automatically set to LOW in this mode.
- Fan: Circulates air without cooling or heating.
- Heating (HEAT): Provides heating for applicable models.
The unit also includes a Timer Control for scheduling automatic turn-on or turn-off within a 1 to 24-hour period. A Water Full Light indicates when the internal tank is full and requires drainage. A Warning Light will flash and beep when the internal tank is full, preventing further operation until drained.
Important Technical Specifications
- Refrigerant Gas: The appliance uses R290/R32 refrigerant gas, complying with UL60335-2-40/UL60335-1 standards.
- Maximum Refrigerant Charge: Not greater than R290 0.304kg / R32 1.84 kg (based on UL60335-2-40).
- Minimum Room Area for Installation:
- R290 gas: 15 m²
- R32 gas: 4 m²
- Exhaust Hose Length: Adjustable from 12" to 47" (30 cm to 120 cm).
- Exhaust Hose Diameter: 5.5" (14 cm).
- Window Bracket Dimensions:
- 19.7" (50 cm) (1 part)
- 19.7" (50 cm) to 38.2" (97 cm) (2 parts)
- 47.2" (1.2 m) (3 parts)
- Power Supply: The device operates on standard electrical power.
- Remote Control Batteries: Requires two AAA or IEC R03 1.5V batteries.
Usage Features
Installation:
- Exhaust Hose Connection: The exhaust hose connector, exhaust hose, and window bracket panel adapter are pre-assembled. Connect the exhaust hose to the rear exhaust outlet on the back of the unit by sliding it in and securing it.
- Window Bracket Installation: Adjust the length of the window bracket to fit the window frame. Secure the window bracket in the desired position using the adjustable knobs.
- Connecting to Window: Connect the window bracket to the window bracket panel adapter and rotate it clockwise until it locks in place.
- Airflow Optimization: Ensure the exhaust hose is not bent or kinked to maintain optimal airflow. The minimum air space from the back of the unit to the wall should be at least 31.5" (80 cm), and the minimum air space from the top/front/left/right is 20" (50 cm). Avoid placing the unit in front of curtains or drapes that could obstruct airflow.
Operation:
- Power Control: Turn the unit on or off using the power button on the control panel or remote.
- Mode Selection: Select the desired operation mode (Cool, Dehumidify, Fan, Heat) using the mode control button. The corresponding indicator light will illuminate.
- Temperature/Timer Settings: Adjust the temperature using the "+" or "-" buttons. The set temperature will be displayed. The timer can be set for automatic turn-on or turn-off within 1-24 hours.
- Fan Speed Control: Select Auto, Low, Medium, or High fan speed.
- Swing Control: Activate automatic oscillation of louvers for wider air distribution.
- Water Full Indicator: The Water Full Light will illuminate when the internal tank is full, requiring drainage. The unit will stop operating until drained.
Safety Precautions:
- Always read and save the safety instructions.
- Do not operate the unit with a damaged plug or loose wall outlet.
- Do not cover the air intake or exhaust.
- Do not place heavy objects on top of the unit.
- Always turn off and unplug the unit when cleaning or servicing.
- Do not use the appliance if it is damaged.
- Do not pierce or burn the refrigerant circuit.
- Ensure the appliance is installed in a room with continuous sources of ignition (e.g., open flame, operating gas appliance, or working electrical heater).
- Do not use any methods other than those recommended by the manufacturer for defrosting or cleaning.
- Only qualified personnel should handle refrigerants.
- Do not mix alkaline, standard, or rechargeable batteries in the remote control. Dispose of used batteries properly.
Maintenance Features
Appliance Maintenance:
- Cleaning: Turn off and unplug the appliance before cleaning. Clean the unit with a soft, dry cloth.
- Dust Filter Maintenance: Clean the dust filter every two weeks to maintain air cooling efficiency.
- Turn off the appliance and remove the upper and lower dust filters.
- Rinse the filters in lukewarm water.
- Dry the filters in a shaded and cool place before reinstalling.
Water Condensation Drainage:
- Manual Draining (Cooling, Dehumidifying, Heating Modes):
- Unplug the unit.
- Place a shallow pan under the lower rubber drain plug.
- Remove the drain plug to allow water to drain.
- Replace the drain plug firmly after drainage.
- For high volumes of condensation, a larger pan or a drain tube (5/8" outside diameter, 1/2" inside diameter vinyl tubing) can be used. Ensure the drain tube is positioned lower than the drain plug for continuous flow.
- The appliance should not be positioned on a base higher than 1" from the floor for safety.
- Continuous Draining (Dehumidifier Mode):
- Unplug the unit.
- Remove the lower rubber drain plug.
- Connect a 3/4" hose or standard garden hose (not included) to the drain tube.
- Route the drain tube into a floor drain or down drain.
- Replace the tube and plug firmly after connection.
- It is NOT recommended to connect the drain hose for continuous drainage while the unit is switched ON in air conditioning cooling mode. Continuous drainage is only suitable when the unit is set up in Dehumidifier mode.
- A longer drain hose or not enough height difference from the drain plug to the floor can reduce water drainage.
End of Season Storage & Maintenance:
- Drain Water: Ensure all remaining water condensation is drained from the unit.
- Dry Excess Moisture: Run the unit in Fan-only mode for 30 minutes to dry any excess moisture before storing.
- Power Off: Turn off and unplug the air conditioner.
- Clean Filters: Remove and clean the dust filters, then reinstall them after drying.
- Disconnect Window Installation Kit:
- Remove the hose from the unit by rotating counter-clockwise.
- Remove the window bracket panel adapter from the window bracket by rotating counter-clockwise.
- Store the window kit parts in a bag with the remote control.
- Clean the window kit with a damp cloth if needed and ensure all parts are dry before storage.
- Cover Unit: Cover the air conditioner with a cloth or plastic bag to protect it from dust and scratches.
- Coil Power Cord: Coil the power cord to protect it from dents and creases.
- Storage Location: Store the air conditioner in a cool, dry place, away from direct sunlight.