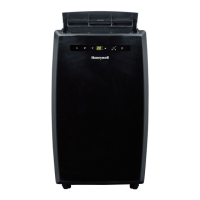
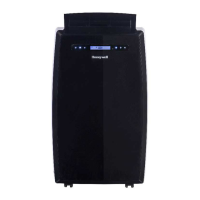
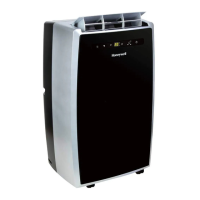
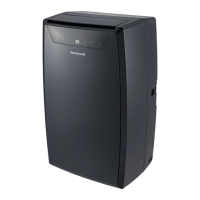
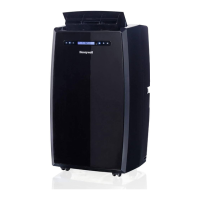
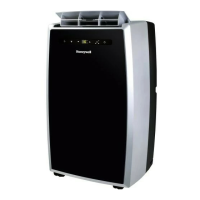
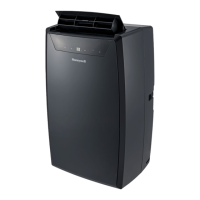
This document describes the Honeywell Portable Air Conditioner, a versatile appliance designed for spot cooling, dehumidifying, and fan-only operation, with some models also featuring a heating function.
Function Description:
The Honeywell Portable Air Conditioner is a compact unit that houses a compressor, condenser, and evaporator. It works by dehumidifying and cooling the air, while a flexible exhaust hose expels heat outside. This design eliminates the need for permanent installation, making the unit easy to move from room to room for flexible air conditioning.
The unit incorporates an "Auto Evaporation System," which automatically evaporates condensate through the exhaust hose. This means that, under normal conditions, there is no need to manually empty the drainage tank. However, in highly humid environments, manual drainage may still be necessary.
For optimal efficiency in cooling or dehumidifying modes, it is recommended to keep doors and windows closed. If the unit is used solely in fan mode, opening a window can improve air circulation.
Important Technical Specifications:
The appliance uses R290/R32 refrigerant gas, which complies with UL60335-2-40 / UL60335-1 safety standards. The maximum refrigerant charge amount is not greater than R290 0.304kg or R32 1.84 kg, based on UL60335-2-40.
The unit's exhaust hose has a diameter of 5.91 inches (15 cm) and can be extended from 12 inches (30 cm) to 47 inches (120 cm). It is crucial not to replace or lengthen the exhaust hose, as this can cause the unit to malfunction and void warranties.
Minimum air space requirements for operation are: at least 31.5 inches (80 cm) from the back of the unit to a wall, and a minimum of 20 inches (50 cm) from the top, front, left, and right sides. The unit should not be placed in front of curtains or drapes, as this can obstruct airflow.
The appliance is designed for use in domestic environments. For R290 gas, the minimum room area for installation, use, and storage is 15 m²; for R32 gas, it is 4 m².
Usage Features:
The control panel and remote control allow users to manage various settings:
- Power Control / Standby Mode: Turns the unit on and off. When plugged in but off, the button illuminates, indicating standby mode.
- Warning Light: Flashes when the internal water tank is full, signaling the need for drainage. The unit will not operate until drained.
- Mode Control: Selects between Air Conditioning, Heating (on applicable models), Dehumidifying, and Fan modes.
- Air Conditioning Mode: Allows adjustment of fan speed and air temperature. Temperature settings range from 16°C to 32°C (61°F to 89°F). Usage humidity range is 30%-80% RH.
- Dehumidifying Mode: Dehumidifies air without full cooling. Fan speed can be adjusted if room temperature is above 25°C (77°F); otherwise, it's preset to LOW. Continuous drainage is recommended in this mode, and the exhaust hoses should not be connected. The unit automatically adjusts dehumidification based on ambient room temperatures and does not display humidity levels.
- Fan Mode: Circulates air without cooling.
- Heating Mode (applicable models only): Uses heat-pump technology to transfer heat from outside into the room. This mode is activated only when the ambient temperature is below 25°C (77°F), with a desired temperature range of 16°C to 25°C (61°F to 77°F). The exhaust hoses must vent outside when using heating mode. The internal water tank collects condensation, requiring drainage, especially in humid rooms (recommended for rooms with 50% humidity or lower).
- Temperature / Timer Set Controls: Adjusts the timer and thermostat. In cooling mode, the set temperature is adjustable. The timer can be set from 1 to 24 hours for auto turn-off or auto turn-on. Pressing both temperature adjustment buttons simultaneously toggles the display between Celsius (°C) and Fahrenheit (°F).
- Fan Speed Control: Offers three settings: High, Medium, and Low.
- Timer Control: Sets the unit to turn off automatically after a specified number of hours (1-24) when running, or to turn on automatically after a specified number of hours (1-24) when in standby mode.
Installation:
The unit comes with an installation kit including a window bracket kit, window bracket panel adapter, exhaust hose connector, hole cover, and exhaust hose. The exhaust hose connector, exhaust hose, and window bracket panel adapter are pre-assembled.
Installation involves:
- Adjusting the window brackets (approximately 19.7 inches/50 cm each, extendable up to 47.2 inches/1.2 m with multiple parts) to fit the window or balcony door, then securing them with adjustable knobs.
- Connecting the exhaust hose to the rear exhaust outlet by sliding it in and rotating clockwise to lock.
- Connecting the window bracket panel adapter to the window bracket by sliding it in and rotating clockwise to lock.
- Connecting the assembled window bracket to the window.
Maintenance Features:
- Appliance Maintenance: Turn off and unplug the unit before cleaning. Clean the appliance with a soft, dry cloth only.
- Dust Filter Maintenance: The dust filters (upper and lower) should be cleaned every two weeks to maintain cooling efficiency.
- Switch off and unplug the unit.
- Remove the upper and lower dust filters.
- Gently wash with water and/or diluted liquid dishwashing detergent.
- Rinse thoroughly, shake off excess water, and allow to dry completely before reinstalling. A vacuum cleaner can also be used to remove dust.
- WARNING: Do not operate the unit with removed or loose-fitting rear grills or filters. Do not touch internal parts or wiring.
- End of Season Storage & Maintenance:
- Drain any remaining water condensation from the lower drain plug.
- Run the unit in Fan-only mode for 30 minutes to dry excess moisture.
- Turn off and unplug the unit.
- Clean and reinstall the dust filters.
- Disconnect the window installation kit: remove the exhaust hose by rotating anti-clockwise, and remove the window bracket panel adapter by rotating anti-clockwise. Store the kit parts with the remote control in a bag alongside the unit. Clean the window kit with a damp cloth and water if needed, ensuring all parts are dry before storage.
- Coil the power cord to protect it from bends and creases.
- Do not store the appliance covered with plastic bags.
Water Condensation Drainage:
When the internal water tank is full, the unit stops operating, and the power control button flashes red. Drainage is required.
- Manual Draining (Cooling, Dehumidifying, Heating modes):
- Unplug the unit.
- Place a shallow pan under the lower rubber drain plug.
- Remove the lower rubber drain plug to drain water.
- Replace the plug firmly after drainage.
- Turn on the unit.
- For high volumes of condensation, a larger pan or a vinyl drain tube (5/8" outer diameter, 1/2" inner diameter) can be used. The drain tube must be positioned lower than the drain plug.
- WARNING: For safety, the unit should not be placed on a base higher than 1 inch from the floor, unless it's a stable, flat base.
- Continuous Draining (Dehumidifier Mode only):
- Unplug the unit.
- Remove the upper rubber drain plug (some residual water may spill).
- Connect a 3/4" hose or standard garden hose (not included) to the drain connector.
- Water can continuously drain into a floor drain or bucket.
- Replace the drain plug.
- Turn on the unit.
- IMPORTANT: Continuous drainage is NOT recommended in air conditioning cooling mode as it can reduce cooling efficiency. It is only suitable for Dehumidifier mode.
- IMPORTANT: Continuous drainage is not available in heating mode. In heating mode, the internal tank fills faster and requires more frequent emptying, especially in humid rooms. Use heating mode in rooms with 50% humidity or lower, and avoid operating moisture-producing appliances.
The manual emphasizes reading and saving instructions, with the English version prevailing in case of conflict. Key warnings include:
- Do not operate with a damaged plug or loose outlet; replace damaged cords.
- Do not cover air intake/exhaust or place objects on the unit.
- Always turn off and unplug for cleaning/servicing.
- Do not use if damaged; contact authorized service agent for repairs.
- Unplug when stored or not in use.
- Do not pull/carry by power cord, pinch cord in doors, or run under carpets.
- Do not use near fire sources, flammable goods, or in areas where water can be projected.
- Do not touch plug/device with wet hands.
- Only use the provided installation kit; improper installation voids warranties.
- Do not use an extension cord.
- Children aged 8+ and persons with reduced capabilities can use the appliance with supervision and instruction. Children should not play with the appliance or perform maintenance unsupervised.
- Do not insert fingers or rods into the air outlet.
- Manufacturer is not liable for injury/damage due to non-compliance with maintenance or improper use.
- Install according to national wiring regulations.
- Transport the appliance upright.
- Do not turn on for at least one hour before first use.
- Ensure connection to an efficient ground checked by a qualified electrician.
- Stagnation of refrigerant gas leaks in unventilated rooms can cause fire/explosion if it contacts ignition sources.
- Store carefully to prevent mechanical faults.
- Only accredited personnel should work on refrigerant circuits.
- Do not use unauthorized means to accelerate defrosting or cleaning.
- Keep flammable substances at least 50cm away.
- Do not operate in wet rooms (bathroom, laundry).
- Use in a well-ventilated room corresponding to manufacturer specifications.
- Keep ventilation openings clear.
- Do not pierce or burn refrigerants; refrigerants may be odorless.
- Do not modify the appliance.
- All safety-related procedures must be carried out by competent persons.
R290/R32 Safety Symbols:
- Flammable Refrigerant (R290/R32): A flame symbol indicates the appliance uses flammable refrigerant. Risk of fire if leaked and exposed to an ignition source.
- Read Operation Manual: An open book symbol indicates the operation manual should be read carefully.
- Service Personnel: A wrench symbol indicates service personnel should handle equipment with reference to the installation manual.
- Information Available: An "i" symbol indicates information is available in the operating or installation manual.
Troubleshooting Guide:
The manual provides solutions for common problems such as:
- Unit not starting (no electricity, dead remote batteries, unplugged cord, tripped LCDI plug).
- Unit runs for a short while only (blocked air outlet, bent exhaust hose).
- Unit keeps switching off frequently in heating mode (room too humid, full water tank).
- Unit runs but not cooling (open door/window, dirty filter, detached exhaust hose, high temperature setting, blocked air outlet/intake, room too large, large windows).
- Unit not running and power button blinking (water full indicator) (excess water condensation).
- Heater not switching on (heating function not activated, ambient temperature too high).