www.honeywell.com/security
76 | Performance Series IP Camera Software Configuration Guide
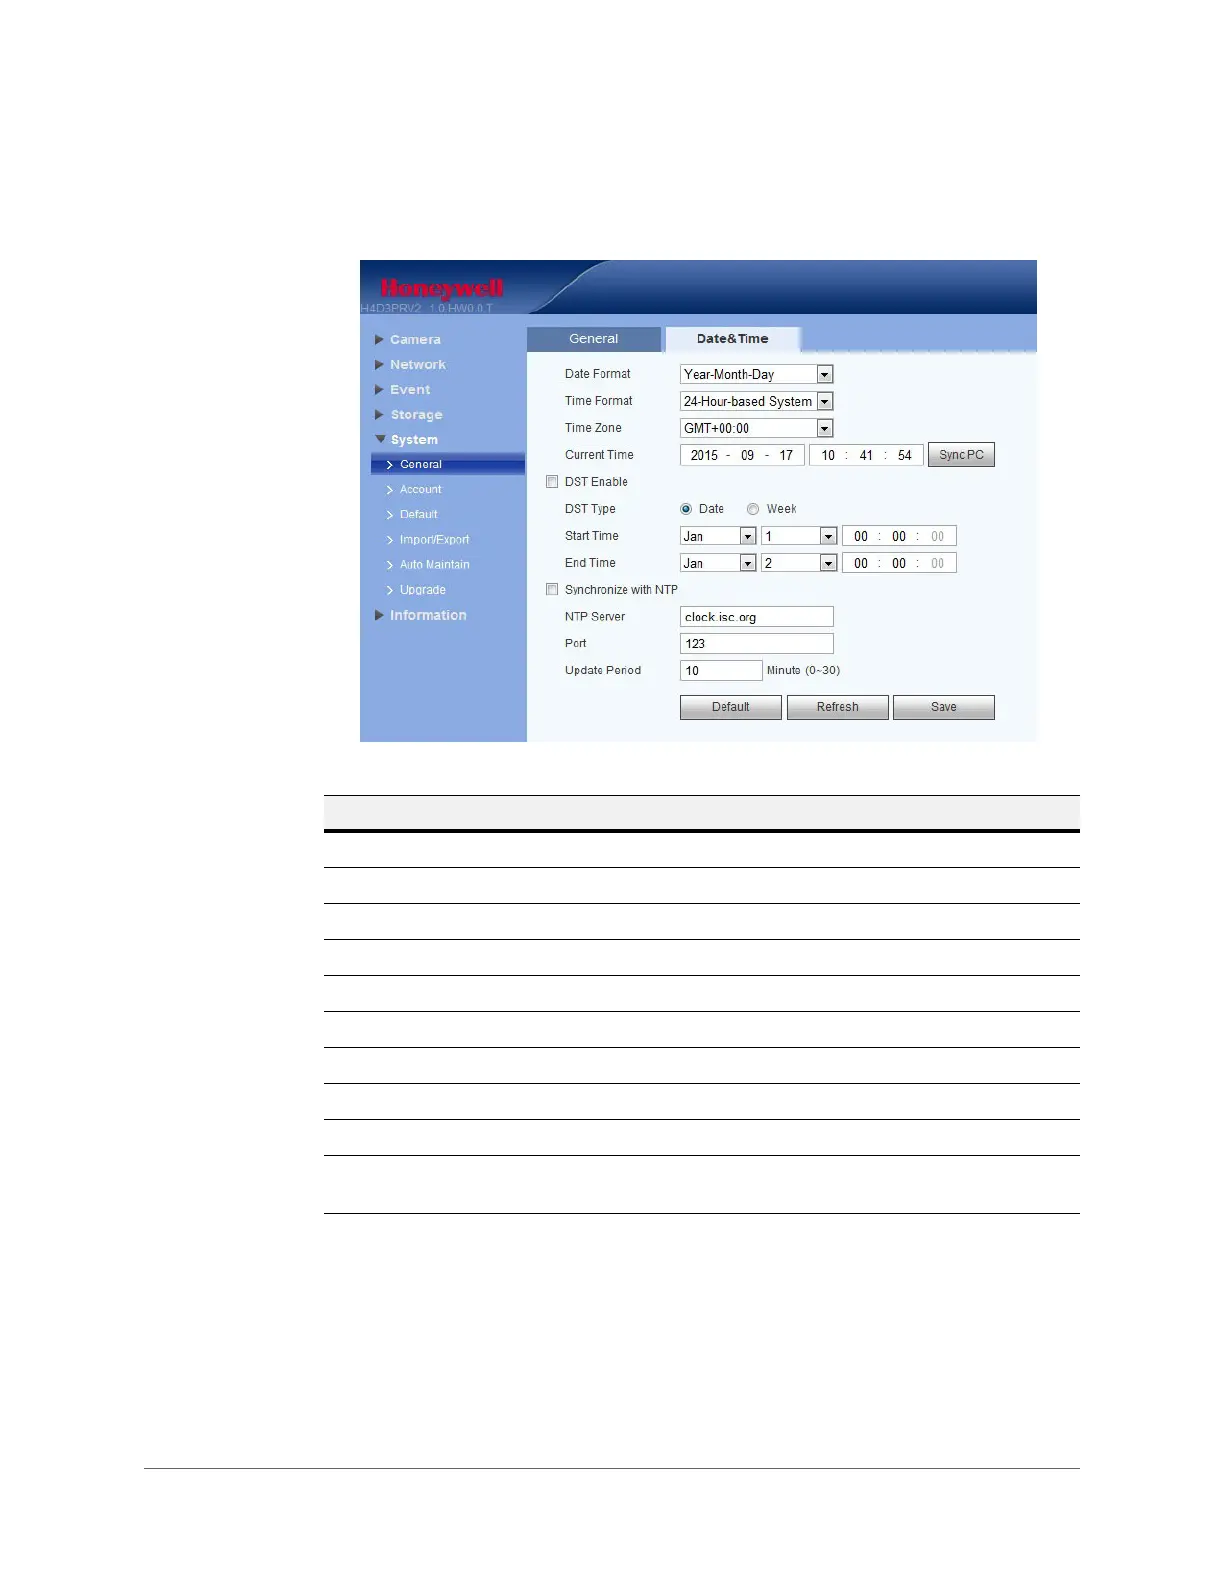
Date and Time
Figure 5-29 Date and Time Configuration Interface
Account Setup
The system supports up to 15 characters for the user name or user group name. You can use
letters, numbers, and the underscore character ( _ ) for the user or group name.
You can configure up to 18 users and eight groups (default factory settings). The factory default
setup includes two user levels: user and admin (case-sensitive).
Table 5-20 Date and Time Configurations
Parameter Function
Date Format Select a date format from the drop-down list.
Time Format Select a time format, either 24-hour or 12-hour.
Time Zone Select the time zone for the camera.
Current Time Set it to set the system’s time. You have to Save to activate this time.
Sync PC Click to sync the camera’s time with your PC’s time.
DST Set when Daylight Saving Time begins and ends. Select Date or Week.
NTP Click to enable NTP.
NTP Server Configure the NTP time server.
Port Configure the port for the NTP time server.
Update Period Configure synchronization periods between the camera and the time
server.