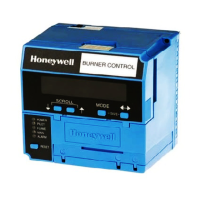
RM7838B, RM7838C 7800 SERIES RELAY MODULES
23 32-00211—01
Code 2-3
*Flame Signal
Overrange*
Flame signal value is
too high to be valid.
1. Make sure the flame detector and flame amplifier are compatible.
2. Remove the flame amplifier and inspect its connections. Reset the flame
amplifier.
3. Reset and sequence the relay module.
4. Check the flame detector sighting position; reset and recycle. Measure
flame strength. Verify that it meets specifications. If not, refer to the flame
detector and/or flame amplifier checkout procedures in the installation
instructions.
5. If the code reappears, replace the flame amplifier and/or the flame detec-
tor.
6. If the fault persists, replace the relay module.
Code 3-1
*Running/Inte
rlock Switch
Problem*
Running or Lockout
Interlock fault during
Prepurge.
1. Check wiring; correct any errors.
2. Inspect the fan; make sure there is no air intake blockage and that it is
supplying air.
3. Make sure the Lockout Interlock switches are functioning properly and
the contacts are free from contaminants.
4. Reset and sequence the relay module to Prepurge (place the TEST/RUN
Switch in the TEST position, if available). Measure the voltage between
terminal 7 and G (ground); 120 Vac should be present. Switch TEST/RUN
back to RUN.
5. If steps 1 through 4 are correct and the fault persists, replace the relay
module.
Code 3-2
*Running/Inte
rlock On
During
Standby*
Lockout Interlock
powered at improper
point in sequence or
On in Standby.
1. Check wiring to make sure that the Lockout Interlocks are connected
properly between terminals 6 and 7. Correct any errors.
2. Reset and sequence the relay module.
3. If the fault persists, measure the voltage between terminal 6 and G
(ground), then between terminal 7 and G. If there is 120 Vac at terminal 6
when the controller is off, the controller switch may be bad or is jumpered.
4. If steps 1 through 3 are correct and there is 120 Vac at terminal 7 when
the controller is closed and the fault persists, check for a welded or
jumpered Running Interlock or Airflow Switch. Correct any errors.
5. If steps 1 through 4 are correct and the fault persists, replace the relay
module.
Code 3-3
*VPS in
Improper
State*
VPS (Valve Proving
Switch) in wrong state
during VPS Test.
1. Check wiring, making sure upstream valve is connected to terminal 9 and
downstream valve is connected to terminal 17.
2. Conduct Valve Seat leakage test using a manometer.
3. Reset and sequence the relay module; if fault repeats, test VPS (connected
to terminal 16) is functioning properly; replace if necessary.
4. Reset and sequence the relay module.
5. If fault persists, replace the relay module.
Code 4-1
*Purge Card
Problem*
No purge card or the
purge card timing has
changed from the
original configuration.
1. Make sure the purge card is seated properly.
2. Inspect the purge card and the connector on the relay module for any
damage or contaminants.
3.
Reset and sequence the relay module.
4. If the fault code reappears, replace the purge card.
5. Reset and sequence the relay module.
6. If the fault code persists, replace the relay module.
Code 4-2
*Wiring
Problem/Inter
nal Fault*
Pilot (ignition) valve
terminal, main valve,
ignition or Main Valve
2 was on when it
should be off.
Electrical Shock Hazard; Fire or Explosion Hazard.
Can cause severe injury, death or property damage.
Remove system power and turn off power supply.
1. Remove system power and turn off fuel supply.
2. Check wiring; correct any errors.
3. inspect Pilot Fuel Valve(s), both places, and connections.
4. Reset and sequence the relay module.
5. If the fault persists, replace the relay module.
Table 9. Blinking Fault Codes and Recommended Troubleshooting. (Continued)
Blink Code System Failure Recommended Troubleshooting

 Loading...


