EasyManua.ls Logo

Honeywell RM7800L1087 - User Manual

Honeywell RM7800L1087
32 pages
Print Icon
To Next Page IconTo Next Page
Loading...
INSTALLATION INSTRUCTIONS
66-1162-2
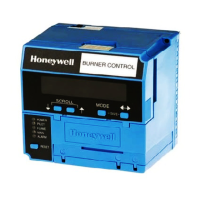
RM7800L1087; RM7840G1022,L1075;
EC7840L1014 Relay Modules
with Valve Proving
APPLICATION
The Honeywell RM7800L/40L and EC7840L Relay Modules
are microprocessor-based integrated burner controls for
automatically fired gas, oil, or combination fuel single burner
applications. The RM7800L/40L and EC7840L Relay Modules
are used for UL/CSA Modulating and FM/IRI Modulating
burner applications. The
RM7800L/40L, EC7840L
system
consists of a Relay Module. Keyboard Display Modules
(standard with RM7800), Dust Cover (standard with RM7840/
EC7840L), Subbase, Amplifier, and Purge Card. Options
include Personal Computer Interface, DATA CONTROLBUS
MODULE™, Remote Display Mounting, First-Out Expanded
Annunciator and Combustion System Manager™ Software.
Functions provided by the RM7800L/40L, EC7840L include
automatic burner sequencing, flame supervision, system
status indication, system or self-diagnostics and
troubleshooting.
RM7800L1087/RM7840G1022,L1075; EC7840L1014 offer
the Valve Proving test feature.
Using the S7800A1142 Keyboard Display (standard on
RM7800L1087) the following features can be set up:
Post Purge time—Up to 66 minutes—Device shipped
with 15 seconds Post purge.
Valve Proving features including:
VPS test time
When (Never, Before, After, Split or Both)
See S7800A1142 Instructions (65-0288) for its features.
Series 5 can be programmed for Modbus communication.
At commissioning time, the Valve Proving System may be
scheduled to occur at one of five different times:
Never—Device default as received—Valve proving
does not occur.
Before—Valve proving before run concurrent with Pre-Purge.
After—Valve proving occurs after the Run state, before
the device goes to Standby (Concurrent with Post-
Purge, if selected.)
Both—Valve proving occurs at both times Before and
After, noted above.
Split—The main valve 2 (MV2) (high pressure) seat test
is performed at the Before time and the main valve 1
(MV1) (low pressure) seat test is performed during the
After time.
The following assumptions apply when using the RM7840G,L,
RM7800L, EC7840L:
Fig. 1. The valve proving system.
MV1—Wired to terminal 9. It is located in the most upstream
position of the main gas valve train.
VPS—Valve Proving Switch: Setpoint at 1/2 of Main Valve
inlet pressure.
MV2—Wired to terminal 21. It is the main valve located
closest to the burner.
The PII—Pre-Ignition Interlock (or Proof of Closure Switch) for
terminal 20 can be installed on MV1, MV2, or as a series
connection through both valves.
Appendix B lists many wiring options for single and dual fuel
along with the Valve Proving options.
SPECIFICATIONS
Electrical Ratings, see Table 3:
Voltage and Frequency:
RM78xx—120 Vac (+10/-15%), 50 or 60 Hz (±10%).
EC78xx—220–240 Vac (+10/-15%), 50 or 60 Hz (±10%).
Power Dissipation: RM7800/RM7840/EC7840L: 10W
maximum in the Run mode.
MV1
MV2
VP
SW.
M24161
OUTLET
INLET
1
CAUTION: VALVE ENERGIZING TIMING IS BASED ON HONEYWELL VALVE
OPENING TIMES OF 13 SECONDS MAXIMUM.
− FOR VALVES WITH TIMINGS GREATER THAN 13
SECONDS OR THOSE THAT DO NOT OPEN THE ACTIVE
VALVE WITHIN THE ENERGIZED TIME, A BYPASS
SOLENOID VALVE (1/4”, 120 VAC) IS REQUIRED TO
OBTAIN THE PROPER TEST PRESSURES.
− THE BYPASS VALVE WILL BE WIRED IN PARALLEL TO THE
VALVE IT IS BYPASSING (TERMINAL 9 FOR MV1 OR
TERMINAL 21 FOR MV2).
1

Other manuals for Honeywell RM7800L1087

Questions and Answers

  • W
    wilsonnicholasSep 12, 2025
    What to do if Honeywell Control Unit shows Man-Open Switch, Start Switch or Control On in wrong state?
    • K
      katie26Sep 12, 2025
      If your Honeywell Control Unit indicates that the Man-Open Switch, Start Switch, or Control is On in the wrong operational state: 1. Check wiring and correct any errors. 2. Ensure that the Manual Open Valve Switch, Start Switch, and Control are operating properly. 3. Note if the Start Switch is held “On” too long. 4. Reset and sequence the relay module. 5. Reset and sequence the relay module. If the fault persists, replace the relay module (RM7838A1014, RM7838B1013, RM7838C1004, RM7838A2014, RM7838B2013, RM7838C2004 only).
  • C
    Christina CabreraAug 22, 2025
    What to do if Honeywell Control Unit has an unexpected flame signal?
    • M
      Melinda WalkerAug 23, 2025
      If your Honeywell Control Unit senses flame when no flame is expected during STANDBY or PURGE, follow these steps: 1. Ensure no flame is present in the combustion chamber and correct any issues. 2. Verify compatibility between the flame amplifier and flame detector. 3. Check and correct any wiring errors. 4. Remove and reseat the flame amplifier, inspecting its connections. 5. Reset and sequence the relay module. 6. If the issue persists, replace the flame amplifier or flame detector. 7. If the problem continues, replace the relay module.
  • B
    Briana BuchananAug 25, 2025
    How to troubleshoot flame amplifier problem in Honeywell Control Unit?
    • C
      Crystal RodriguezAug 25, 2025
      To troubleshoot a flame amplifier problem in your Honeywell Control Unit, where flame is not sensed, or sensed incorrectly, follow these steps: 1. Check the wiring and correct any errors. 2. Ensure the flame amplifier and flame detector are compatible. 3. Remove the flame amplifier, inspect its connections, and reseat it. 4. Reset and sequence the relay module. 5. If the problem persists, replace the flame amplifier and/or the flame detector. 6. If the issue continues, replace the relay module.
  • A
    Abigail MorenoAug 26, 2025
    What causes flame signal overrange in Honeywell Control Unit?
    • R
      Raven WilliamsAug 27, 2025
      If your Honeywell Control Unit displays a flame signal value that's too high, it means the flame signal is over range. Here’s how to address it: 1. Ensure that the flame detector and flame amplifier are compatible. 2. Remove the flame amplifier, inspect its connections, and reset it. 3. Reset and sequence the relay module. 4. Check the flame detector's sighting position, then reset and recycle. Measure flame strength and verify that it meets specifications. 5. If the issue reappears, replace the flame amplifier or the flame detector. 6. If the fault continues, replace the relay module.
  • U
    usteeleAug 27, 2025
    Why Honeywell Control Unit has running/interlock switch problem?
    • B
      Brian SanchezAug 27, 2025
      A Running or Lockout Interlock fault during Pre-Purge on your Honeywell Control Unit can be addressed by: 1. Checking the wiring and correcting any errors. 2. Inspecting the fan for blockages and ensuring it supplies air. 3. Ensuring Lockout Interlock switches function correctly and their contacts are clean. 4. Resetting and sequencing the relay module to Pre-Purge (using the TEST/RUN switch if available). Measure the voltage between terminal 7 and G (ground); line voltage should be present. Switch TEST/RUN back to RUN. 5. If the fault persists after these steps, replace the relay module.
  • H
    hcarrilloAug 29, 2025
    What to do if Honeywell Control Unit shows wiring problem or internal fault?
    • T
      Tiffany HornAug 29, 2025
      If your Honeywell Control Unit indicates a wiring problem or internal fault, specifically if the pilot (ignition) valve terminal, main valve, ignition, or Main Valve 2 was on when it should be off, take these steps: 1. Remove system power and turn off the fuel supply. 2. Check the wiring and correct any errors. 3. Inspect the Pilot Fuel Valve(s), and their connections. 4. Reset and sequence the relay module. 5. If the problem continues, replace the relay module.
  • R
    rojasrachelDec 1, 2025
    Why is the Honeywell Control Unit running/interlock on during standby?
    • M
      meghanmckinneyDec 1, 2025
      If the Lockout Interlock is powered at an improper point in the sequence or is On during Standby in your Honeywell Control Unit, here’s how to troubleshoot: 1. Check the wiring to ensure the Lockout Interlocks are properly connected between terminals 6 and 7. Correct any errors. 2. Reset and sequence the relay module. 3. If the fault persists, measure the voltage between terminal 6 and G (ground), then between terminal 7 and G. If there is line voltage at terminal 6 when the controller is off, the controller switch may be bad or is jumpered. 4. If steps 1 through 3 are correct and there is line voltage at terminal 7 when the controller is closed and the fault persists, check for a welded or jumpered Running Interlock or Airflow Switch. Correct any errors. 5. If all the above steps ar...
  • K
    Kim AcostaSep 13, 2025
    What to do if Honeywell Control Unit shows internal faults?
    • M
      Maria HolderSep 13, 2025
      If your Honeywell Control Unit displays internal faults due to a Relay Module self-test failure: 1. Reset and sequence the relay module. 2. If the fault reappears, remove power from the device, reapply power, then reset and sequence the relay module. 3. If the fault persists, replace the relay module.
  • J
    Jeffrey GriffithSep 10, 2025
    How to troubleshoot high fire or low fire switch failure in Honeywell Control Unit?
    • R
      Roger NguyenSep 10, 2025
      To troubleshoot a High Fire Switch or Low Fire Switch failure in your Honeywell Control Unit: 1. Check wiring and correct any errors. 2. Reset and sequence the relay module. 3. Use the manual motor potentiometer to drive the motor open and closed. Verify at the motor switch that the end switches are operating properly. Use the RUN/TEST switch if a manual potentiometer is not available. 4. Reset and sequence the relay module. 5. If the fault persists, replace the relay module.
  • X
    xruizSep 6, 2025
    What causes configuration jumper problem in Honeywell Control Unit?
    • T
      tammyblackSep 7, 2025
      A configuration jumper problem in your Honeywell Control Unit, where the configuration jumpers differ from the sample taken at startup, can be resolved as follows: 1. Inspect the jumper connections, ensuring that any clipped jumpers were completely removed. 2. Reset and sequence the relay module. 3. If the fault persists, replace the relay module.

Honeywell RM7800L1087 Specifications

General IconGeneral
BrandHoneywell
ModelRM7800L1087
CategoryControl Unit
LanguageEnglish

Related product manuals