Advanced Installation Guide
69-2602EF — 01 24
SETUPWIRINGASSISTANCETROUBLESHOOTING
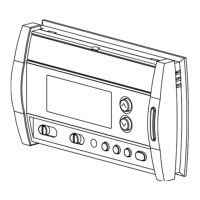
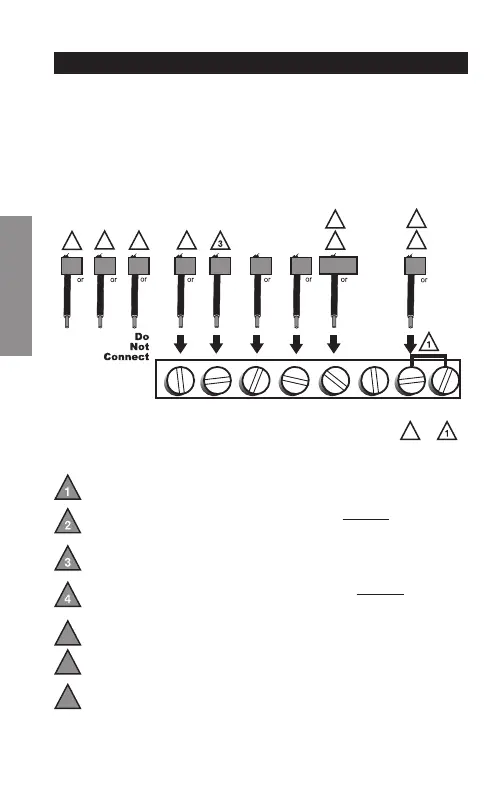
Wiring—Heat Pump
Alternate wiring (for heat pumps with auxiliary or
backup heat only)
If labels do not match letters on the thermostat, check the
chart below and connect to terminal as shown here (see
notes, below).
Wiring complete, return to Step 7.
Leave metal jumper in place, connecting R & Rc terminals.
If your old thermostat had both V and VR wires, stop now and contact a
qualified contractor for help.
If your old thermostat had separate O and B wires, wrap the B wire in
electrical tape and do not connect.
If your old thermostat had Y1, W1 and W2 wires, stop now and
contact a qualified contractor for help.
Do not use C or X wire. Do not use B wire if you already have O wire.
Wrap bare end of wire with electrical tape.
Do not use L wire. Wrap bare end of wire with electrical tape.
If your old thermostat had E and Aux wires (or alternate wires),
connect both wires to Aux terminal.
5
6
7
M32728
2
7
4
AUX
W
W1
W2
F
B
OG
H
C
RC
V
VR
B
X
R
M
Y1
Y
E
7
X
X2
L
F
6
5
3
2
1
B O G Y
W/
AUX
NOT
USED
R Rc
 Loading...