13
RTH7500 Series
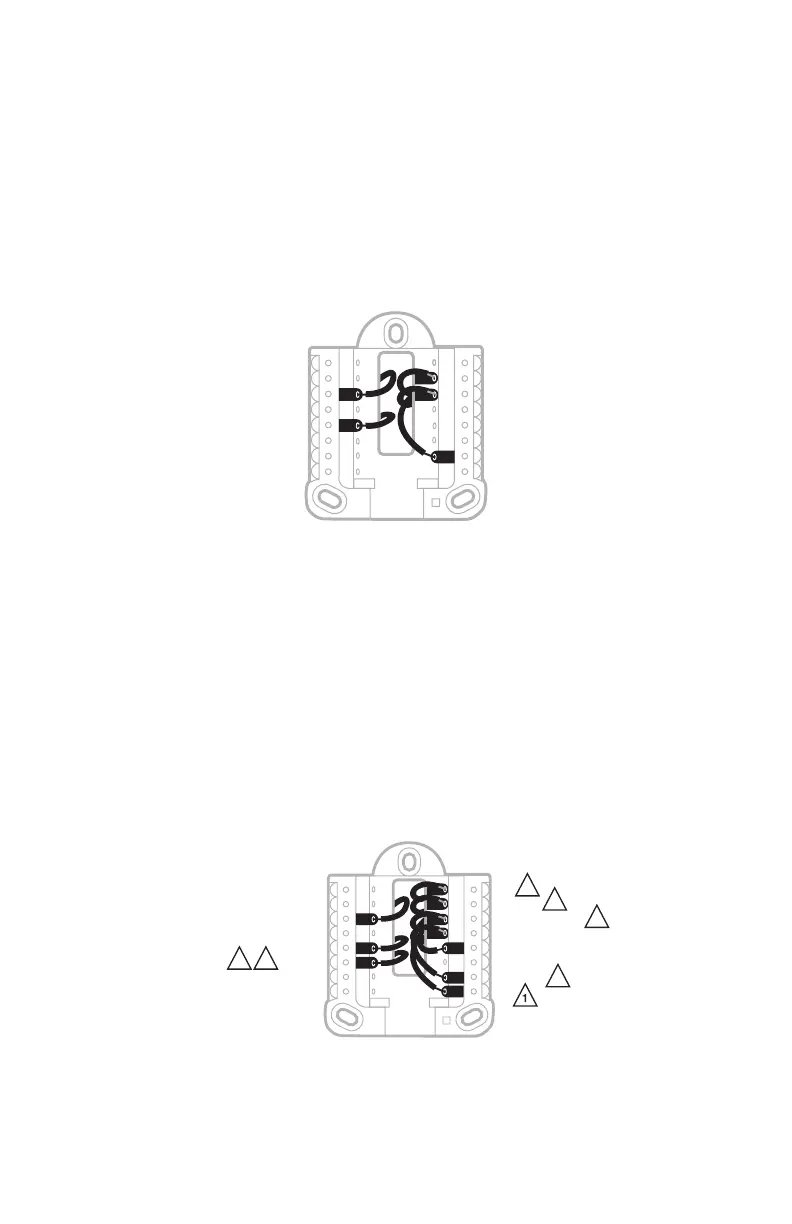
Wiring—heat pump
Connect wires: heat pump
1 Match each labeled wire with same letter on new thermostat.
2 Insert the wires into the matching terminal.
NOTE: If you have difficulty inserting wires, you may have to press down the
terminal push button next to the corresponding terminal.
Labels don’t match?
If labels do not match letters on thermostat, see page 13.
AUX
S
S
Y
U
U
G
C
Y
A
Rc
W
K
W
2
R
L/A
O/B
E
Alternate wiring (for heat pumps only)
NOTES:
1. Keep R Slider Tab in the up position (1 wire).
2. If your old thermostat had both V and VR wires, stop now and contact a
qualified contractor for help.
3. If your old thermostat had separate O and B wires, attach the B wire to the C
terminal. If another wire is attached to the C terminal, stop now and contact
a qualified contractor for help.
4. If your old thermostat had Y1, W1 and W2 wires, stop now and contact a
qualified contractor for help.
AUX
S
S
Y
U
U
G
C
Y
A
Rc
W
K
W
2
R
L/A
O/B
E
2
3 5
3
4
5
or X or B
or F
or Y1 or M
2
or H or B
or R
or V or VR
or W or W1 or W2
or X or X2
or F
 Loading...