5496 Intelligent Power Module Manual — P/N 151276-L8:F2 2/15/2022 7
Section 2: Prerequisites for Installation
2.1 Hardware
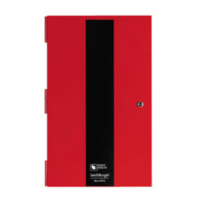
The 5496 ships with the following hardware:
• A cabinet with all hardware assembled
• Two keys for the 5496 front door
• Ten 4.7K ohm end-of-line resistors
• A battery wiring harness and jumper to wire batteries in series
2.2 Environmental Specifications
It is important to protect the 5496 control panel from water. To prevent water damage, the following conditions should be FOLLOWED
when installing the units:
• Do not mount directly on exterior walls, especially masonry walls (condensation).
• Do not mount directly on exterior walls below grade (condensation).
• Protect from plumbing leaks.
• Protect from splash caused by sprinkler system inspection ports.
• Do not mount in areas with humidity-generating equipment (such as dryers, production machinery).
When the user selects a location to mount the 5496, the unit should be mounted where it will NOT be exposed to temperatures outside the
range of 32°F-120°F (0°C-49°C) or humidity outside the range of 10%-93% at 86°F (30°C) non-condensing.
2.3 Preventing Water Damage
Water damage to the fire system can be caused by moisture entering the cabinet through the conduits. Conduits that are installed to enter the
top of the cabinet are most likely to cause water problems. Installers should take reasonable precautions to prevent water from entering the
cabinet. Water damage is not covered under the warranty.
2.4 Calculating Current Draw and Standby Battery
This section is for helping you determine the current draw and standby battery needs for your installation.
2.4.1 Worksheet Requirements
To calculate the 5496 current draw and standby battery requirements, refer to the following steps.
Filling in the Current Draw Worksheet
Refer to Table 2.2 in Section 2.4.3 to complete the following steps.
1. Add up the current draw for all auxiliary devices and record in the table at Line B.
2. Add up all notification appliance loads and record in the table at Line C.
3. For notification appliances and auxiliary devices not mentioned in the manual, refer to the device manual for the current ratings.
4. Make sure that the total alarm current you calculated, including current for the panel itself, does not exceed 6.0 A. This is the maximum
alarm current allowable.
5. Complete the remaining instructions in Table 2.2 to determine battery size requirements.
NOTE: For UL installations 4.7kΩ end-of-line resistor (ordered separately) must be used.

 Loading...