- 2 -
TESTING
Test communications between the detector and the control panel. The
detector mode has two test buttons; one for smoke testing and one for
CO testing.
The detector may also be functionally tested using canned smoke and
canned CO. If the detector fails any of the test methods, the detector
should be replaced.
NOTE: Testing the detector will activate the alarm and send a signal to the
panel. Before testing, notify the proper authorities to avoid any
false alarms.
Smoke Test (Alarm Test)
Press and hold the Smoke Test button for 1 to 2 seconds. The
detector will sound and illuminate per Table 2 and send a smoke alarm
signal to the control panel (all programmed smoke detector loops are
signaled). Verify that the smoke alarm signal was received at the
control panel.
Smoke System Test (Functional Smoke Test)
Press and hold the Smoke Test button for 3 to 5 seconds to enter the
functional smoke test mode. See Functional Smoke Test section below.
Functional Smoke Test
With the detector in smoke system (functional) test mode, spray
canned smoke into the detector. The canned smoke that can be used
and is approved for test include: Home Safeguard Industries 25S, SDi
CHEK02 and CHEK06, SDi SOLOA4, and SDi SMOKESABRE.
1.
The detector will sound and illuminate per Table 2 and a smoke
alarm signal will be sent to the panel.
2.
Verify the smoke alarm signal was received by the control panel.
CO Test (Alarm Test)
Press and hold the CO Test button for 1 to 2 seconds. The control
panel should display and sound a CO alarm (all programmed CO
detector loops are sent).
CO System Test (Functional CO Test)
Press and hold the CO Test button for 3-5 seconds to enter the
functional gas test mode. See Functional Gas Test section below.
Functional Gas Test
Solo C6 brand canned CO may be used to verify the detector’s ability to
sense CO by utilizing the RealTest® feature as follows:
1. Press and hold the CO test button for 3 to 5 seconds. The green
LED will start blinking once per second indicating the detector is in
RealTest® mode. (If the detector will not go into RealTest® mode,
the CO sensor may be in fault or at end-of-life.)
2. While the green LED is blinking once per second, spray a small
amount of canned CO directly into the CO gas entry port.
3. Upon successful gas entry and if functioning properly, the detector
will go into CO alarm and send an alarm to the control panel.
4. The CO test will automatically clear when the CO clears from the
sensor or in 30 seconds if no CO was introduced.
HUSH FEATURE / ALARM SILENCE
If required, the audible alarm for smoke and CO conditions can be
silenced for 5 minutes by pushing the “Test/Hush” button. In addition,
low chirping can be silenced for 12 hours when the Test/Hush button is
pressed.
During a Smoke alarm, if an alarm condition still exists after the 5
minute hush period, the alarm will sound. The hush feature will not
operate at levels above 4%/ft smoke concentration.
During a CO alarm, if carbon monoxide is still present after the 5 minute
hush period, the alarm will sound. The hush feature will not operate at
levels above 350 ppm (parts per million) carbon monoxide.
CO SENSOR END-OF-LIFE FEATURE
When the CO sensor has passed end-of-life, a trouble signal will be
sent to the control panel (if programmed). This indicates that the CO
sensor inside the detector must be replaced. If unresolved for 30 days,
the detector will chirp every 45 seconds. The typical life of the CO
sensor is ten years from the date of manufacture. It is recommended to
periodically check the “Replace by” date located on the label on the
back of the detector head.
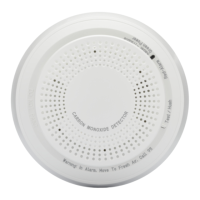
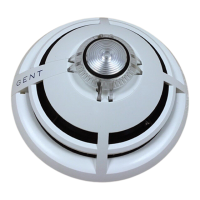
CO Test Button
Smoke Test Button
5800 Combo ii -005
Follow
instructions
on the Can
CO Gas Port
Test
Buttons
HEAT
≥ 12”
(30.48 cm)
SMOKE
*
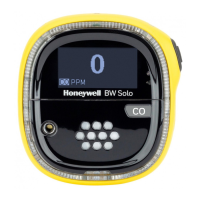
Solo C6
CO
1
2
3
4
( )
30
0
45
5
~ 5 sec/seg
15
or
( )
Table 3: Carbon Monoxide Detector: Events &
Contact ID Codes
Event Alpha Keypad
CS Report
CO alarms CO Alarm
CO alarm (CID 162)
CO test CO Alarm CO alarm (CID 162)
Low battery Lo Bat
RF low-battery
(CID 384)
Detector
supervision
CO Trouble
RF sensor supervision
(CID 381)
Detector end-
of-life/trouble
CO Trouble
Sensor trouble - end-
of life (CID 380)
Tamper
disarmed = CO Trouble
armed = CO Alarm
RF sensor tamper
(CID 383)
Table 2: LED Indication & Sounder during Test and Trouble
MODE
Status LED
(Top)
Side LED
Windows
Sounder
Speaker
Smoke Test
Blink Green
once every
second
Dark Temp-3
Warning of
alarm signal
transmission.
Voice smoke
warning
Smoke System
(functional) Test
Blink Red
once every 10
secs
Blink once
every
10 secs
RealTest™
Functional CO gas
entry test – Waiting
for gas entry
Blink Green
once per
second
Dark Silent
Voice
instructions for
testing; warning
of alarm signal
RealTest™
Functional CO gas
entry test -Upon
successful gas
entry
Blink Red
once every
10 secs
Blink blue
every
10 secs
Modified
Temp-4
Voice carbon
monoxide
warning
Low Battery
Blink Amber
every 10 secs
Dark
Chirp
every 45
secs
after 7
days
Voice instruc-
tions when
chirp is
silenced by
pressing either
test button
Smoke
Maintenance
Blink Amber
every 5 secs
Dark Silent
Voice smoke
maintenance
instructions if
either test
button is
pressed
CO Trouble
Double Blink
Amber every
5 secs
Dark Silent
CO End of Life –
First 29 days
Double Blink
Amber every
3 secs
Dark Silent
Voice end-of-
life instructions
when either test
button is
pressed
CO End of Life –
after 30 days
Double Blink
Amber every 3
secs
Dark
Chirp
every 45
secs
Voice end-of-life
when
either test button
is pressed
Power Up
Blink Green,
for 30 secs
Dark Silent
Language set
instructions only
on first time
power-up
Normal (Standby)
Single Blink
Green every
10 secs
Dark Silent
Silent
Freeze Warning
(low temp)
Blink Red
every 10 secs
TESTING SIGNAL STRENGTH
Perform this test in accordance with NFPA 72 inspection, testing and maintenance requirements to determine a strong communication
path with the control panel.
1. Activate the wireless system’s GO/NO GO TEST mode.
2. Press the detector’s Smoke TEST button (•) for 1-2 seconds. The detector should immediately transmit an alarm signal to the control
panel. The built-in horn will start to sound about 2.5 seconds after pressing the button.
3. The wireless system’s keypad should emit at least three beeps when the alarm transmission is received and display the transmitting
detector’s zone number.
4. When the console has received the test signal, the horn will stop and a few seconds later the detector’s zone number will clear from
the console display.
5. If the console does not respond as noted, and if this is an initial installation, try moving the detector to another location that provides
proper reception. Also be sure that the detector has been “enrolled” by the control panel (see Enrollment section). Then, repeat the
test.
6. Turn off the system’s TEST mode (typically security code + OFF).

 Loading...