T775P SERIES 2000 ELECTRONIC STAND-ALONE CONTROLLER
62-0256—11 14
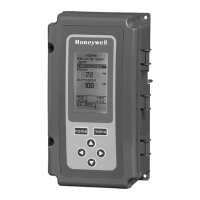
Fig. 23. Setup - Sensors - Sensor A - Calibrate.
1.2.2.2. CALIBRATE (the sensor)
Ensure that the wire size calibration value is within the
limits. See “Temperature Sensor Calibration” on page 8.
1. From the Sensor selections, use the and but-
tons to highlight CALIBRATE.
2. Press the button to display the calibration degree
value.
3. Use the and buttons to increase/decrease the
desired calibration degrees.
Default: 0
Range: +/-10°F (+/-6°C)
4. Press the button to accept the value and return to
the Sensor A selections.
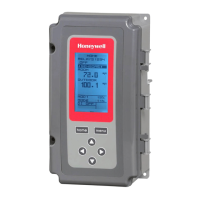
Fig. 24. Setup - Sensors - Sensor A - Label.
1.2.2.3. LABEL (the sensor input)
For a sensor already labeled, the display positions to and
highlights that label.
1. From the Sensor selections, use the and but-
tons to highlight LABEL.
2. Press the button to display the label list.
3. Use the and buttons to scroll through list and
highlight the desired label.
— For Sensor A, the label names are Sensor, Boiler,
Supply, and Chiller. Supply is the default.
— For Sensor B, the label names are Sensor and
Outdoor. Outdoor is the default.
— For Sensor C, the label names are Sensor, Boiler,
Return, and Chiller. Return is the default.
4. Use the button to accept the highlighted label
and exit the list.
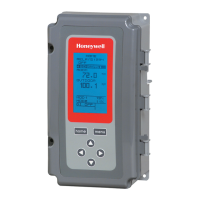
Fig. 25. Setup - Sensors - Exit.
1.2.2.4. Exit Sensor A Setup
Press the button to exit the Sensor A selections and
return to the Sensors menu.
or
Use the and buttons to highlight EXIT and press the
button.
Continue with “1.2.3. SENSOR B”.
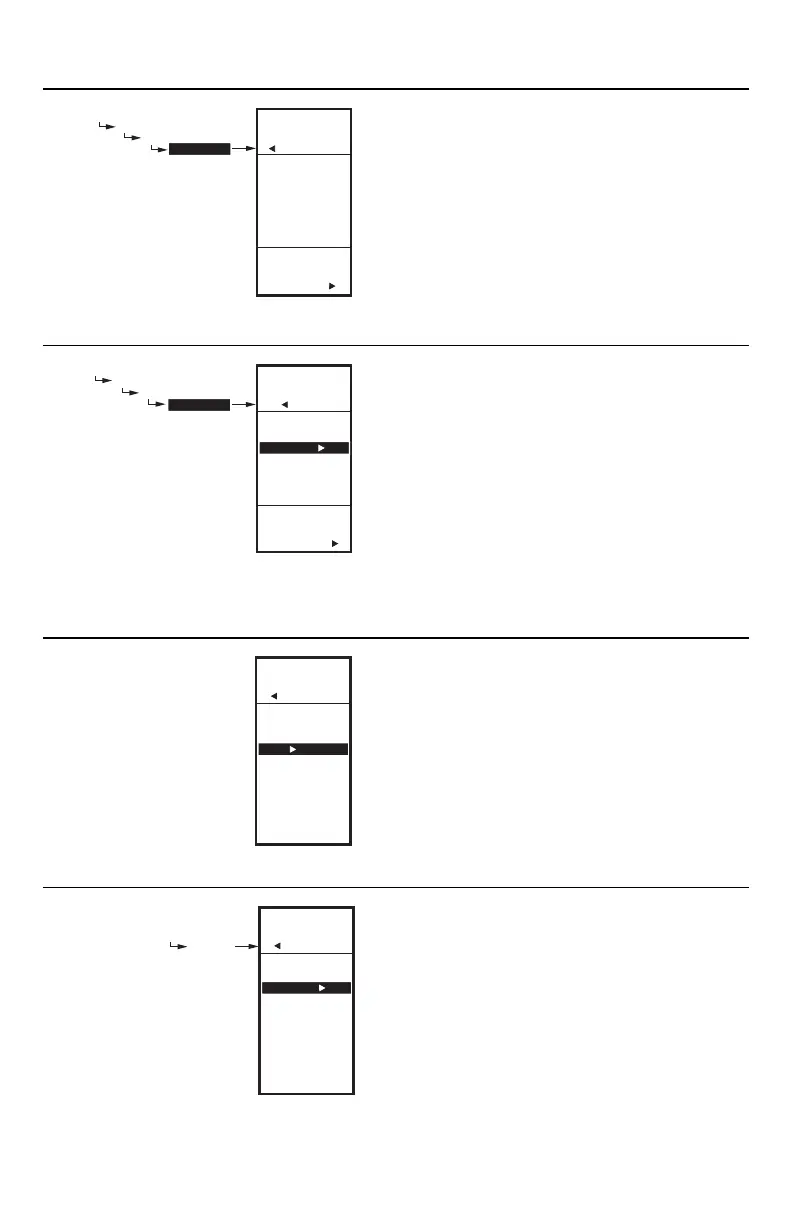
Fig. 26. Setup - Sensors - Sensor B Menu.
1.2.3. SENSOR B
For two-sensor reset control, Sensor B must always be
the controlling temperature.
For example, in a reset control based on outside
temperature, Sensor B must be the outside sensor.
1. From the Sensors menu, use the button to high-
light SENSOR B.
2. Press the button to display the Sensor B menu.
3. Repeat the selections described in
“1.2.2.2. CALIBRATE (the sensor)” through
“1.2.2.4. Exit Sensor A Setup” beginning on
page 14.
Continue with “1.2.4. SENSOR C”.
SETUP
SENSORS
SENSOR A
CALIBRATE
ENTER
VALUE TO
CALIBRATE
SENSOR A
SETUP
SENSORS
SENSOR A
CALIBRATE
0.0
F
o
M24650
SETUP
SENSORS
SENSOR A
LABEL
SETUP
SENSORS
SENSOR A
LABEL
SELECT
LABEL FOR
SENSOR A
M24651
SENSOR A
BOILER A
SUPPLY A
CHILLER A
SETUP
SENSORS
SENSOR A
UNITS
CALIBRATE
LABEL
EXIT
M24652
SETUP
SENSORS
SETUP
SENSORS
# SENSORS
SENSOR A
SENSOR B
SENSOR C
EXIT
M24653
 Loading...