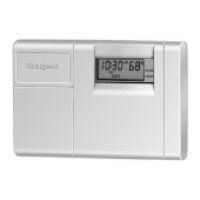
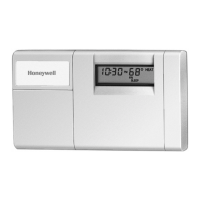
T8112 PROGRAMMABLE THERMOSTAT
68-0170
5
R
Rc
W Y G
B D
A C
4-WIRE HEAT/COOL (JUMPER INTACT)
L1
(HOT)
L2
POWER SUPPLY. PROVIDE DISCONNECT MEANS AND
OVERLOAD PROTECTION AS REQUIRED.
1
JUMPER
HEATING
RELAY OR
VALVE COIL
M1710B
COOLING
CONTACTOR
COIL
FAN
RELAY
Fig. 7. 4-wire heat/cool application (jumper intact).
R
Rc
W Y G
B D
A C
5-WIRE HEAT/COOL (JUMPER REMOVED)
L1
(HOT)
L2
POWER SUPPLY. PROVIDE DISCONNECT MEANS AND
OVERLOAD PROTECTION AS REQUIRED.
1
M1711B
L1
(HOT)
L2
COOLING
CONTACTOR
COIL
FAN
RELAY
HEATING
RELAY OR
VALVE COIL
1 1
Fig. 8. 5-wire heat/cool application (jumper removed).
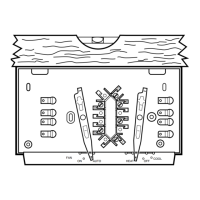
Adjust Fan Operation Switch, as Required
The thermostat fan operation switch, labeled FUEL SWITCH
(see Fig. 9) is factory set in the F position. This is the correct
setting for most systems. If you have an electric heat system,
set the switch to E. In systems with the G terminal connected,
the E setting turns on the fan immediately with heating or
cooling.
M3669
R
Rc
W Y G
B D
A C
THERMOSTAT BACK
FOR HIGH EFFICIENCY FURNACE (90%+ AFUE)
SCREW A–OUT 1 TURN
SCREW B–IN
FUEL SWITCH – F POSITION
F
E
FUEL SWITCH
WARM AIR
FURNACE
A–IN
ADJUST SCREWS THROUGH HOLES
TO SELECT OPERATION DESIRED
B–IN
FUEL SWITCH
POSITION
HEATING SYSTEM
ELECTRIC
FURNACE
HOT WATER
BOILER
A–IN
A–OUT
1 TURN
B–IN
B–OUT
1 TURN
E
F
F
ADJUST:
Fig. 9. Back view of thermostat.
Adjust System On-Time as Required
The thermostat on-time is factory set for a warm air, gas or oil
heating system. If you are installing it on another type of
system, the system on-time must be adjusted by changing
the setting of screws A and B on the back of the thermostat.
Use the heating system table in Fig. 9 as a guide to minimize
room temperature swings. The system on-time should be
optimized according to the type of system. Setting the screw
out one turn
means turning the screw approximately 360°, or
one complete turn.
NOTE: This thermostat does not have a setting for steam/
gravity air. Cycles would not be long enough for
accurate temperature control.
NOTE: For condensing furnaces, follow manufacturer
instructions.
IMPORTANT
When using a high efficiency furnace such as a
90 percent or greater AFUE (Average Fuel Utilization
Efficiency) unit, adjust screw A out one turn and
screw B In one turn.
If you want a longer on-time, readjust screws A and B as
follows (refer to Table 1 Compatibility Chart):
• Warm Air Furnace—set at the Hot Water setting (A—out
one turn, B—in).
• Electric Furnace—leave at the Warm Air Furnace setting
(A—in, B—in).
NOTE: This thermostat does not have a setting for steam/
gravity air. Cycles would not be long enough for
accurate temperature control.
Install Batteries
IMPORTANT
Batteries must be installed for programming and
operating the thermostat and heating/cooling
system.
 Loading...