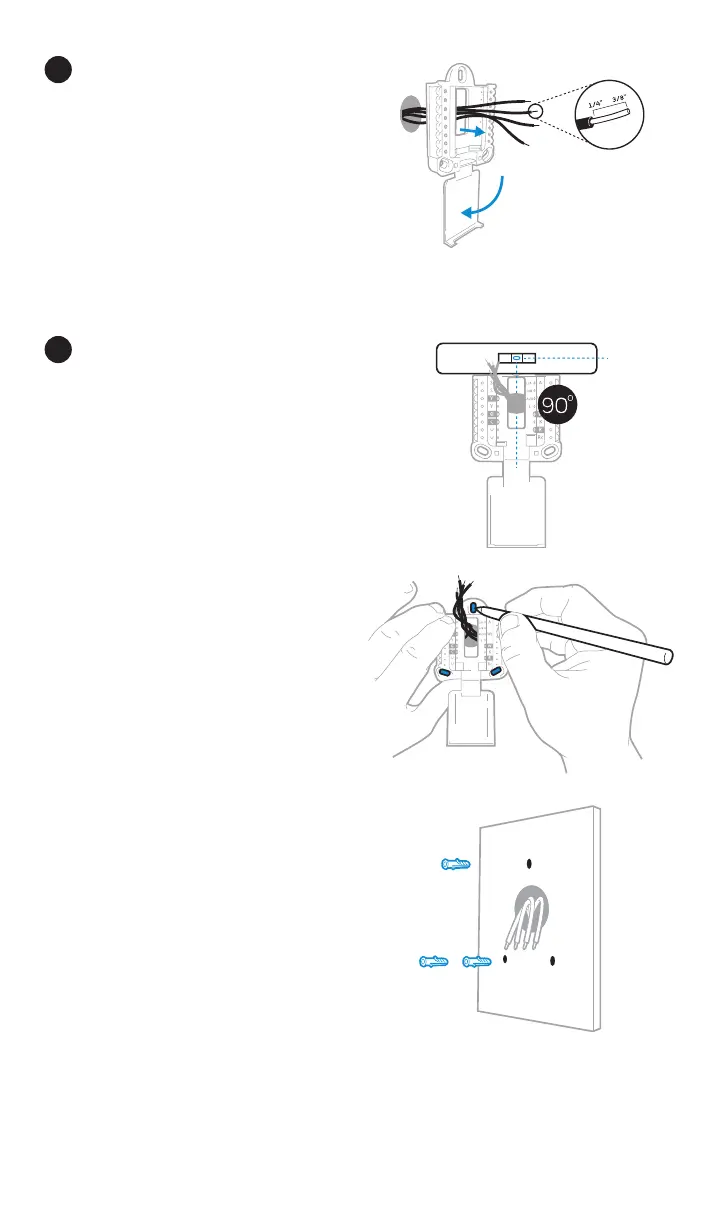
EasyManuals Logo

Honeywell T9 User Manual

Honeywell T9
36 pages
To Next Page IconTo Next Page
To Previous Page IconTo Previous Page
Page #10 background imageLoading...
Page #10 background image
10
18
19
Position wall plate
Pull open the wall plate that was included
with your new thermostat. Insert the
bundle of wires through the back of the
wall plate.
Make sure at least 1/4-inch of each wire
is exposed for easy insertion into the wire
terminals.
Insert recommended wall anchors
It is recommended that you use the
wall anchors included in the box to
mount your thermostat.
You can use the wall plate to mark
where you want to place the wall
anchors.
a) Level the wall plate
b) Mark the location of the wall
anchors using a pencil
c) Remove the wall plate
d) Drill the holes using a 7/32” drill
bit
e) Insert the wall anchors
f) Make sure the anchors are flush
with the wall
g) Reposition the wall plate on wall
-
UWP
Anchors Wall

Questions and Answers:

Question and Answer IconNeed help?

Do you have a question about the Honeywell T9 and is the answer not in the manual?

Honeywell T9 Specifications

General IconGeneral
ModelT9
BrandHoneywell
TypeSmart Thermostat
ConnectivityWi-Fi
DisplayTouchscreen
SensorsTemperature, Humidity, Proximity
Energy SavingENERGY STAR certified
App ControlHoneywell Home App
Warranty3-year limited warranty
CompatibilityAmazon Alexa, Google Assistant
FeaturesGeofencing, Smart Alerts
Zones SupportedMultiple zones with additional sensors
Power SourceC-Wire (Required), Battery Backup
Compatibility with HVAC systemsMost 24V heating and cooling systems: forced air, heat pump, gas, electric

Related product manuals