Do you have a question about the Honeywell THP9045A and is the answer not in the manual?
Lists small screwdriver, mounting tape, and thermostat wire bundle.
Identify existing wires to confirm if a C wire is present.
Use an extra wire from the bundle if no C wire is present on the old thermostat.
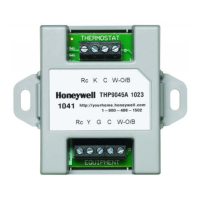
Instructions for loosening screws, inserting wires, and securing them.
Diagrams show wiring differences for conventional and heat pump systems.
Attaching the wire saver near the heating/cooling system's terminal block using tape.
Determining the correct wiring setup based on system stages (single/two-stage).
Detailed steps for wiring a single-stage heating/cooling system.
Instructions for connecting wire saver for two-stage heat, single-stage cooling.
Steps for connecting wire saver for two-stage heating and cooling systems.
Illustrates the system wiring before and after installing the wire saver.
Closing the door activates the interlock switch for system and thermostat power.
Proceed with Step 1.8 in the Quick Start Guide for further setup.
| Type | Programmable Thermostat |
|---|---|
| Display | Color touchscreen |
| Wi-Fi Capability | Yes |
| Product Type | Thermostat |
| Connectivity | Wi-Fi |
| Humidity Control | Yes |
| Remote Access | Yes |
| Geofencing | Yes |
| Compatibility | Compatible with most heating and cooling systems |
| Power Source | Battery or Hardwired |
| Application | Residential and commercial HVAC control |
| Voice Control | Yes (Amazon Alexa, Google Assistant) |
| Alerts | Yes |
| Warranty | 1 year |