– 18 –
PROMPT
EXPLANATION
Each zone must be assigned a zone type, which defines the way in which the system responds to faults in
that zone. Refer to the
Zone Type Definitions
section in the
VISTA-32FB
Installation and Setup Guide
for
detailed definitions of each zone type. Enter the zone type desired (or change it, if necessary). Available
zone types are listed below.
00 = Assign for Unused Zones 14 = CO Detector Alarm
01 = Entry/Exit #1, Burglary 16 = Fire With Verification
02 = Entry/Exit #2, Burglary 17 = Waterflow
03 = Perimeter, Burglary 18 = Fire Supervisory
04 = Interior Follower, Burglary 19 = 24-Hour Trouble
05 = Trouble Day/Alarm Night 20 = Arm–STAY†
06 = 24 Hr. Silent Alarm 21 = Arm AWAY†
07 = 24 Hr. Audible Alarm 22 = Disarm†
08 = 24 Hr. Auxiliary 23 = No Alarm Response (e.g., relay activation)
09 = Fire Without Verification 27 = Access Point – Not Used
10 = Interior Delay, Burglary 28 = MLB Supervision (if VGM installed) – Not Used
12 = Panel Link Supervision – Not
Used
29 = Momentary Exit (used with VistaKey module) - Not Used
13 = Remote P/S
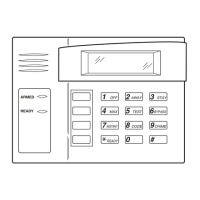
010 ZONE TYPE
PERIMETER 03
Zone number 010 and
Zone Type 03 entry shown
† These are special zone
types used with 5800
Series Wireless
Pushbutton Units that
result in arming the system
in the STAY or AWAY
mode, or disarming the
system, depending on the
selection made.
Press [✱] to continue.
010 PARTITION
1
Enter the partition number (1–2) you are assigning this zone to.
Press [✱] to continue.
010 REPORT CODE
1st 03 2nd 12 3C
Enter the report code. The report code consists of 2 hexadecimal digits, each in turn consisting of 2
numerical digits. For example, for a report code of "3C," enter 03 for "3" and 12 for "C."
(Refer to the
System Communication
section in the
Installation and Setup Guide
for more information about
report codes and reporting formats.)
Press [✱] to continue.
010 BELL/RLY SEL
0
Each zone can be assigned to activate either one or both Notification Appliance Circuits and/or the system’s
auxiliary relay. Enter one of the following assignments:
0=none; 1=bell 1; 2=bell 2; 3=bell 1 & bell 2; 4=aux relay; 5=bell 1 & aux relay; 6=bell 2 & aux relay; 7=bell 1
& bell 2 & aux relay.
Press [✱] to continue.
010 INPUT TYPE
RF Xmitter 3
Input types 4 & 5 are
valid for certain 5800
Series transmitters only
If using input type 02
with a door/window type
transmitter, only loop 1
may be used.
Enter the input device type as follows:
00 = not used
01 = hardwired
02 = RF motion (RM type)
03 = supervised RF transmitter (RF type)
04 = unsupervised RF transmitter (UR type)
05 = RF button-type transmitter (BR type)
06 = serial number polling loop device (SL type)
07 = DIP switch-type polling loop device
08 = right loop of DIP switch type device
09 = keypad input (code + #73)
Right loops refer to the use of the right loop on a 4190WH Zone Expander Module and/or 4278EX PIR,
which allow hardwired devices to be monitored by the polling loop.
If you are programming hardwired or DIP switch polling loop devices, the summary display appears after
completing this entry.
NOTE: After programming, refer to the Installation and Setup Guide test section for testing of the RF
devices.
Press [✱] to continue.

 Loading...