XNX Universal Transmitter
Installation and Operation
77
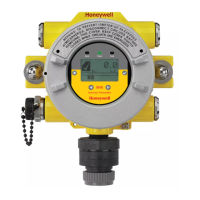
Selecting the Numeric Format
If “Other mA Sensor” has been selected as the sensor type, the
transmitter’s output can be displayed in one of three numeric
formats. From the Ranges & Alarms menu, select the
✓
switch to
open the Range menu (Figure 91). Select the
✓
switch again to
display the Range Lower Limit menu. Select the
switch twice
to open the rst Numeric Format menu.
✓
Figure 91. Navigating to the rst Numeric Format menu
Select the
✓
switch to open the second Numeric Format menu,
which displays the formats available for numerical display (see
Figure 92).
✓
✓
✖
✖
Figure 92. Navigating to the second Numeric Format menu
Select or to cycle through the three options. When the
desired format is highlighted, select the
✓
switch to make the
selection the default display format. Select
✖
twice to return to
the Ranges & Alarms menu.
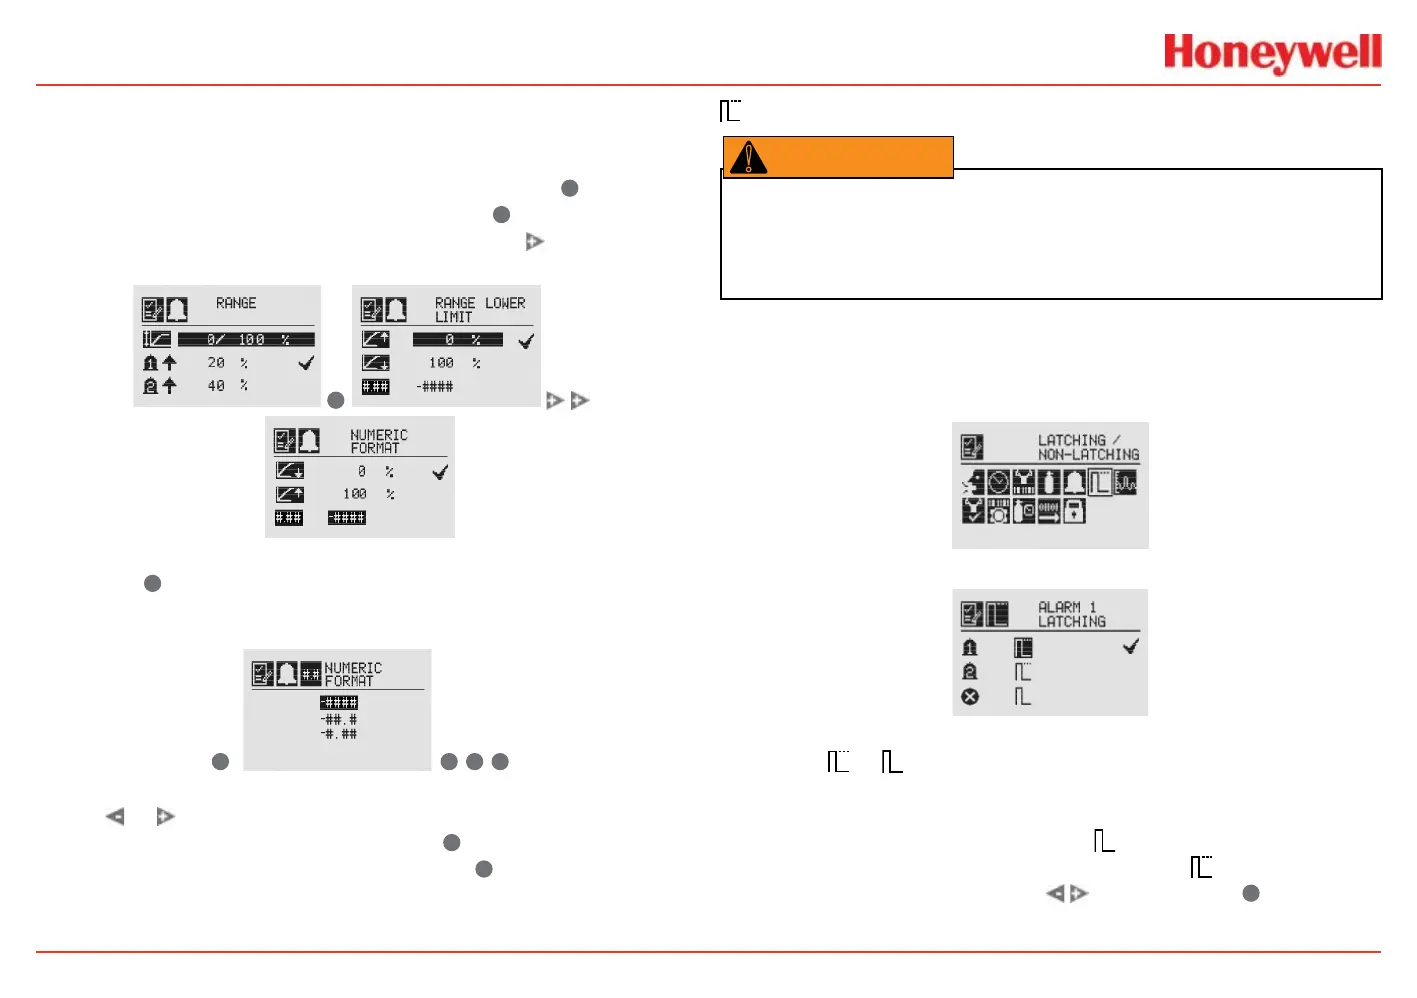
Latching/Non-Latching Alarms
Warning: There is a potential loss of sensitivity during exposure to high
concentrations of H
2
S. Under these conditions, set the control unit to latch at
overrange. In standalone configuration, set alarms to latching. When resetting the
overrange or alarm, verify correct operation of the transmitter.
Latching / Non-Latching is used to control whether Alarms 1 and
2 and faults will latch alarms.
Figure 93. Alarm Latching/Non-Latching screen
Figure 94. Alarm Latching screen
Select the
or
icon beside the alarm limit to display the
Alarm Latching/Unlatching screen. Alarm latching determines
whether alarms that are triggered are automatically reset when
the condition dissipates (latching off
) or remain active until
an operator resets them manually (latching on
). Highlight the
desired latching option with the switches. Use
✓
to accept
it.
 Loading...