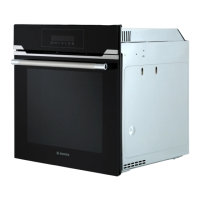
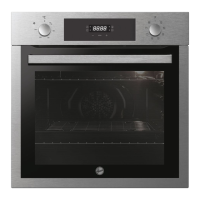
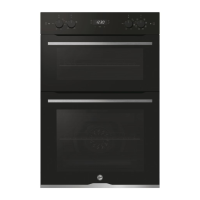
This document is a user manual for a Hoover double oven, providing essential information for safe operation, maintenance, and installation.
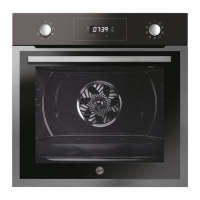
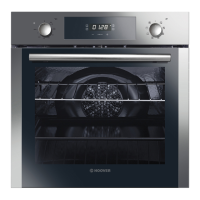
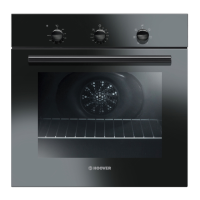
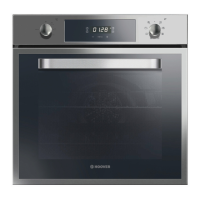
The oven is designed for cooking food and should not be used as a heat source. It features two cavities, allowing for versatile cooking options. The control panel, located at the top, includes various settings for cooking functions, temperature, and timers.
Key Features and Functions:
- Control Panel: The central interface for operating the oven, featuring dials and a digital display.
- Shelf Positions: Multiple shelf positions are available within each oven cavity, often supported by lateral wire grids (if included), to accommodate different cooking needs and dish sizes.
- Grids and Trays: The oven comes with grids for holding baking trays and plates, and drip trays for collecting residues during cooking. Lateral wire grids, if present, are located on both sides of the oven cavity and hold metal grills and drip pans.
- Fan (if present): Aids in heat distribution for even cooking.
- Oven Door: Designed for easy access to the oven cavity.
- Serial Number: A dedicated space is provided to record the oven's serial number for future reference and customer service.
- Softclose (if present): Hinges that ensure an automatic soft and smooth movement when closing the oven door, preventing abrupt closures.
- Telescopic Guides (if present): Two guide rails that facilitate the cooking status check by allowing easy extraction and repositioning of trays and grids inside the oven cavity.
- Catalytic Panels (if present): Special panels coated with enamel, featuring a microporous structure that turns fat into gaseous elements, making them easy to remove. These panels are designed to be replaced after approximately three years of use (based on 2/3 cooking cycles per week).
Cooking Modes:
The oven offers several cooking modes, each designed for specific culinary tasks:
- LAMP: Simply turns on the oven light for visibility.
- DEFROST: Circulates air at room temperature around frozen food to defrost it without altering its protein content.
- MULTI-LEVEL: Recommended for poultry, pastries, fish, and vegetables. This mode ensures better heat penetration, reduced cooking and preheating times, and allows for cooking different foods simultaneously without mixing smells. An additional ten minutes should be allowed when cooking multiple items.
- MASTER BAKE: This function promotes healthier cooking by reducing the need for fat or oil. It combines heating elements with a pulsating air cycle for optimal baking results.
- BOTTOM HEATING + FAN: Uses the bottom heating element with fan circulation, ideal for juicy fruit flans, tarts, quiches, and pâté. It prevents food from drying and encourages rising in cakes and bread dough. The shelf should be placed in the bottom position for this mode.
- CONVENTIONAL: Utilizes both top and bottom heating elements. It requires about ten minutes of preheating and is suitable for traditional roasting and baking, including red meats, roast beef, leg of lamb, game, bread, foil-wrapped food (papillotes), and flaky pastry. Food should be placed on a shelf in the mid-position.
- BOTTOM HEATING: Uses only the lower heating element, perfect for all pastry-based dishes, flans, quiches, tarts, and any cooking requiring more heat from below.
- GRILL: Operates with the door closed, using the top heating element. The temperature can be adjusted, and five minutes of preheating are required. It is suitable for grills, kebabs, and gratin dishes. White meats should be placed further from the grill, while red meats and fish fillets can be placed on the shelf with the drip tray underneath.
- PIZZA: Circulates hot air to ensure perfect results for dishes like pizza or cake.
Usage Features:
- Setting the Clock: The manual provides clear instructions for setting and adjusting the clock on the control panel.
- Minute Minder: A timer function that can be set to remind you of cooking stages or other tasks.
- Cooking Time: Allows users to set a specific cooking duration for their dishes.
- End of Cooking: Indicates when the set cooking time has elapsed.
- Key Lock: A safety feature to prevent accidental changes to settings during operation.
- Setting Cooking Temperature: Users can easily set the desired cooking temperature using the control dial.
- Before Using the Appliance: Instructions include cleaning the oven cavity before first use and ensuring proper ventilation.
- Changing the Bulb: Detailed steps are provided for replacing the oven light bulb, emphasizing the need to switch off the appliance first to avoid electric shocks.
Maintenance Features:
- General Cleaning: Regular cleaning extends the appliance's lifespan. It's crucial to wait for the oven to cool before cleaning. Abrasive detergents, steel wool, or sharp objects should be avoided to prevent damage to enamelled parts. Only water, soap, or bleach-based detergents (ammonia) should be used.
- Glass Parts: The glass window should be cleaned with an absorbent kitchen towel after each use. For stubborn stains, a detergent-soaked sponge, well-wrung out, followed by rinsing with water, is recommended.
- Oven Window Seal: Can be cleaned with a slightly damp sponge if dirty.
- Accessories: Grids and trays should be cleaned with a wet, soapy sponge, then rinsed and dried. Abrasive detergents should be avoided.
- Drip Pan: After grilling, the drip pan should be removed, hot fat poured into a container, and the pan washed with hot water, a sponge, and washing-up liquid. For greasy residues, soaking in water and detergent or using a commercial oven detergent is suggested. A dirty pan should never be returned to the oven.
- Glass Door Cleaning: Step-by-step instructions are provided for disassembling and cleaning the oven door glass, ensuring thorough cleaning and proper reassembly. This includes removing the wire racks, cleaning them (dishwasher safe or with a wet sponge), and reinstalling them in reverse order.
- Troubleshooting: A table outlines common problems, possible causes (e.g., clock not set, cooking function/temperature not set, condensation on user interface), and corresponding solutions.
Installation:
- Electrical Safety: Emphasizes the importance of a qualified electrician for electrical connections, ensuring compliance with local laws and proper earthing. The oven must be connected to an earthed wall outlet or a disconnector with multiple poles.
- Power Cable: If the power cable is damaged, it must be replaced by a special bundle from the manufacturer or customer service, and the operation should be carried out by a qualified professional.
- Ventilation Requirements: Specific diagrams and measurements are provided for installing the oven under a worktop or between furniture, highlighting the need for good ventilation to protect internal parts and ensure proper cooling.
- Fixing: The oven must always be fixed to the furniture using the provided screws.
- Cooktop Clearance: Users are advised to consult the cooktop manufacturer's installation guide to ensure adequate clearances when installing the oven beneath a cooktop.
The manual also includes important safety indications, such as warnings about hot surfaces, keeping children away, and proper handling of the appliance during maintenance. It also provides recommendations for energy saving and environmental protection, encouraging users to avoid pre-heating, fill the oven, and minimize door openings.