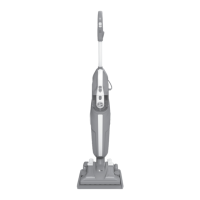
This document is an instruction manual for the Hoover HL4 upright vacuum cleaner, providing comprehensive guidance on its assembly, operation, and maintenance.
Function Description
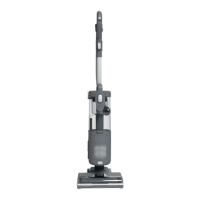
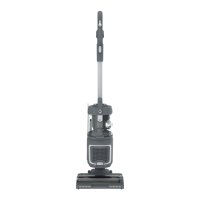
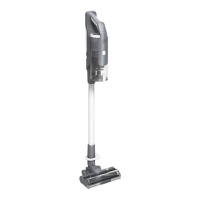
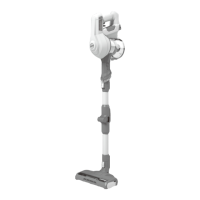
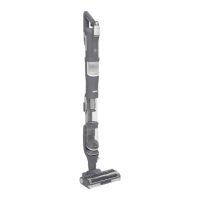
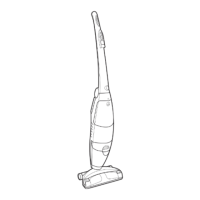
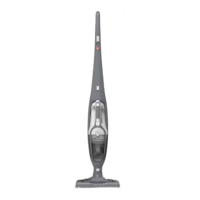
The Hoover HL4 is a versatile upright vacuum cleaner designed for domestic cleaning tasks. It features a powerful suction system and a rotating brushbar to effectively clean various floor types, including hard floors and carpets. The vacuum can be used in three primary modes: Upright mode for general floor cleaning, Upright - Accessory mode for targeted cleaning with attachments, and PUSH&LIFT - Above Floor mode, which converts the cleaner into a portable vacuum for cleaning stairs, cars, and other elevated surfaces. The ANTI-TWIST technology incorporates an integrated comb to prevent hair from wrapping around the brushbar, ensuring consistent performance. The cleaner is equipped with LED lights on the floorhead to illuminate the cleaning path and flashing LED brushbar warning lights to indicate potential blockages or issues. A thermal cut-out mechanism is included as a safety feature to prevent overheating.
Usage Features
The Hoover HL4 offers several features to enhance its usability:
- Assembly: The manual provides a step-by-step guide for assembling the main product unit, wand, hose, and accessories, ensuring a straightforward setup process.
- Upright Mode: To operate in upright mode, the user plugs in the power cord, places a foot on the nozzle, and pulls the handle backward to the desired operating level. The power switch allows selection between "O - Power Off," "I - Hard Floor mode" (low-speed brushbar), and "II - Carpet mode" (high-speed brushbar for deep cleaning). A suction control located on the handle allows adjustment to "MIN," "MEDIUM," or "MAX" settings, suitable for different carpet pile lengths and hard floors. The power cord can be secured in a cord clip on the handle to prevent damage during use.
- Upright - Accessory Mode: In this mode, the cleaner remains in an upright position while the wand and handle are detached from the main product. Accessories can then be attached directly to the end of the wand or handle for above-floor cleaning. The manual emphasizes holding or supporting the cleaner in a safe position when using tools in this mode.
- PUSH&LIFT - Above Floor Mode: This mode transforms the upright cleaner into a portable vacuum. The PUSH&LIFT button releases the portable unit, and the main unit is removed from the floorhead. The wand and handle are then detached from the main product, allowing accessories to be fitted for versatile above-floor cleaning, such as stairs or car interiors.
- Suction Control: The adjustable suction control on the handle allows users to optimize cleaning performance based on the floor covering, from minimum suction for long-pile carpets to maximum suction for hard floors and short-pile carpets.
- Brushbar Warning Lights: Flashing LED lights on the floorhead indicate potential issues with the brushbar, such as blockages, or an incorrect power switch setting, prompting the user to take corrective action.
- Cord Storage: The power cable can be conveniently wound around the upper and lower cord storage hooks for neat storage after use.
Maintenance Features
Regular maintenance is crucial for the optimal performance and longevity of the Hoover HL4. The manual details several maintenance procedures:
- Dust Bin Emptying: The dust bin can be easily removed by pressing the release button. To empty, the user presses the dust bin empty button over a rubbish bin, then presses the lid button to release and open the lid, and removes any excess debris. For allergy sufferers, a specific procedure is recommended: encasing the dust bin in a large bag, closing it tightly, and disposing of it immediately, while wearing disposable gloves and a face mask.
- Filter Cleaning:
- Pre-motor Filters: These filters should be cleaned at least once a month. The procedure involves removing the dust bin assembly, then removing both pre-motor filters from the main product unit. Any excess debris is removed, and the filters are washed with lukewarm water. They must be left to dry for 24 hours before re-fitting. The foam filter should be placed on top when re-fitting.
- Exhaust Filter: To clean the exhaust filter, the main product is laid down, and the exhaust filter cover release button is pushed upwards to remove the cover. The filter is then removed by pressing its release latches. Excess debris is removed, and the filter is cleaned with lukewarm water. It must also be left to dry for 24 hours before re-fitting.
- Brushbar Cleaning: The ANTI-TWIST brushbar, while designed to prevent hair wrapping, may still require cleaning if the cleaner is not picking up efficiently or if the LED warning lights are flashing. The process involves turning the cleaner over, rotating three locking clips 90 degrees with a coin or screwdriver to unlock the brush guard, removing the guard, lifting the brushbar end latch, and removing the brushbar from the nozzle. Any excess debris is then removed from the brushbar and the nozzle. The brushbar is then refitted, and the locking clips are rotated back to secure it.
- Clearing Blockages:
- Floor Nozzle: Blockages in the floor nozzle can be cleared by removing the brushbar to visually identify and remove obstructions. The comb area underneath should also be thoroughly cleaned, and the nozzle neck checked for blockages.
- Other Components & Accessories: For blockages in the hose, handle, wand, crevice tool, or mini turbo nozzle, these components should be removed from the product, vigorously shaken, and visually checked for any obstructions.
- Troubleshooting: The manual includes a troubleshooting section that lists common problems, such as the cleaner not switching on, not picking up debris, or the brushbar not turning, and provides corresponding solutions. These solutions often involve checking the power supply, emptying the dust bin, cleaning filters, checking for blockages, or adjusting settings.
- Thermal Cut-Out Reset: If the cleaner cuts out due to overheating, the thermal cut-out will automatically reset after approximately 1 hour, provided the appliance is switched off, unplugged, and any blockages or dirty filters have been addressed.
The manual emphasizes the importance of using only genuine Hoover attachments, consumables, or spares for continued safe and efficient operation, and recommends that any servicing or repairs be carried out by an authorized Hoover service engineer.