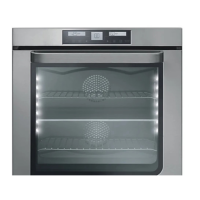
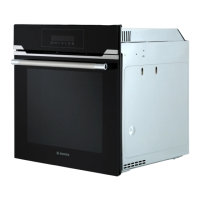
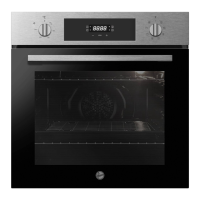
This document describes a Hoover oven, incorporating Pro/Exp'r technology, designed for home use. The oven features a Multijet lateral ventilation system that emits microflows of hot air directly onto food at low speeds, ensuring uniform cooking, reduced moisture loss, and simultaneous cooking on different levels.
General Warnings and Safety
Users should read the instructions carefully and keep them for future reference. Upon unpacking, inspect the oven for damage; if any doubts exist, contact a qualified professional. Packing materials should be kept out of reach of children. The manufacturer is not liable for non-compliance with the instructions. The oven is designed for cooking food only; any other use, such as heating, is improper and dangerous. The appliance and its accessible parts become hot during use, so care must be taken to avoid touching heating elements. The manufacturer is not responsible for damage caused by improper or unreasonable use. Basic electrical safety rules must be followed: do not pull the power cable, do not touch the oven with wet hands or feet, and do not use it barefoot. Adapters, multiple sockets, or cable extensions are not recommended. If the oven malfunctions, switch it off at the mains immediately. Damaged cables must be replaced by properly qualified technicians using H05VV-F type cables that can bear the required electrical current. The earthing cable (yellow-green) must be 10 mm longer than the power cable. Repairs should only be carried out by approved service centers using original parts. No modifications should be made to the oven. Steam or high-pressure sprays should not be used for cleaning. Flammable products should not be stored in the oven. Do not press or sit on the oven door. Oven gloves should be used when handling hot dishes. This appliance is not intended for use by individuals with reduced physical, sensory, or mental capabilities, or lack of experience and knowledge, unless supervised or instructed by a person responsible for their safety. Children under 8 years old should be kept away unless continuously supervised. Children aged 8 and above, and persons with reduced capabilities, can use the appliance if supervised and instructed on safe use and understanding of hazards. Accessible parts, especially during grill use, can be hot, and young children should be kept away. The appliance must be switched off before replacing the lamp to avoid electric shock.
Recommendations
After each use, a minimum of cleaning helps keep the oven clean. Do not line oven walls with aluminum foil or single-use protection, as direct contact with hot enamel can cause melting and deterioration. To prevent excessive dirt and smoke, avoid using the oven at very high temperatures; instead, extend cooking time and lower the temperature slightly. Only use dishes and baking molds resistant to very high temperatures.
Installation
The manufacturer is not obligated to perform installation. Incorrect installation leading to harm or injury is not the manufacturer's responsibility. Installation instructions must be followed by professionally qualified personnel. The kitchen unit housing the oven must be resistant to temperatures of at least 70°C. The oven can be located high in a column or under a worktop. Ensure good ventilation in the oven space for cooling and protection of internal parts, making openings as specified on the last page. When fixing the oven, ensure that the ventilation channels (2mm) on both sides are not closed by overtightening screws.
Electrical Connection
Electrical connection must be carried out by an approved contractor or technician. The installation must comply with local standards. The manufacturer is not responsible for non-compliance. Connection to the network must be via an earthed socket or a multipole circuit-breaker. The installation must be protected by suitable fuses and wires with adequate cross-section. The oven is fitted with a power lead for 220-240 V AC connection. Check the supply voltage. The green/yellow earth wire must be connected to the earth terminal of the installation. Have the earth continuity checked by an electrician. The manufacturer is not liable for incidents arising from an un-earthed oven or one with defective earth continuity. The socket outlet should be accessible for after-sales service. If the power supply cable needs changing, it must be done by after-sales service or similarly qualified personnel.
Oven Equipment
Initial cleaning of all equipment is necessary before first use. Wash with a sponge, rinse, and dry.
- Shelf: Can hold molds and dishes.
- Drip Tray: Catches juices from grilled foods. Never use it as a roasting tray, as fat deposits can spread, causing smoke. Never place it directly on the oven bottom or separator.
- Pastry Tray: Placed on the shelf for cooking small pastries (choux, biscuits, meringues). Never place it directly on the oven bottom or separator.
- Rotisserie (according to model): No pre-heating required. Cooking with the door closed. Energy consumption is 90-95% less than traditional systems. Includes grid, spit, hooks & screws, and a handle. To use, unscrew hooks, put spit into meat, fix meat with hooks, tighten screws, insert spit into motor hole, and attach handle. Unused accessories should be removed from the oven during use.
- Separator: Divides the oven into two cavities for dual mode. Must be used in the third shelf position. Never leave the separator inside the oven during Pyrolytic mode.
- Pizza Stone (according to model): For crisper pizza, equipped with a stand and pizza roller.
LED VISION / U.SEE
This illumination system replaces traditional light bulbs. It features 14 LEDs (non-pyrolytic versions) or 10 High Power LEDs (pyrolytic versions) integrated into the door. These produce high-quality white illumination, providing clear, shadow-free views inside the oven on all shelves. Advantages include optimum view, long life, and very low energy consumption (95% less than traditional illumination).
Cleaning the Oven
Wait for the oven to cool before manual cleaning. Do not use abrasive cleaners, wire wool, sharp objects, or bleach/ammonia, as they can damage the enamel. Never line oven sides with aluminum foil. Do not use a steam cleaner. Children should not perform cleaning or user maintenance without supervision.
- Glass Parts: Wipe clean with absorbent kitchen paper after each use. For heavy spattering, clean with a well-squeezed sponge and detergent, then rinse. Do not use harsh abrasive cleaners or sharp metal scrapers on the oven door glass to avoid scratching and potential shattering.
- Oven Door Seal: Clean with a slightly damp sponge if dirty.
- Accessories: Clean with a sponge soaked in soapy water, rinse, and dry. Avoid abrasive cleaners.
- Drip Tray: After grilling, remove the drip tray, pour warm grease into a container, then wash and rinse in hot water with washing-up liquid. For stubborn residues, soak in water and detergent or use a commercial oven cleaner/dishwasher. Never place a soiled drip tray in the oven.
- Oven Lighting: The bulb and its cover are made of high-temperature resistant material.
Service Centre
Before calling service, check if the oven is properly plugged in. If the fault persists, disconnect the oven from the mains, do not touch it, and call after-sales service. Note the serial number from the specifications plate. The oven comes with a guarantee certificate for free repairs by the Service Centre.
This appliance is marked according to European directive 2002/96/EC on Waste Electrical and Electronic Equipment (WEEE). Proper disposal prevents negative environmental and health consequences. The product should not be treated as household waste but handed over to an applicable collection point for recycling. Disposal must comply with local environmental regulations. For detailed information, contact your local city office, household waste disposal service, or the shop where the product was purchased.
Display Description
The display shows information for the Left Display (Upper Cavity), Central Display (Setting Parameters/Main Cavity), and Right Display (Lower Cavity).
- Left Display (Upper Cavity): Timer, Cooking function upper cavity, Booster Pro, Temperature, Cooking duration, End of cooking.
- Central Display (Setting Parameters/Main Cavity): Cooking duration (total cavity), End of cooking (total cavity), Temperature / Time, Arrow (-), Arrow (+), Start/Stop, On/Off, Time Set, Function / Cavity.
- Right Display (Lower Cavity): Booster Pro, Temperature, Cooking function lower cavity, Cooking duration, End of cooking, Pyrolysis necessary, Child lock, Door lock.
Before First Use
Preliminary Cleaning: Wipe external surfaces with a damp cloth. Wash all accessories and wipe inside the oven with hot water and washing-up liquid. Set the empty oven to maximum temperature for about 1 hour to remove lingering smells. Ensure the room is well ventilated.
Things to Remember:
- Timer modifications must be confirmed by pressing "SET".
- To stop the oven, press "START/STOP".
Clock Setting: When the oven is first connected or after a power cut, the clock must be reset.
- Press "SET" for a few seconds to find "C". The digits on the central display will blink.
- Set the clock using "∧" and "∨", then wait a few seconds or press "SET" again to apply.
Adjusting Display Contrast:
- Press "SET" for a few seconds to find "C" using "∧" and "∨". The contrast (1 minimum to 5 maximum) is displayed.
- Choose the contrast level using "∧" and "∨", then wait a few seconds or press "SET" again to apply.
To set the clock or adjust contrast after initial switch-on, press "ON/OFF" to switch on, then follow steps 1 and 2.
Minute Mind:
- Press "ON/OFF" to switch on.
- Press "SET" for a few seconds to find "C" using "∧" and "∨", then press "SET".
- Set the required time using "∧" and "∨", then wait a few seconds or press "SET" again to apply.
This function allows the oven to be used as an alarm clock independently of the oven's operation.
Child Lock:
- To set the child lock, press "F" for a few seconds.
- To activate, press "OK". To deactivate, press "NO".
Child lock can be activated when the oven is ON or OFF.
How to Use the Oven
Single Mode: Remove the separator. All functions can be chosen. Cooking methods and suggested temperatures are listed in the table. Temperatures can be modified within a pre-determined range.
- Press "ON/OFF" to switch on.
- Press "F". Choose the desired cooking function using "∧" and "∨".
- The appropriate temperature or level is displayed. Modify temperature using "SET" and "∧" and "∨", then press "SET" again to confirm. The temperature display is fixed but can be modified during the cooking cycle.
- To start cooking, press "START/STOP". The oven will heat up, and the indicator light blinks until the selected temperature is reached, then becomes fixed with an audible sound.
- To change the oven function, repeat steps 2-4.
- To stop cooking, press "START/STOP".
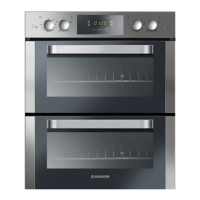
Dual Mode: Insert the separator into the third shelf position. Functions can be chosen for both upper and lower cavities.
- Press "ON/OFF" to switch on.
- Press "F" to select which part of the oven (UPPER or LOWER) to use; choose the function using "∧" and "∨".
- The appropriate temperature or level is displayed. Modify temperature using "SET" and "∧" and "∨", then press "SET" again to confirm. The temperature display is fixed but can be modified during the cooking cycle.
- To start cooking, press "START/STOP". The oven will heat up, and the indicator light blinks until the selected temperature is reached, then becomes fixed with an audible sound.
- To stop cooking, select "OFF".
Cooking Duration:
- Press "Time Set" and find "hourglass" using "arrows".
- Press "Temperature/Time Set" and set the cooking duration using "arrows".
- To confirm, press "Temperature/Time Set" again.
End of Cooking:
- Press "Time Set" and find "hourglass" using "arrows".
- Press "Temperature/Time Set" and set the end of cooking time using "arrows".
- To confirm, press "Temperature/Time Set" again.
To delete a set time, find "barred clock" using "arrows" in the time set menu and press "Temperature/Time Set". This function is typically used with "cooking duration". For example, to cook for 45 minutes and be ready by 12:30: select function, set duration to 45 minutes, set end time to 12:30. Cooking will start automatically at 11:45 (12:30 minus 45 mins) and stop at 12:30. If "End of cooking" is selected without setting cooking duration, the oven will start immediately and stop at the set end time.
Cooking Modes
All cooking should be carried out with the door closed.
- BOTTOM + FAN: Bottom heating element and fan. Ideal for fruit flans, tarts, quiches, pastries. Prevents food from drying, encourages bread dough to rise. Place shelf in the bottom position.
- BOTTOM: Lower element only. Ideal for all pastry-based dishes, flans, quiches, tarts, pâté, and dishes needing more heat from below.
- BOTTOM + GRILL: Both top and bottom heating elements. Ideal for traditional roasting and baking of red meat, roast beef, lamb, game, bread, or foil-wrapped foods.
- BOTTOM + GRILL + FAN: Both top and bottom heating elements with fan. Circulates hot air. Recommended for poultry, pastries, fish, vegetables. Provides better heat penetration, reduced cooking/preheating times. Allows cooking different foods simultaneously on different levels with even heat distribution without mingling tastes/smells. Add 10 minutes for cooking different foods simultaneously.
- RING + FAN: Heated air blown by fan onto different levels. Ideal for cooking different food types simultaneously (e.g., meat and fish) without mixing tastes/smells. Cooks gently. Ideal for sponge cakes, pasties.
- GRILL: Top heating element. Guaranteed for mixed grills, kebabs, gratin dishes. Pre-heat to high temperature for 5 minutes. Place white meats further from the grill element for longer, more succulent cooking. Place red meat and fish fillets directly on the shelf with the drip tray below.
- GRILL + FAN: Top heating element with fan. Circulates hot air. Pre-heating recommended for red meats, not for white meats. Ideal for thicker food items (pork, poultry). Place food directly in the middle of the shelf. Slide drip tray underneath to collect juices. Ensure food is not too close to the grill element and turn halfway through cooking.
- GRILL + TURNSPIT + FAN: Top oven element with fan and rotisserie. Food is evenly cooked, preventing dryness. Rotisserie continues for ~5 minutes after cooking using residual heat. No preheating required.
- DEFROST: Fan circulates hot air around frozen food, defrosting in minutes without altering protein content. Preset to 40°C constant.
- KEEP WARM: Reheat precooked food (second level from top) or defrost bread/pizza/pastry (lower level). Preset to 60°C constant.
- PYRO: The oven cleans itself. Three choices: ECO, NORMAL, SUPER.
Pyrolytic Cycle (According to the model)
The oven is equipped with a pyrolyser cleaning system that destroys food residues at high temperatures. The operation is automatic and programmed. Fumes are cleaned by passing over a pyrolyser that starts with cooking. A safety lock prevents the door from opening during the high-temperature cycle. The pyrolyser can be stopped at any time.
NOTE: If a hob is fitted above the oven, do not use gas burners or electric hot-plates during pyrolyser operation to prevent overheating.
Three Pyrolytic Cycles:
- ECO PYROCLEAN: Cleans a moderately stained oven (65 minutes).
- NORMAL PYROCLEAN: Cleans a normally stained oven (75 minutes).
- SUPER PYROCLEAN: Cleans a heavily stained oven (90 minutes).
Never use commercial cleaning products on a Pyrolytic oven.
Tip: Performing pyrolytic cleaning immediately after cooking utilizes residual heat, saving energy.
Before a Pyrolytic Cycle:
- Remove all accessories (separator, grids, trays, etc.) as they cannot withstand high temperatures and would be damaged.
- Remove any large spillages or stains that would take too long to destroy or could ignite.
- Close the oven door.
- Remove excess spillage.
Using the Pyrolytic Cycle:
- Press "F". Choose ":::" using "∧" and "∨", then press "SET" to confirm. ":::" will appear, and ECO mode flashes.
- ECO: 65 minutes, moderately stained.
- NORMAL: 75 minutes, normally stained.
- SUP: 90 minutes, heavily stained.
- Using "∧" and "∨", select the desired Pyrolytic mode (ECO, NORMAL, or SUP). Then press "SET" to confirm.
Your choice is confirmed after 3 seconds. The oven starts the pyrolytic cycle. The selected mode flashes, and the ":::" and "O" indicator lights appear. The locking oven door symbol appears, indicating the door is locked. The cooling fan operates. The indicator light flashes until the required temperature is reached, then becomes fixed. At the end of the cycle, the oven switches off automatically. An audible signal sounds for 15 seconds, and the ":::" and "O" indicator lights flash. Press "START/STOP" to stop. Otherwise, the symbols continue flashing, and the ":::" symbol disappears from the Timer. The pyrolytic mode is incorrect. The oven door remains locked until the temperature has reduced. The locking oven door symbol illuminates when the door cannot be opened. The cooling fan remains on until the oven components reach a reasonable temperature. At the end of the cycle, the indicator flashes again and remains on until the oven's internal temperature is sufficiently low. Pyrolysis leaves a white residue on the oven walls. After the oven cools completely, clean the inside with a damp sponge.
Cooking Tips
- Do not salt meats until after cooking to prevent spattering and smoke.
- White meat, pork, veal, lamb, and fish can be put into a cold oven. Cooking time will be longer but penetration to the center will be better.
- Correct preheating is essential for red meat cookery.
Grills:
- Before loading: Remove meat from the refrigerator a few hours before grilling. Lay it on kitchen paper to improve searing, taste, and prevent it from staying cold. Add pepper and spices before grilling, but salt after cooking. Baste food with a little oil using a wide flat basting brush. Sprinkle with more pepper and herbs.
- During cooking: Do not pierce food during cooking, even when turning it, to retain juices.
Baking:
- Avoid shiny tins, as they reflect heat and can spoil cakes. If cakes brown too quickly, cover with greaseproof paper or aluminum foil (shiny side towards the cake).
- Avoid opening the door during the first 20-25 minutes of cooking, as soufflés, brioches, and sponge cakes may fall. Check if cakes are done by pricking the center with a knife or knitting needle; if it comes out dry, the cake is ready. If moist or with bits of cake, continue baking at a slightly lower thermostat.