2
*Certain Models Only **Nozzle design may vary according to models
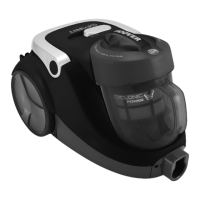
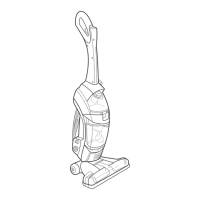
GETTING TO KNOW YOUR CLEANER
C. Hose Latch for Nano Pack™ system
D. Cord Reel Pedal
H. Hose
I. Hose Handle Hook (For Nano Pack™
system)
J. Hose Handle
K. Suction Regulator
L. Telescopic Tube
M. Telescopic Tube Adjuster
N. Telescopic Tube Parking Hook (For
Nano Pack™ system)
O. Carpet and Floor nozzle (GP)**
O1. Carpet Nozzle (CA)**
O2. Hard Floor Nozzle (HF)**
P. Floor Type Selector*
Q. 2 in 1 accessory
S. Nozzle Parking Slot
T. Telescopic Tube Parking Slot
U. Pre-motor Filter
V. Exhaust Filter
W. Pet Hair Remover Mini Turbo Nozzle*
X.
Allergen Remover Mini Turbo Nozzle
*
ASSEMBLYING YOUR CLEANER
Remove all components from the packaging.
1. Connect the hose to the cleaner main body, ensuring it clips and locks into position.
To release: simply press the buttons on the hose end and pull. [1]
2. Connect the hose handle to the telescopic tube upper end [2], or accessories if
3. [3] or
USING YOUR CLEANER
1. Extract power cord and plug it into the power supply. [4] Do not pull the cord beyond
the red marker.
2. Adjust the telescopic tube to the desired height by moving the telescopic tube
adjuster to the most comfortable cleaning position. [5]
3. Carpet & Floor Nozzle *** on the nozzle [6] to select
Hard Floor
Carpet
4. Switch the cleaner on by pressing the On/Off Pedal on the cleaner main body. [7]
5. Adjust the Suction Regulator on the hose handle to the desired level. [8]
6. Switch off at the end of use by pressing the On/Off Pedal. Unplug and press the cord reel
pedal to wind the power cord back into the cleaner. [9]
PARKING AND STORAGE SECTION
The exible hose and telescopic tube can be parked for temporary while in use [10]
or in the Nano Pack™ storage position when not in use:
1. Retract the telescopic tube to its storage length. [13]
2. Remove the nozzle from the end of the telescopic tube.
3. Remove the hose handle from the telescopic tube.
4.
product. [13]
5. Place the nozzle into the nozzle parking slot underneath the product. [13]
6. Place the telescopic tube into the telescopic tube parking slot underneath the
product. [13]
CLEANER MAINTENANCE
Replacing the Dust Bag
If the bag check indicator is red, please check and, if necessary, replace the bag.
1. Remove the hose from the cleaner.
2. [14]
3. Close the bag to avoid dust escaping by pulling the tongue and
remove the bag. [15]
Carefully dispose the full bag into a bin.
[16]
4. Fit a new bag into the cleaner by inserting the collar into the bag holder.
[16]
5.
REMEMBER: The bag check indicator may be red if an obstruction has occurred. In this case
refer to ‘Removing a Blockage From the System’.
Cleaning the Filter:
To remove the pre-motor lter:
1. Open the bag door and remove the dust bag from the cleaner (see “Replacing The
dust bag”).
2. [17]
3. [17]
Cleaning the exhaust lter:
1. [18]