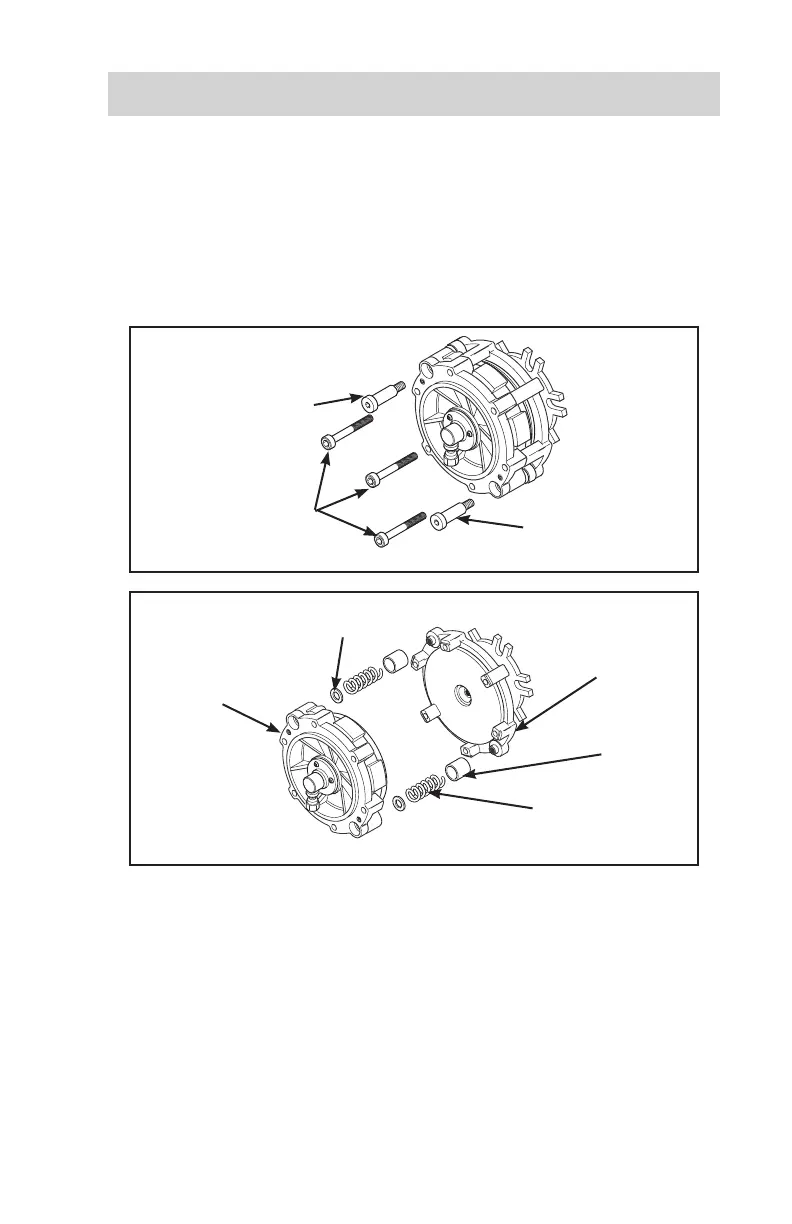
Step 1
Socket Head
Cap Screws
Shoulder Screws
Seal
Washer
Steps 2-3
Shoulder Screws
Air Chamber
and
Piston
Drive
Sleeve
Silicone
Sleeve
Compression
Spring
REPAIR KIT INSTALLATION
1. R e mo v e th e si x So c k e t He a d Ca p Sc re ws ; th en ,
remove and discard the two Shoulder Screws.
2. Separate theAir Chamber and Piston from the Drive Sleeve.
3. Remove and discard the two old Silicone Sleeves, Compression
Springs, and Seal Washers.
4. SeparatetheAirChamberfromtheoldPistonanddiscardtheold
PistonandO-ringSeal.
5. ExaminetheinsideoftheAirChamberforsignsofdirtandforeign
material.TheAirChambershouldberelativelycleananddry.If
not,aproblemmayexistinthevehicleairsystemandmustbe
corrected before the Fan Drive is reinstalled.
6. Usingpartscleaningsolvent,cleantheo-ringcontactsurfacesof
theAirChamberandnewPiston.
5