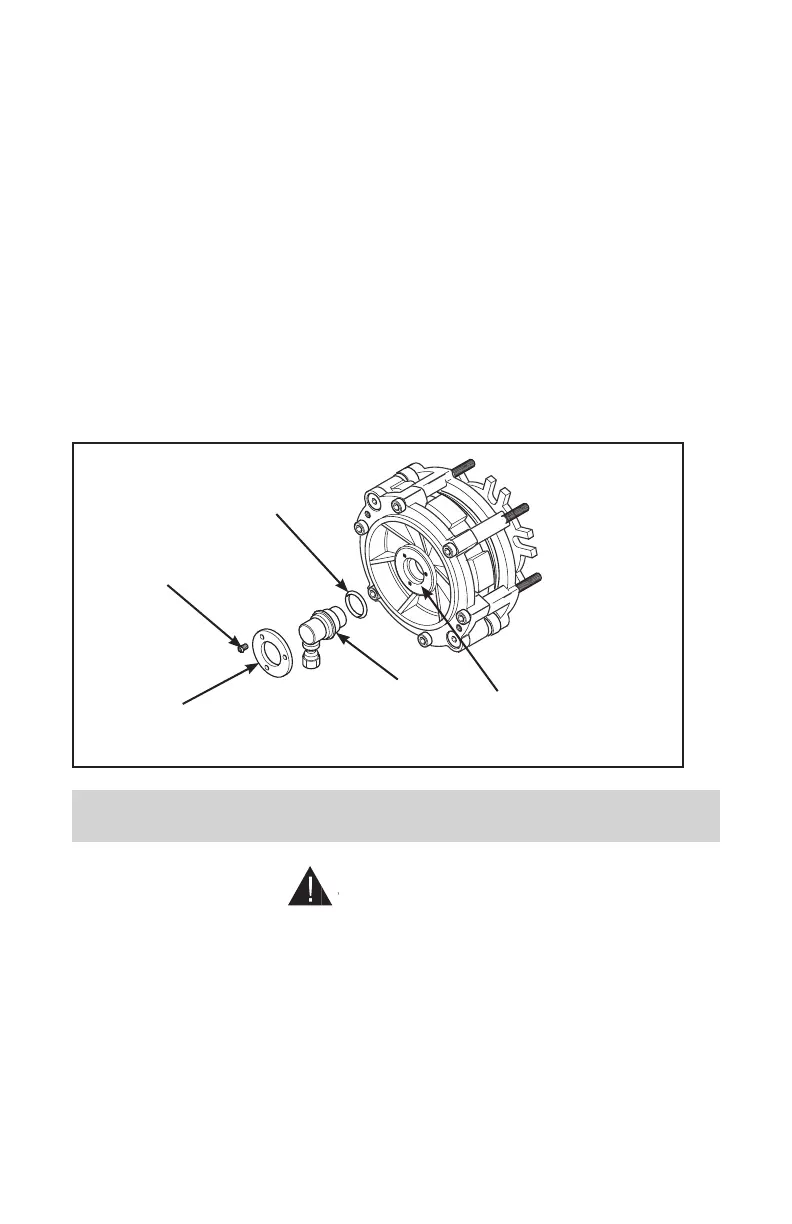
20. Remove the three Pan Head Screws and the old Retaining
Washer;then,removethe oldRotaryAirUnionandoldO-ring
Seal.
21. LubricatethenewO-ringSealwiththeo-ringlubricantsupplied
inthe Repair Kit; then,install thenewO-ring Seal into theAir
Chamber.
22. PressthenewRotaryAirUnionintotheAirChamberandnew
O-ringSeal.
23. SlidethenewRetainingWasheroverthenewRotaryAirUnion.
24. Install and tighten the three Pan Head Screws to 13-17 In. Lbs.
[1.5-1.9N•m]torque.
Pan
Head
Screw
Rotary Air
Union
O-ring
Seal
Retaining
Washer
Air
Chamber
INSTALLATION
Avoid damaging the Rotary Air Union during fan installation,
removal, or when servicing the Fan Drive.
1. Usingsuppliednutsandlockwashers,mountthefanontotheFan
Drive;then,tightenthenutsto10Ft.Lbs.[13.6N•m]torque.
2. UsingSAEgrade8bolts,installthefanandFanDriveassembly
onto the fan drive pulley. Tighten the mounting bolts to 25 Ft. Lbs.
[33.9N•m]torque.
Steps 20-24
8