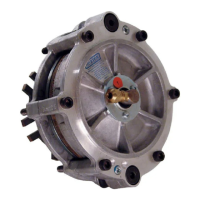
13. Install the two new Silicone Sleeves over the new Compression
Springs and onto the Drive Sleeve.
14. Place the two new Seal Washers on top of the new Compression
Springs.
15. AligntheAirChamberandnewPistonwiththetabsoftheDrive
Sleeve.
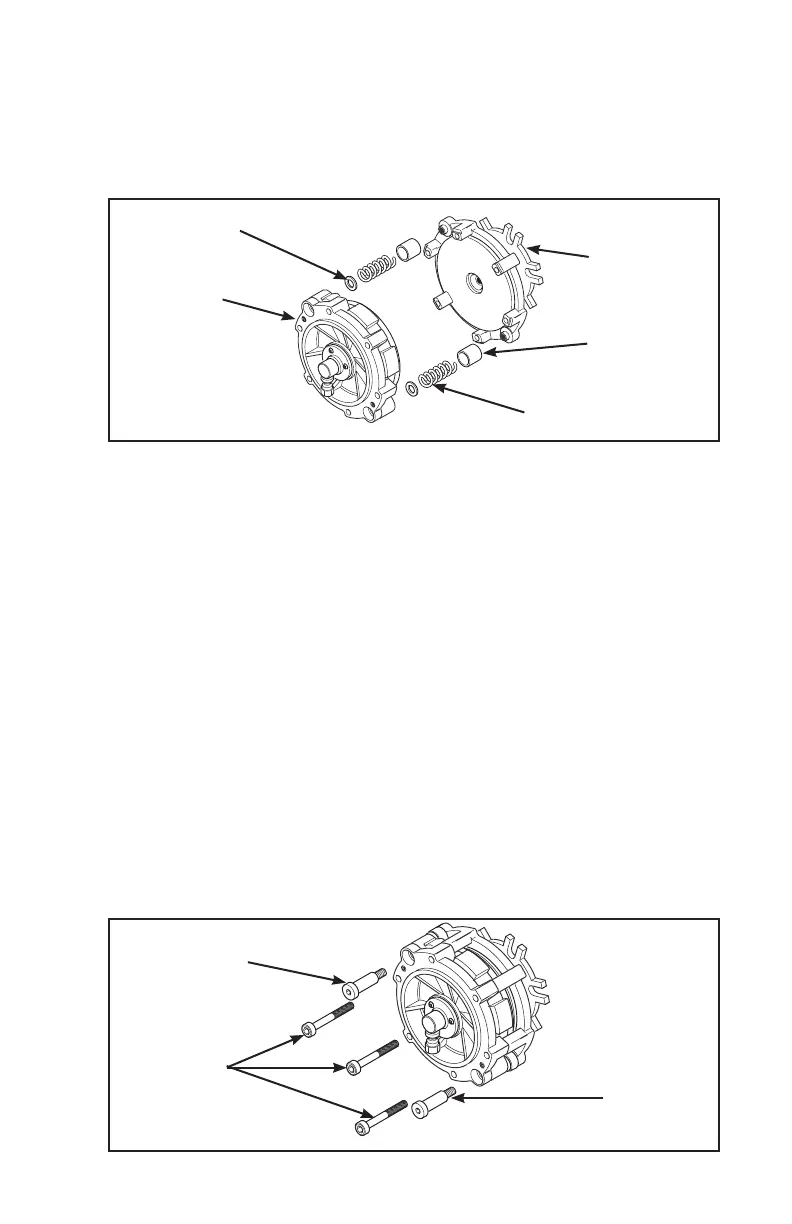
16. ApplyadropofLoctite
®
242 to the threads of the two new Shoulder
ScrewsandsecuretheAirChamberandnewPistontotheDrive
Sleeve.
17. AlternatelyandevenlytightenthetwonewShoulderScrewsto
20-25Ft.Lbs.[27.1-33.9N•m]torque.
18. ApplyadropofLoctite
®
242halfwaydownthethreadsofthesix
SocketHeadCapScrewsandinstallthesixSocketHeadCap
Screws.
19. AlternatelyandevenlytightenthesixSocketHeadCapscrews
to20-25Ft.Lbs.[27.1-33.9N•m]torque.
NOTE
If you are replacing the Rotary Air Union, continue with Step 20.
Steps 13-14
Air Chamber
and
Piston
Drive
Sleeve
Silicone
Sleeve
Seal
Washer
Compression
Spring
Steps 15-19
Socket
Head
Cap
Screws
Shoulder
Screws
Shoulder
Screws
7