TIMEDBAKING
(continued)
HOW to&!t Dday Start and Automatic Stop
To avoid possible b- place the shelves in
the correct position before you turn the oven on.
You can set the oven control to &lay-at@ cook for a
specific length of time and then turnoff automatically.
NOTE: You must use the TIMED BAKE setting.
1. To set the Start Tree, push in the knob on the
DEXAY START dial and turn the pointer to the
time you want the oven to turn o% for example 3:30.
2. To set the Stop Time, push in the knob on the
STOP TIME dial and turn the pointer to the time
you want the oven to turnoff, for example 6:00.
This means your recipe called for 2%hours of
baking time.
The time on the STOP TIME dial must be later
than the time shown on the range clock and the
DEIAY START dial.
3. Turn the OVEN SET knob to TIMED BAKE. Turn
the OVEN TEMP knob to the desired temperature.
4. When cooking is complet~ turn the OVEN SET
knob (on some models) and the OVEN TEMP
knob to OFF and remove the food from the
oven. Remember, foods that are left in the
oven continue cooking after the controls are off.
NOTE:
QFoods that are highly perishable, such as rnil~
e= fish, stuffings, poultry and pork should not
be allowed to sit for more than one hour before or
after rooking. Room temperature promotes the
growth of harmful bacteria. Be sure that the oven
light is off because heat from the bulb wiIl speed
harmfid bacteria growth.
‘ The oven indicator light(s) at the TIMED BAKE
setting may work diHerently than they do at the
BAI@ sehg.
. -
ADJUSTTHE OVEN THERMOSIXT-DO ITYOURSEW!
o
OVENTEMP OVEN TEMP
3ooe.3P. #
OFF
o Q
●
2$0.’
II
●4s0
r
●
●
s
~
200°
●=
%
@
I
W&
●~OIL
*c@
es
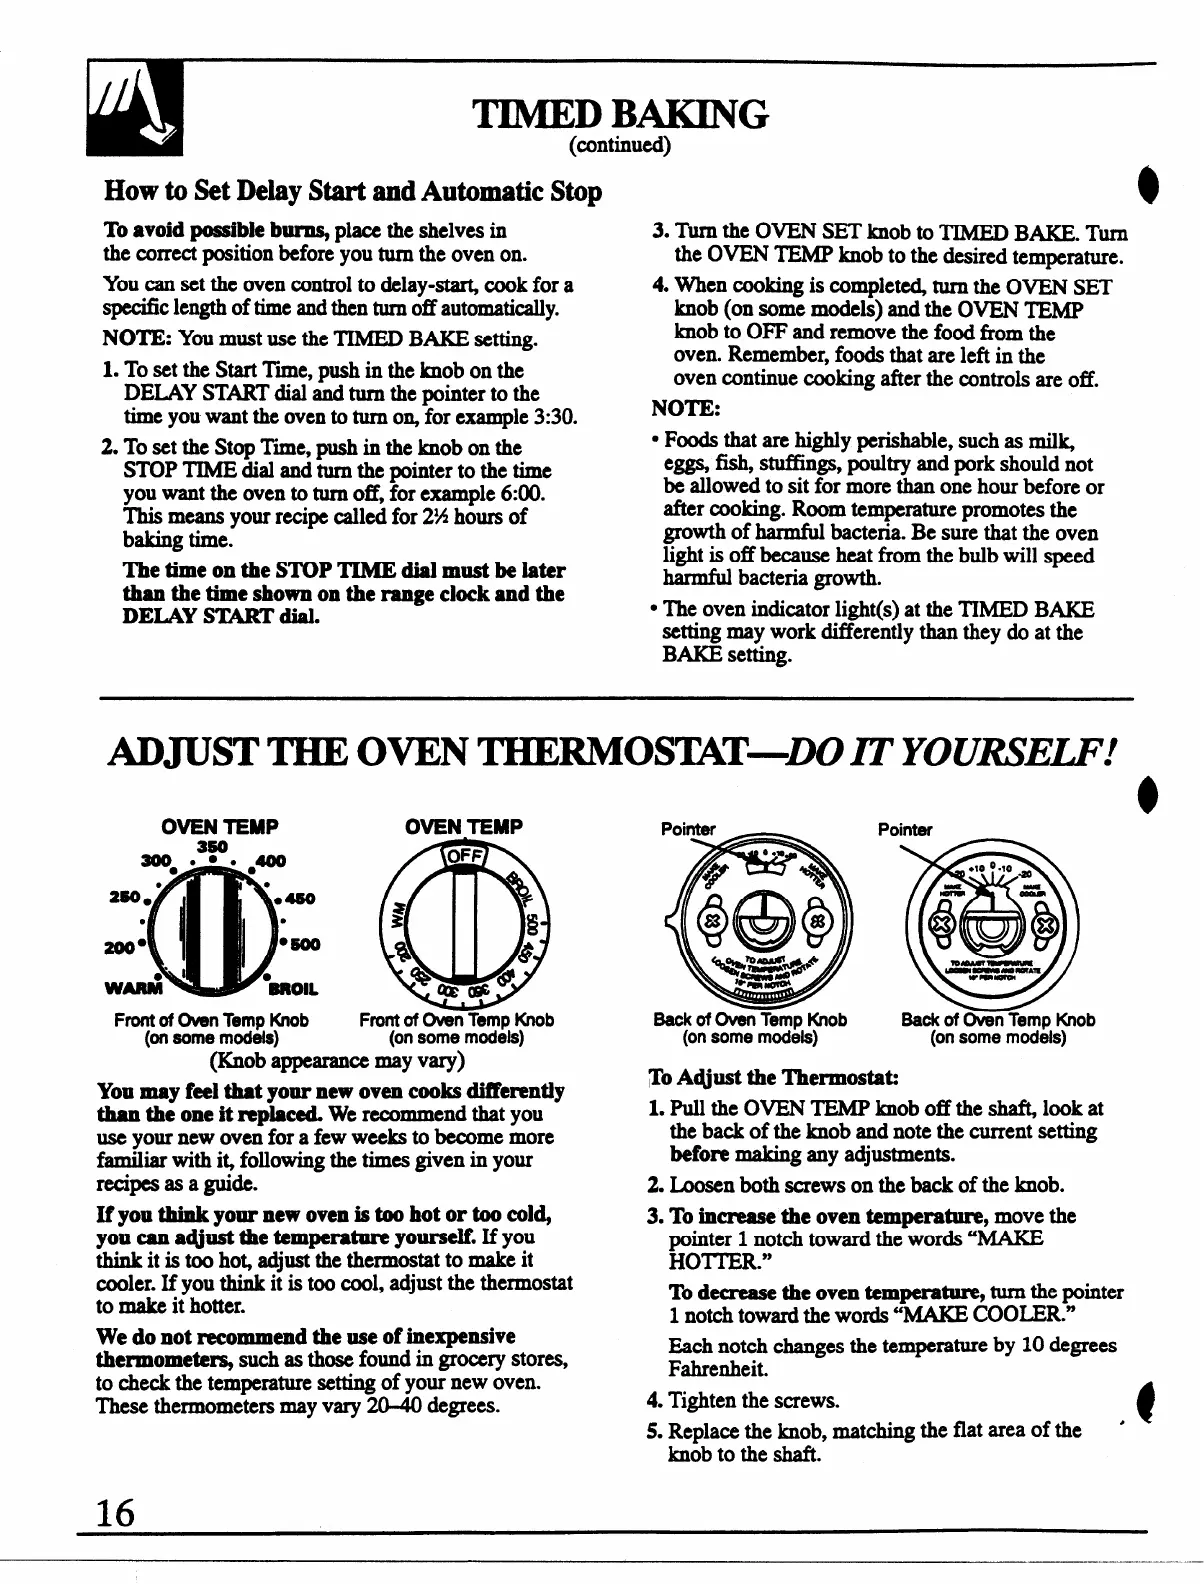
Frontof OvenTempKnob Frontof Oven TempKnob
(onsome models) (onsome models)
(ISnobappearance may vary)
You may f=l that your new oven cooks differently
than the one it replaced. We recommend that you
use your new oven for a few weeks to become more
familiar with i~ following the times given in your
recipes as a guide.
If you think your new oven is too hot or too col~
you can a@st the temperature yourself. If you
think it is too ho$ adjustthethermostat to make it
cooler. If you think it is too cool, adjust the thermostat
to make it hotter.
We do not recommend the use of inexpensive
thermomete~ such as those found in grocery stores,
to check the temperature setting of your new oven.
These thermometers may vary 20=40 degrees.
Pointer
BackofOven TempKnob
(onsome models)
Pointer
Baokof OvenTemoKnob
(on some modds)
To A~ust the Thermostat
1. pull the OVEN TEMPknob off the@ look at
the back of the knob and note the current setting
before making any adjustments.
2. Loosen both screws on the back of the knob.
3. To increase the oven temperature, move the
pointer 1 notch toward the words “MAKE
HOH.”
To decrease the oven temperature, turnthepointer
1 notch toward the words “MAKE COO~R.”
Each notch changes the temperature by 10 degrees
Fahrenheit.
4. Tighten the screws.
5. Replace the knob, matching the
flatareaof the ‘
t
knob to the shaft.
16
 Loading...