Page 7
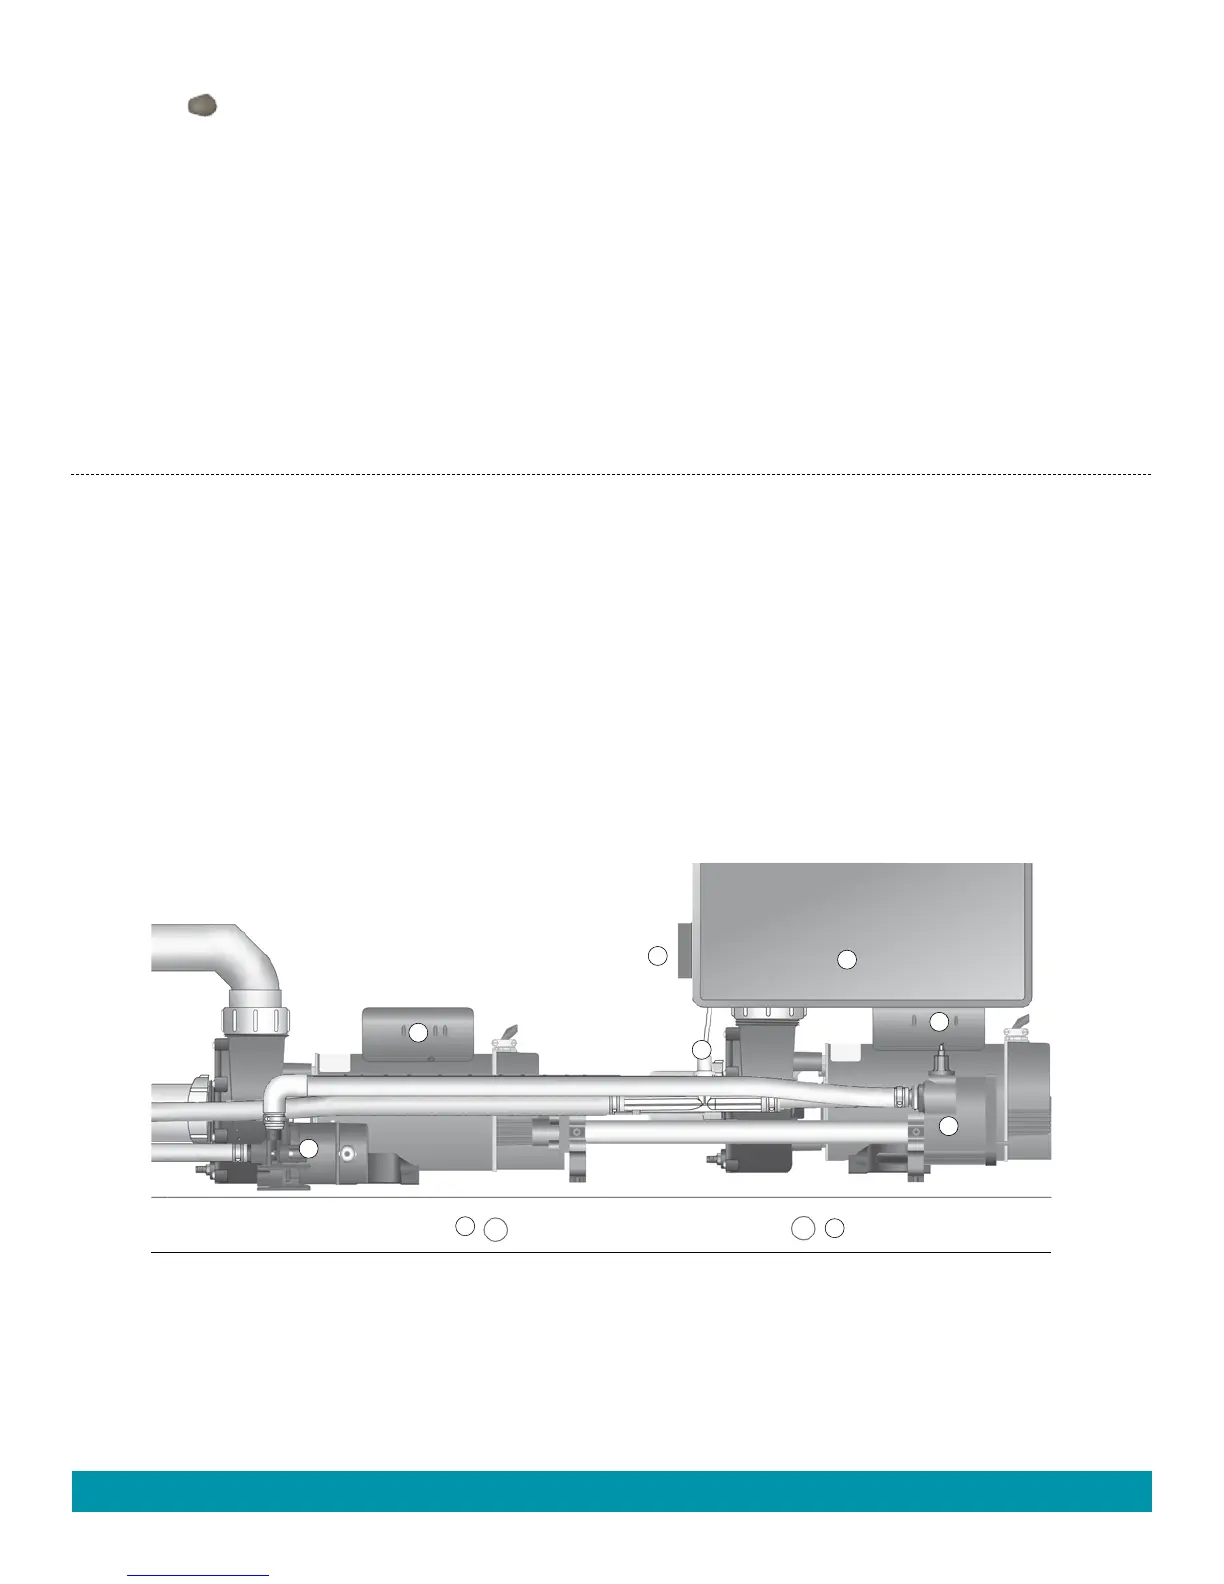
1. Wavemaster
®
jet pump
2. No-Fault
®
heater
3. Silent Flo 5000
®
circulation pump
4. IQ 2020
®
control box
5. Ozone injector
6. Main drain (with shut-off valve)
7. Secondary drain
8. Bonding terminal
1
2
3
4
5
6
7
8
1
EQUIPMENT COMPARTMENT
Getting Started
9. ROTATE THE SMARTJET SYSTEM LEVER(S) TO 2ND
POSITION
(9 O’CLOCK)
Activate the
clean cycle as described
in step 5 to
turn on the cycle for ten minutes to circulate the spa
water
. Test the spa water for Free Available Chlorine (FAC) residual.
If the residual is between 3 and 5 ppm on the test strips (found in
the test kit) go on to the next step. If the residual is less than 3 ppm,
superchlorinate the spa water by adding 1½ teaspoons of chlorine
(sodium dichlor) per 250 gallons (950 liters) of spa water. Then
Activate the clean cycle again to circulate the spa water for another
ten-minute period.
Repeat this procedure until both SMARTJET
lever(s) operating positions have been tested.
10. RECHECK the Total Alkalinity (TA) at 80 ppm, Calcium Hardness
(CH) at 100 ppm, then spa water pH at between 7.4 and 7.8. using a
FRESHWATER 5-way test strip.
IMPORTANT: Make sure you adjust your Total Alkalinity first, as
an out-of-balance condition will affect your ability to adjust the pH
correctly, and will prevent the sanitizer from operating effectively.
The spa is ready for use when the spa water has circulated
through each SMARTJET lever operating position and the
chlorine level remains between 3 ppm and 5 ppm.
11. TEST WATER WEEKLY OR BEFORE EACH TIME
THE SPA IS USED
GettInG Started
EQUIPMENT COMPARTMENT DOOR
The equipment compartment door is located below the dock. To remove door, slide each of the 3 clips to the left and lower clip (if clip doesn't slide, slightly
loosen the 2 screws holding the clip). Lower door panel, remove connector from back side of door attached to the Logo light, remove door panel. Reverse
procedure to reattach door panel.
IMPORTANT: Make sure top right side of Logo Light is seated inside spa corner cutout when replacing the door.
EQUIPMENT COMPARTMENT
The illustration below is to be used as a reference only (your spa may look different). The equipment compartment is located behind the front panel of the
spa below the dock.
 Loading...